

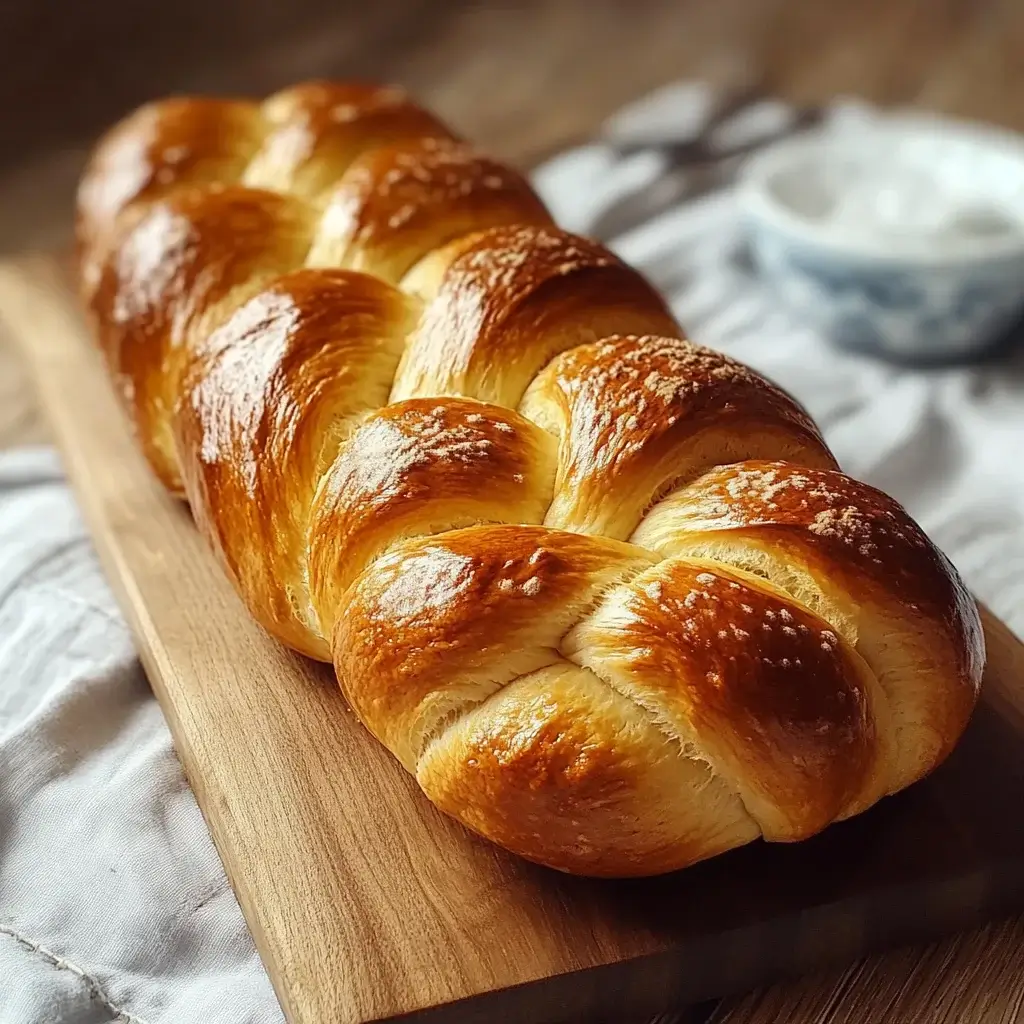
Introduction to Challah Bread
Challah bread has a special place in my heart, much like the warm memories of family gatherings around the dinner table. This traditional Jewish bread, with its rich flavor and beautiful braided shape, is perfect for any occasion. Whether you’re looking to impress your loved ones or simply want to elevate your everyday meals, this recipe is a delightful solution. The process of making challah is not just about baking; it’s about creating something that brings people together. Let’s dive into the secrets of crafting the perfect loaf that will have everyone asking for seconds!
Why You’ll Love This Challah Bread
This challah bread is a game-changer in the kitchen. It’s surprisingly easy to make, even for those who might feel intimidated by baking. The rich, slightly sweet flavor pairs beautifully with both savory and sweet dishes. Plus, the braided shape adds a touch of elegance to your table. Whether it’s for a holiday feast or a cozy family dinner, this bread will surely impress and satisfy everyone’s taste buds.
Ingredients for Challah Bread
Gathering the right ingredients is the first step to creating your perfect challah bread. Here’s what you’ll need:
- All-purpose flour: The backbone of your bread, providing structure and chewiness.
- Sugar: Just a tablespoon adds a hint of sweetness, enhancing the flavor.
- Salt: Essential for balancing flavors and enhancing the overall taste.
- Instant yeast: This helps the dough rise quickly, giving you that fluffy texture.
- Warm water: Activates the yeast; make sure it’s around 110°F for best results.
- Vegetable oil: Adds moisture and richness to the bread.
- Egg: One large egg enriches the dough and gives it a beautiful golden color.
- Optional toppings: Sesame seeds or poppy seeds can be sprinkled on top for added flavor and crunch.
For those looking to switch things up, consider adding a couple of tablespoons of honey or maple syrup for a sweeter loaf. Dried fruits like raisins or cranberries can also be mixed in for a fruity twist. You can find the exact quantities for these ingredients at the bottom of the article, ready for printing!
How to Make Challah Bread
Step 1: Prepare the Dry Ingredients
Start by grabbing a large mixing bowl. Combine the all-purpose flour, sugar, salt, and instant yeast. Stir them together until they’re well mixed. This step is crucial because it ensures that the yeast is evenly distributed throughout the flour. A good mix sets the foundation for a beautifully risen challah bread. Trust me, this simple step makes a world of difference!
Step 2: Mix Wet Ingredients
In a separate bowl, whisk together the warm water, vegetable oil, and one large egg. Make sure the water is warm, around 110°F, to activate the yeast properly. This mixture will bring moisture and richness to your dough. It’s like a warm hug for your dry ingredients, preparing them for the magic to come!
Step 3: Combine Ingredients
Now, pour the wet ingredients into the bowl with the dry ingredients. Mix everything together until a dough starts to form. You want to see the flour disappear and the ingredients come together. It might look a bit shaggy at first, but don’t worry; that’s just the dough warming up for its kneading session!
Step 4: Knead the Dough
Time to get your hands a little messy! Turn the dough out onto a floured surface. Knead it for about 8-10 minutes until it’s smooth and elastic. You’ll know it’s ready when it springs back after you poke it. This step develops the gluten, giving your challah that delightful chewy texture. Plus, it’s a great way to relieve stress after a long day!
Step 5: First Rise
Place the kneaded dough in a greased bowl and cover it with a clean kitchen towel. Let it rise in a warm spot for about 1 to 1.5 hours, or until it has doubled in size. This is where the magic happens! The yeast will work its wonders, creating air pockets that make your bread light and fluffy.
Step 6: Shape the Dough
Once the dough has risen, punch it down gently to release the air. Turn it out onto a floured surface and divide it into three equal pieces. Roll each piece into a long rope, about 12-15 inches long. This is where you can get creative! The ropes don’t have to be perfect; a little rustic charm adds character to your loaf.
Step 7: Braid the Loaf
Now, it’s time to braid! Take the three ropes and pinch them together at one end. Braid them together, making sure to keep it tight but not too tight. Pinch the ends to seal the braid. This step not only looks impressive but also helps the bread rise evenly. Your loaf is starting to take shape!
Step 8: Second Rise
Place your beautifully braided loaf on a baking sheet lined with parchment paper. Cover it with a towel and let it rise again for about 30-45 minutes. This second rise is essential for achieving that perfect texture. It’s like giving your bread a little extra time to shine before it hits the oven!
Step 9: Bake the Bread
Preheat your oven to 350°F. Brush the top of the loaf with the remaining beaten egg for a beautiful golden finish. If you like, sprinkle sesame or poppy seeds on top for added flavor. Bake for 25-30 minutes, or until the bread is golden brown and sounds hollow when tapped on the bottom. The aroma will fill your kitchen, making it hard to wait for it to cool!
Tips for Success
- Always measure your flour correctly; spoon it into the cup and level it off for accuracy.
- Let your dough rise in a warm, draft-free area for the best results.
- Don’t skip the second rise; it’s crucial for a light, airy loaf.
- Experiment with toppings like seeds or herbs for added flavor.
- Store leftover challah in an airtight container to keep it fresh longer.
Equipment Needed
- Mixing bowls: A large bowl for mixing dough; any sturdy bowl will do.
- Measuring cups and spoons: Essential for accuracy; a kitchen scale is a great alternative.
- Floured surface: A clean countertop works perfectly for kneading.
- Baking sheet: Use any flat baking tray lined with parchment paper.
- Kitchen towel: To cover the dough while it rises; a clean cloth or plastic wrap works too.
Variations
- Honey Challah: Add 2 tablespoons of honey or maple syrup to the wet ingredients for a sweeter flavor.
- Fruit-Infused Challah: Mix in dried fruits like raisins, cranberries, or apricots for a delightful twist.
- Herbed Challah: Incorporate fresh herbs like rosemary or thyme into the dough for a savory version.
- Whole Wheat Challah: Substitute half of the all-purpose flour with whole wheat flour for a healthier option.
- Chocolate Chip Challah: Fold in chocolate chips for a sweet treat that’s perfect for dessert.
Serving Suggestions
- Pair your challah bread with a rich, homemade soup for a comforting meal.
- Serve it alongside a fresh salad for a light lunch option.
- Toast slices and spread with butter or jam for a delightful breakfast.
- Use it for French toast; the texture holds up beautifully!
- Present it on a wooden board, garnished with fresh herbs for an elegant touch.
FAQs about Challah Bread
What makes challah bread different from regular bread?
Challah bread is unique due to its rich flavor and beautiful braided shape. It often contains eggs, which give it a tender crumb and a slightly sweet taste. This traditional Jewish bread is typically enjoyed during special occasions, making it stand out from everyday loaves.
Can I make challah bread ahead of time?
Absolutely! You can prepare the dough in advance and let it rise in the refrigerator overnight. Just remember to bring it back to room temperature before shaping and baking. This method can save you time on busy days while still delivering that fresh-baked goodness.
How do I store leftover challah bread?
To keep your challah bread fresh, store it in an airtight container at room temperature for up to three days. If you want to keep it longer, slice it and freeze it in a resealable bag. Just pop it in the toaster when you’re ready to enjoy a slice!
Can I use whole wheat flour for challah bread?
Yes, you can! Substituting half of the all-purpose flour with whole wheat flour adds a nutty flavor and extra nutrients. Just keep in mind that the texture may be slightly denser, but it will still be delicious!
What are some popular toppings for challah bread?
Common toppings include sesame seeds and poppy seeds, which add a delightful crunch. You can also experiment with toppings like everything bagel seasoning or even a sprinkle of cinnamon sugar for a sweet twist. The options are endless!
Final Thoughts
Baking challah bread is more than just a culinary task; it’s an experience that fills your kitchen with warmth and joy. The process of kneading, braiding, and watching the dough rise is a beautiful reminder of the simple pleasures in life. Each loaf tells a story, whether it’s shared at a family gathering or enjoyed during a quiet moment with a cup of coffee. As you slice into that golden, fluffy bread, you’ll find satisfaction not just in the taste, but in the love and effort you put into creating something special. Happy baking!
Challah Bread: Discover the Secrets to Perfect Loaves!
Ingredients
Method
- In a large mixing bowl, combine the flour, sugar, salt, and instant yeast. Mix well to combine the dry ingredients.
- In a separate bowl, whisk together the warm water, vegetable oil, and 1 egg.
- Pour the wet ingredients into the dry ingredients and mix until a dough forms.
- Knead the dough on a floured surface for about 8-10 minutes, until it is smooth and elastic.
- Place the dough in a greased bowl, cover it with a clean kitchen towel, and let it rise in a warm place for about 1 to 1.5 hours, or until it has doubled in size.
- Once risen, punch down the dough and turn it out onto a floured surface. Divide it into three equal pieces.
- Roll each piece into a long rope, about 12-15 inches long.
- Braid the three ropes together to form a loaf, pinching the ends to seal.
- Place the braided loaf on a baking sheet lined with parchment paper. Cover it with a towel and let it rise for another 30-45 minutes.
- Preheat the oven to 350°F.
- Brush the top of the loaf with the remaining beaten egg and sprinkle with sesame or poppy seeds if desired.
- Bake for 25-30 minutes, or until the bread is golden brown and sounds hollow when tapped on the bottom.
- Allow the bread to cool on a wire rack before slicing.
Nutrition
Notes
- For a sweeter bread, add 2 tablespoons of honey or maple syrup to the wet ingredients.
- Try adding dried fruits like raisins or cranberries to the dough for a fruity twist.