

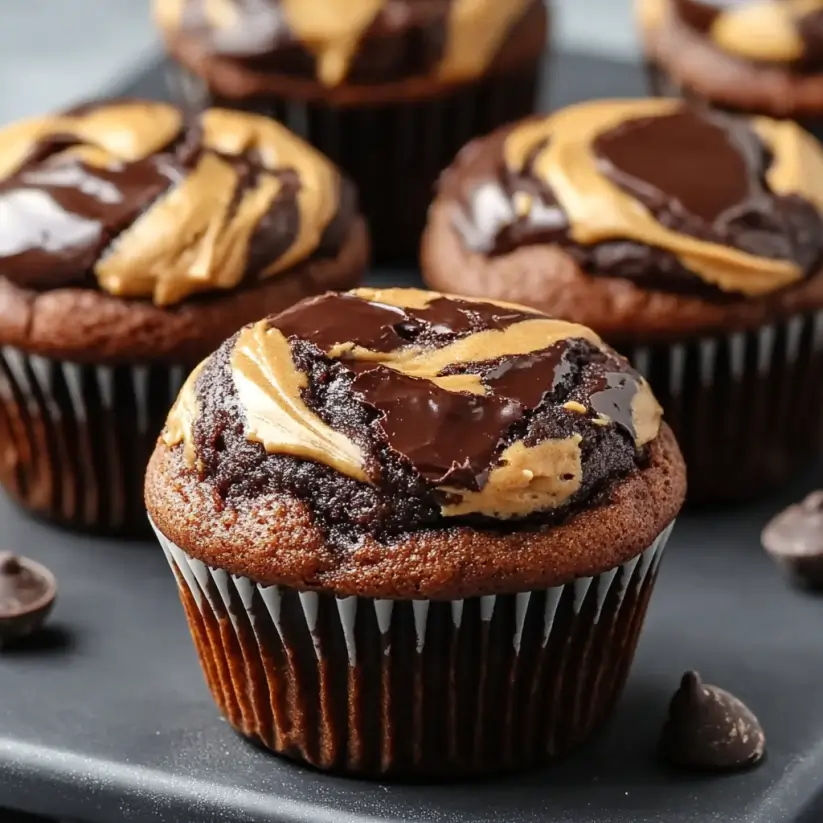
Introduction to Chocolate Peanut Butter Swirl Muffins
There’s something magical about the combination of chocolate and peanut butter. It takes me back to my childhood, where every spoonful of peanut butter felt like a treasure. Now, as a passionate home cook, I’ve turned that nostalgia into a delightful treat: Chocolate Peanut Butter Swirl Muffins. These muffins are not just a quick solution for a busy morning; they’re a warm hug in baked form. Perfect for breakfast or a sweet snack, they’ll impress your loved ones and satisfy your cravings. Let’s dive into this delicious adventure together!
Why You’ll Love This Chocolate Peanut Butter Swirl Muffins
These Chocolate Peanut Butter Swirl Muffins are a game-changer in the kitchen. They’re incredibly easy to whip up, taking just 35 minutes from start to finish. The rich chocolate flavor paired with creamy peanut butter creates a taste sensation that’s hard to resist. Plus, they’re perfect for any occasion—whether it’s a busy weekday breakfast or a cozy weekend treat. Trust me, once you try them, you’ll be hooked!
Ingredients for Chocolate Peanut Butter Swirl Muffins
Gathering the right ingredients is the first step to creating these delightful Chocolate Peanut Butter Swirl Muffins. Here’s what you’ll need:
- All-purpose flour: The backbone of your muffins, providing structure and a soft texture.
- Granulated sugar: Sweetens the muffins and helps them rise, giving that perfect fluffy bite.
- Unsweetened cocoa powder: Adds rich chocolate flavor without extra sweetness, balancing the taste beautifully.
- Baking soda: This leavening agent helps the muffins rise, making them light and airy.
- Salt: A pinch enhances all the flavors, making each bite more delicious.
- Buttermilk: Adds moisture and a slight tang, keeping the muffins tender.
- Vegetable oil: Keeps the muffins moist and adds richness without the heaviness of butter.
- Egg: Binds the ingredients together and contributes to the muffins’ structure.
- Vanilla extract: A splash of this adds warmth and depth to the flavor profile.
- Creamy peanut butter: The star of the show! It creates that luscious swirl and adds a nutty richness.
- Semi-sweet chocolate chips: These little morsels provide bursts of chocolatey goodness in every bite.
For those looking to mix things up, consider substituting half of the all-purpose flour with whole wheat flour for a healthier twist. You can also add chopped nuts for extra crunch or a sprinkle of sea salt on top before baking for a gourmet touch. Exact measurements for these ingredients can be found at the bottom of the article, ready for printing!
How to Make Chocolate Peanut Butter Swirl Muffins
Now that you have all your ingredients ready, let’s get to the fun part: making these Chocolate Peanut Butter Swirl Muffins! Follow these simple steps, and you’ll have a batch of deliciousness in no time.
Step 1: Preheat and Prepare
First things first, preheat your oven to 350°F (175°C). This is crucial for perfect baking. While that’s heating up, line a muffin tin with paper liners. This makes cleanup a breeze and keeps your muffins from sticking.
Step 2: Mix Dry Ingredients
In a large mixing bowl, whisk together the all-purpose flour, granulated sugar, cocoa powder, baking soda, and salt. This step ensures that all the dry ingredients are evenly distributed, which is key for consistent flavor in your muffins.
Step 3: Combine Wet Ingredients
In another bowl, mix the buttermilk, vegetable oil, egg, and vanilla extract until smooth. This rich mixture will be the base of your muffins, adding moisture and flavor that makes them irresistible.
Step 4: Combine Wet and Dry Mixtures
Now, pour the wet ingredients into the dry ingredients. Stir gently until just combined. Be careful not to overmix; a few lumps are perfectly fine. This keeps your muffins light and fluffy, which is exactly what we want!
Step 5: Add Chocolate Chips
Next, gently fold in the semi-sweet chocolate chips. These little gems will melt slightly during baking, creating delightful pockets of chocolate in every bite. Trust me, you’ll want that burst of flavor!
Step 6: Prepare Peanut Butter
In a small microwave-safe bowl, warm the creamy peanut butter for about 20-30 seconds. This makes it easier to swirl into the batter. A smooth peanut butter will create those beautiful swirls we’re after.
Step 7: Fill Muffin Cups
Fill each muffin cup about two-thirds full with the batter. Then, drop a teaspoon of the warmed peanut butter on top of each muffin. This is where the magic begins, as the peanut butter will create that signature swirl.
Step 8: Swirl the Peanut Butter
Using a toothpick or a knife, gently swirl the peanut butter into the batter. Don’t overdo it; you want to see those lovely swirls, not mix it completely. This adds a beautiful finish to your muffins.
Step 9: Bake
Now, it’s time to bake! Place the muffin tin in the preheated oven and bake for 18-20 minutes. Keep an eye on them, and when a toothpick inserted into the center comes out clean, they’re ready to come out. This is the moment of anticipation!
Step 10: Cool and Enjoy
Once baked, allow the muffins to cool in the pan for about 5 minutes. Then, transfer them to a wire rack to cool completely. This helps them set perfectly and makes them easier to handle. Now, you’re ready to enjoy your delicious Chocolate Peanut Butter Swirl Muffins!
Tips for Success
- Measure your ingredients accurately for the best results.
- Don’t overmix the batter; a few lumps are okay!
- Use room temperature ingredients for a smoother batter.
- Experiment with different nut butters for unique flavors.
- Store leftover muffins in an airtight container to keep them fresh.
Equipment Needed
- Muffin tin: A standard 12-cup muffin tin works best, but you can use silicone molds for easy removal.
- Mixing bowls: Use one large bowl for dry ingredients and another for wet ingredients.
- Whisk: A simple whisk will help combine your ingredients smoothly.
- Measuring cups and spoons: Essential for accurate ingredient measurements.
- Toothpick or knife: Perfect for swirling the peanut butter and testing doneness.
Variations
- For a healthier twist, substitute half of the all-purpose flour with whole wheat flour.
- Try adding chopped nuts like walnuts or pecans for an extra crunch.
- Use almond butter or cashew butter instead of peanut butter for a different flavor profile.
- Incorporate a dash of cinnamon or espresso powder for a unique depth of flavor.
- Make them gluten-free by using a gluten-free all-purpose flour blend.
Serving Suggestions
- Pair your Chocolate Peanut Butter Swirl Muffins with a hot cup of coffee or a glass of cold milk for a classic combo.
- Serve them warm with a dollop of whipped cream or a scoop of vanilla ice cream for an indulgent dessert.
- For a fun presentation, dust with powdered sugar or drizzle with melted chocolate before serving.
FAQs about Chocolate Peanut Butter Swirl Muffins
Can I make these muffins ahead of time?
Absolutely! These Chocolate Peanut Butter Swirl Muffins store well. You can bake them a day in advance and keep them in an airtight container. Just warm them up in the microwave for a few seconds before serving for that fresh-baked taste.
What can I substitute for buttermilk?
If you don’t have buttermilk on hand, don’t worry! You can easily make a substitute by mixing one cup of milk with a tablespoon of vinegar or lemon juice. Let it sit for about 5 minutes, and you’ll have a perfect buttermilk replacement.
Can I freeze these muffins?
Yes, you can freeze Chocolate Peanut Butter Swirl Muffins! Just let them cool completely, then wrap them tightly in plastic wrap or aluminum foil. They’ll stay fresh in the freezer for up to three months. Thaw them at room temperature when you’re ready to enjoy.
How can I make these muffins healthier?
To make these muffins a bit healthier, consider using whole wheat flour instead of all-purpose flour. You can also reduce the sugar slightly or use a natural sweetener like honey or maple syrup. Adding in some oats can also boost the fiber content!
What’s the best way to store leftover muffins?
Store your leftover Chocolate Peanut Butter Swirl Muffins in an airtight container at room temperature for up to three days. If you want to keep them longer, freezing is the way to go. Just remember to thaw them before enjoying!
Final Thoughts
Creating these Chocolate Peanut Butter Swirl Muffins is more than just baking; it’s about crafting a moment of joy. The rich aroma wafting through your kitchen, the anticipation as they bake, and the first bite that melts in your mouth—these experiences are what make cooking so rewarding. Whether you’re sharing them with family or savoring one alone with your morning coffee, these muffins bring a sense of comfort and happiness. So, roll up your sleeves, embrace the mess, and enjoy the delicious journey of making these delightful treats. You won’t regret it!
Chocolate Peanut Butter Swirl Muffins: A Delicious Delight!
Ingredients
Method
- Preheat your oven to 350°F (175°C) and line a muffin tin with paper liners.
- In a large mixing bowl, whisk together the flour, sugar, cocoa powder, baking soda, and salt until well combined.
- In another bowl, mix the buttermilk, vegetable oil, egg, and vanilla extract until smooth.
- Pour the wet ingredients into the dry ingredients and stir until just combined. Do not overmix.
- Gently fold in the chocolate chips.
- In a small microwave-safe bowl, warm the peanut butter for about 20-30 seconds until it’s easier to swirl.
- Fill each muffin cup about two-thirds full with the batter, then drop a teaspoon of peanut butter on top of each muffin.
- Use a toothpick or a knife to swirl the peanut butter into the batter.
- Bake for 18-20 minutes, or until a toothpick inserted into the center comes out clean.
- Allow the muffins to cool in the pan for 5 minutes before transferring them to a wire rack to cool completely.
Nutrition
Notes
- For a healthier option, substitute half of the all-purpose flour with whole wheat flour.
- Add chopped nuts or a sprinkle of sea salt on top before baking for added texture and flavor.