

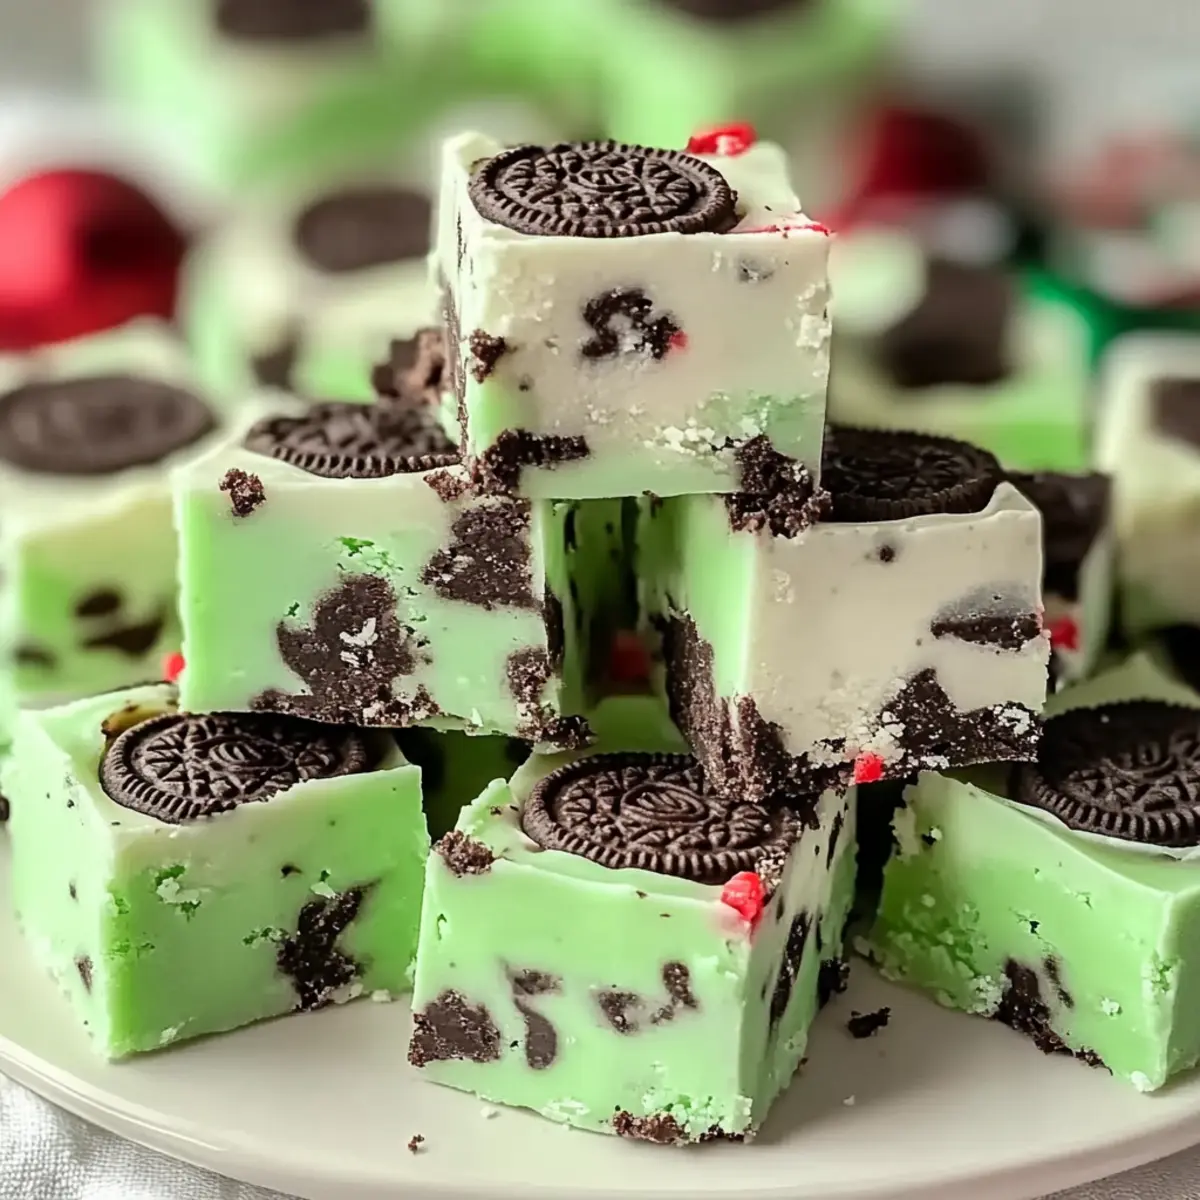
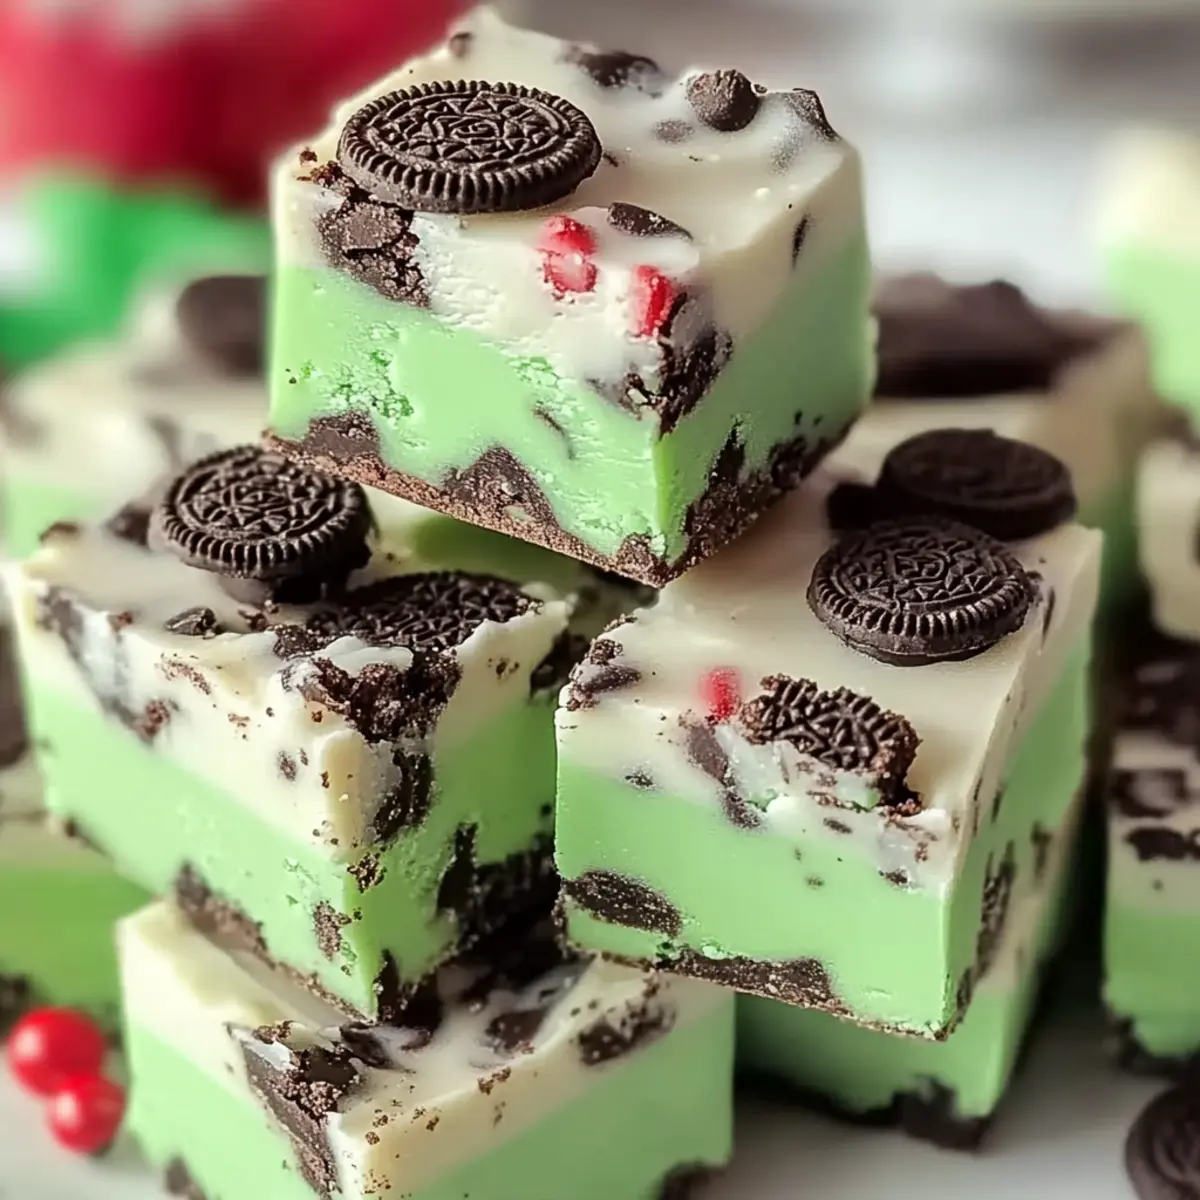
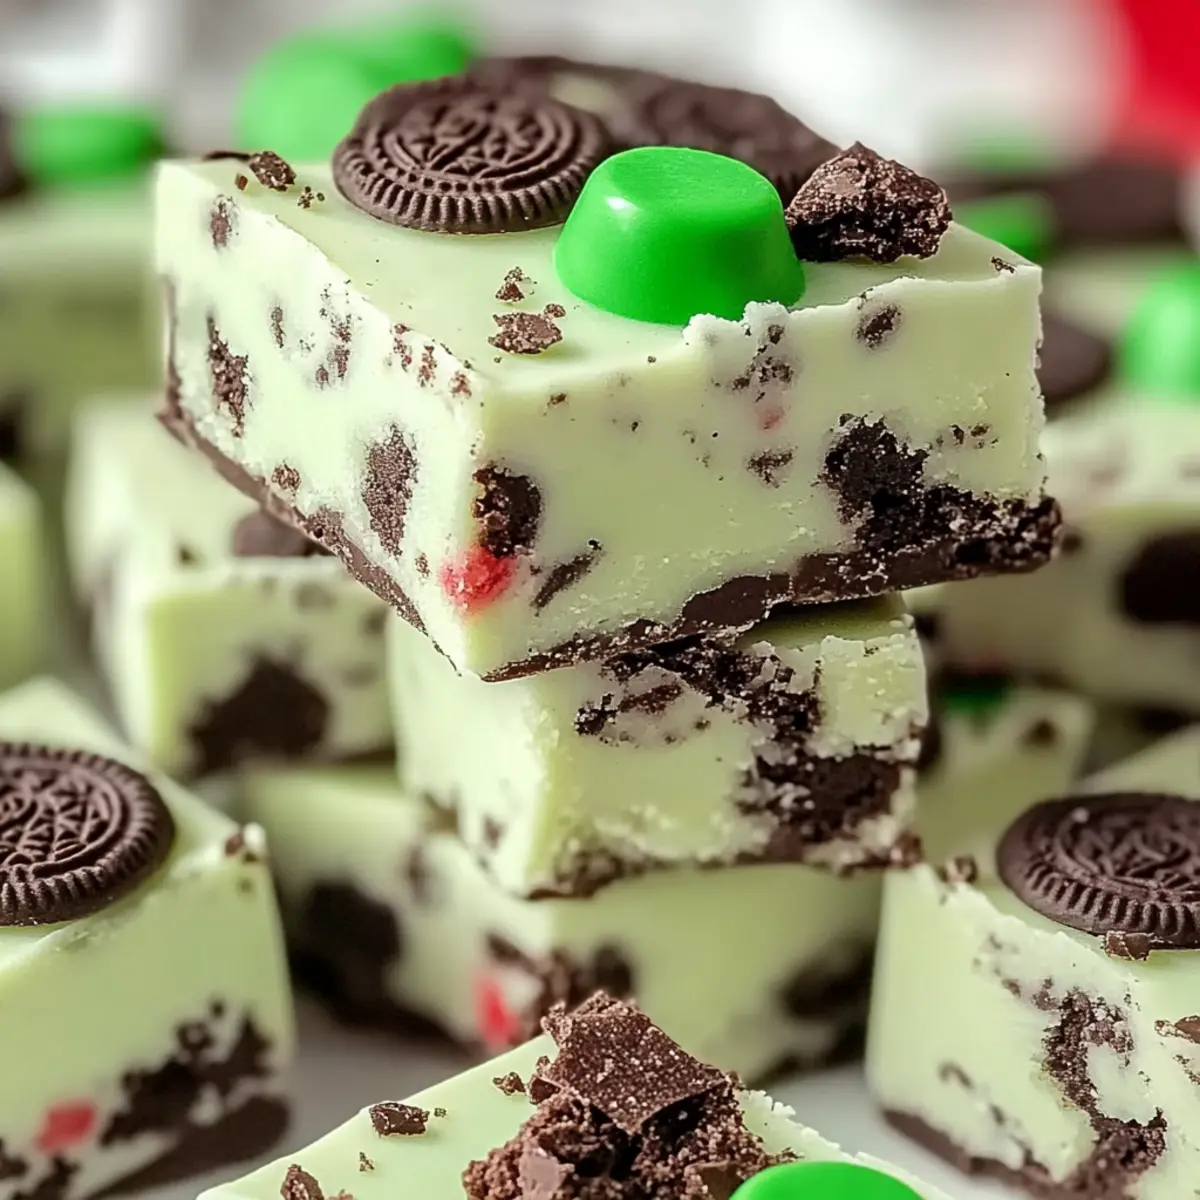
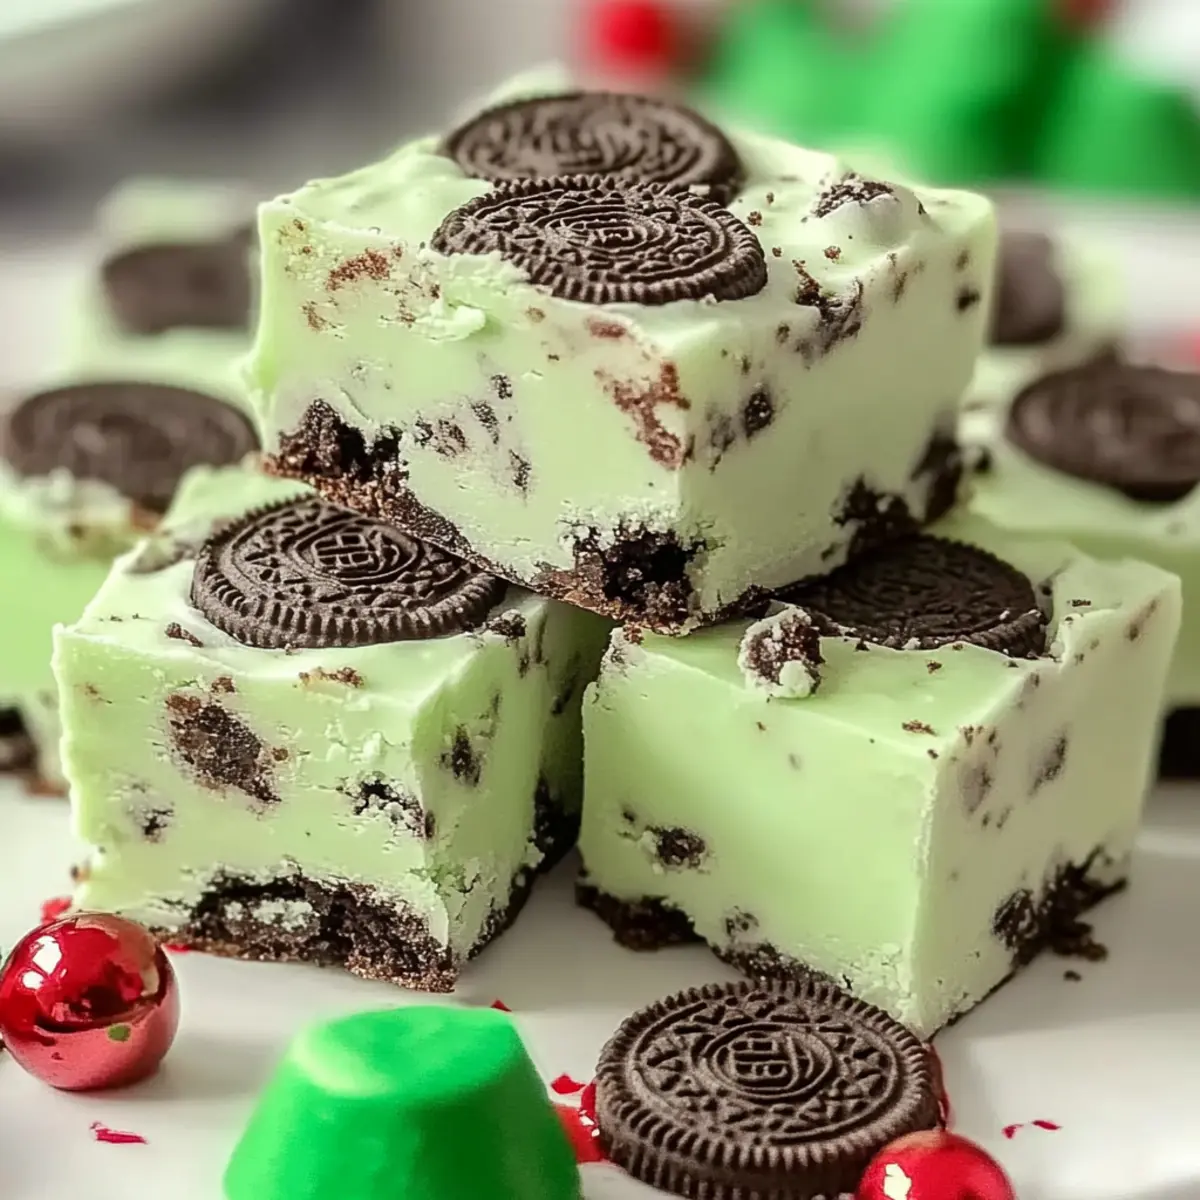
The aroma of mint and chocolate danced through the kitchen, instantly transporting me to festive holiday gatherings filled with laughter and joy. That’s the magic behind my Christmas Mint Oreo Fudge—a delightful no-bake treat that combines creamy white chocolate and the classic crunch of Oreos, perfectly infused with refreshing peppermint. This fabulous fudge is not only quick to whip up, taking less than an hour, but it also offers countless customizable options to suit every palate. Imagine how much fun it will be to share a batch with friends and family at cookie exchanges or as thoughtful gifts! As you follow along, you’ll discover just how easy it is to impress everyone with this festive delight. Are you ready to make some holiday magic in your kitchen?
Why is This Fudge a Holiday Must-Have?
Irresistible Flavor: The delightful mix of creamy white chocolate and crunchy Oreo bits creates a truly addictive treat that no one can resist.
Customizable Options: Whether you prefer a nutty crunch or a fruity twist, this fudge invites you to get creative with ingredients that suit your taste.
No-Bake Convenience: In less than an hour, you can craft this festive fudge, making it perfect for last-minute gatherings or cookie exchanges.
Perfect for Sharing: Its vibrant colors and delicious flavor make it an excellent choice for gifts and holiday parties. If you love easy, impressive desserts, you’ll also want to check out my Oreo Cake Pops.
Family-Friendly: Simple enough for kids to help, it’s a fun baking adventure everyone will enjoy together!
Make the holidays magical with this delightful treat everyone will love!
Christmas Mint Oreo Fudge Ingredients
For the Fudge Base
• White Chocolate Chips – Create a creamy base for the fudge; using a chopped white chocolate bar can add a richer texture.
• Sweetened Condensed Milk – This binds the fudge while adding sweetness; Eagle Brand is ideal for the best consistency.
For the Crunch
• Oreo Cookies – Adds delightful crunch and flavor; feel free to swap with gluten-free sandwich cookies for a gluten-free Christmas Mint Oreo Fudge.
For Flavor and Color
• Peppermint Extract – Introduces a refreshing mint flavor; start with 1 teaspoon and adjust to your taste preference off heat.
• Pinch of Salt – Balances the sweetness and enhances overall flavor profile.
• Optional Green Food Gel or Matcha Powder – Adds festive color; it’s an easy way to bring more holiday cheer!
Step‑by‑Step Instructions for Christmas Mint Oreo Fudge
Step 1: Prepare the Baking Pan
Start by lining an 8×8-inch baking pan with parchment paper, ensuring you leave some overhang on the sides for easy removal later. This will help the Christmas Mint Oreo Fudge lift out effortlessly once set. Make sure the paper fits snugly in the corners to avoid leaks during the melting process.
Step 2: Melt Mixture
In a medium saucepan, combine 2 cups of white chocolate chips and 1 cup of sweetened condensed milk over low heat. Stir continuously for about 3-4 minutes, or until the mixture is silky smooth and fully melted. Be attentive to avoid scorching; if the chocolate starts to seize, remove it from the heat immediately to maintain a creamy texture.
Step 3: Flavor and Color
Once your chocolate mixture is smooth, remove the saucepan from the heat. Off the heat, add 1 teaspoon of peppermint extract and a pinch of salt, stirring well to combine. If you wish to add a festive flair, now is the time to mix in a drop or two of green food gel or matcha powder for that holiday color boost.
Step 4: Incorporate Cookies
Gently fold in 1¼ cups of crushed Oreo cookies into the melted mixture until fully combined. Leave some crushed Oreos aside for topping later. The combination of the creamy mixture with crunchy bits will give your Christmas Mint Oreo Fudge that signature texture everyone will love.
Step 5: Transfer to Pan
Carefully pour the fudge mixture into your prepared baking pan. Use a spatula to smooth the top, ensuring it’s evenly spread across the pan. This will create a beautiful and even surface for your fudge, ready to hold onto more Oreo goodness on top.
Step 6: Add Topping
Take the reserved Oreo crumbs and sprinkle them generously over the surface of your fudge, gently pressing them down with your fingers or the back of a spatula. This step adds an extra layer of crunch and aesthetics to your Christmas Mint Oreo Fudge, making it even more inviting.
Step 7: Chill
Place the pan in the refrigerator, allowing the fudge to chill for at least 45 minutes or until firm to the touch. This cooling process is essential for achieving the perfect texture in your fudge, so be patient as it sets and transforms into a delicious treat.
Step 8: Slice and Serve
Once the fudge is firm, lift it out of the pan using the parchment paper overhang. Place it on a cutting board and use a warm knife to slice it into squares. Warm knife cuts through the fudge smoothly, creating clean edges and beautiful pieces of your delightful Christmas Mint Oreo Fudge.
What to Serve with Christmas Mint Oreo Fudge
The perfect way to enhance your holiday gatherings is by pairing this festive fudge with delightful accompaniments that elevate its magical flavors.
-
Hot Cocoa Bar: Creamy hot chocolate topped with marshmallows or whipped cream complements the minty sweetness wonderfully.
-
Peppermint Ice Cream: This cool, creamy treat offers a refreshing contrast to the fudgy richness, creating a blissful pairing.
-
Gingerbread Cookies: The warm, spiced flavor of gingerbread contrasts perfectly with the fudgy sweetness, adding seasonal cheer.
-
Nutty Biscotti: A crunchy, nutty biscotti adds texture and a delightful dip when enjoying your fudge, creating a sophisticated contrast.
-
Chewy Caramel Sauce: Drizzling warm caramel sauce over the fudge enhances its sweetness and adds a luxurious touch to each bite.
-
Eggnog: For those fancy holiday vibes, serve a chilled glass of eggnog; the creamy texture complements the fudge’s richness beautifully.
-
Whipped Cream Topping: A dollop of freshly whipped cream adds lightness, making each bite even more indulgent and festive.
-
Coffee: Sip on a warm cup of coffee to balance the sweetness, enhancing the fudge’s minty chocolate profile with a rich, bold flavor.
Make Ahead Options
Making Christmas Mint Oreo Fudge ahead of time is a game changer for busy holiday schedules! You can prepare the fudge mixture and store it in the refrigerator for up to 3 days before serving. Simply follow the melting and mixing instructions, then transfer the fudge to your lined pan and chill it. To maintain the fudge’s smooth texture, make sure to cover it tightly with plastic wrap or foil. When you’re ready to enjoy, just sprinkle the reserved Oreo crumbs on top and cut it into squares using a warm knife. This way, you’ll have a delightful treat ready to impress with minimal last-minute effort!
Christmas Mint Oreo Fudge Variations
Feel free to shake things up and make this fudge your own with these fun and tasty twists!
-
Chocolate Peppermint Twist: Swap white chocolate chips for semi-sweet chips for a richer, more decadent flavor that deepens the fudge’s complexity. Your taste buds will dance with delight!
-
Nutty Crunch: Add chopped pistachios or pecans to the mixture for a crunchy texture that pairs beautifully with the creamy chocolate. It’s a delightful surprise in every bite.
-
Berry Merry: Incorporate freeze-dried raspberry powder for a fruity twist that not only adds flavor but also a pop of festive color to your fudge. This berry infusion is sure to impress at holiday gatherings!
-
Vegan Option: Use dairy-free white chocolate, coconut condensed milk, and gluten-free cookies to create a delightful vegan version without sacrificing flavor or creaminess. Everyone can join in on the holiday fun!
-
Boozy Boost: Mix in a splash of creme de menthe liqueur for a sophisticated, adult version of this fudge. It adds a warm, festive kick and brings flavors together in a delightful way!
-
Minty Oreo Delight: Crushed mint-flavored Oreos can replace regular Oreos for an extra burst of minty freshness. It’s a flavorful twist that will transport your taste buds to peppermint heaven!
-
Spicy Chocolate: Stir in a touch of cayenne pepper for a surprising heat that’ll make your Christmas Mint Oreo Fudge stand out at cookie exchanges. It’s a fun conversation starter!
If you’re on the lookout for more easy no-bake treats, check out my delightful Oreo Cake Pops to keep the festive spirit alive!
Expert Tips for Christmas Mint Oreo Fudge
-
Maintain Low Heat: Keep the heat low throughout the melting process to prevent the white chocolate from scorching. Stir gently for a smooth texture.
-
Press Cookies Lightly: When adding the Oreo crumbs on top, press them down lightly. This ensures they adhere well, enhancing the overall texture of your Christmas Mint Oreo Fudge.
-
Chill Sufficiently: Allow the fudge to chill for at least 45 minutes to achieve the right firmness. Cutting it too early could lead to messy squares.
-
Experiment with Flavors: Don’t hesitate to customize! Add various ingredients, such as nuts or different extracts, to make your Christmas Mint Oreo Fudge uniquely yours.
-
Cutting Tips: Use a warm knife to slice the fudge; this helps create clean, even squares and prevents the fudge from crumbling.
How to Store and Freeze Christmas Mint Oreo Fudge
Fridge: Store your Christmas Mint Oreo Fudge in an airtight container for up to 2 weeks to maintain its delightful creaminess and minty flavor.
Freezer: If you want to enjoy it longer, freeze the fudge in a single layer, wrapped tightly in plastic wrap or stored in a freezer-safe container for up to 2 months.
Thawing: To enjoy frozen fudge, simply transfer the desired amount to the fridge and allow it to thaw slowly. This preserves its texture and taste for a perfect treat anytime.
Make-Ahead Tip: Preparing this fudge a week in advance is a fantastic idea for stress-free holiday planning. Just keep it chilled and ready to impress!
Christmas Mint Oreo Fudge Recipe FAQs
What type of white chocolate should I use for the fudge?
Absolutely! I recommend using high-quality white chocolate chips, as they melt smoothly and create a creamy base. If you prefer a different texture, feel free to use a chopped white chocolate bar instead.
How should I store the Christmas Mint Oreo Fudge?
For best results, keep your fudge in an airtight container in the fridge for up to 2 weeks. If you want to savor it longer, freeze it wrapped tightly in plastic wrap or in a freezer-safe container for up to 2 months.
Can I freeze the Christmas Mint Oreo Fudge?
Yes, you can! To freeze your fudge, lay it out in a single layer first, then wrap it tightly with plastic wrap or place it in a freezer-safe container. Thaw it slowly in the fridge before serving for the best texture, preserving that luscious creaminess.
What if my fudge doesn’t set properly?
If you find that your fudge hasn’t set as expected, don’t worry! Simply return it to a saucepan over low heat, adding a bit more sweetened condensed milk, and stir until smooth. Then, pour it back into the pan and refrigerate again until it firms up.
Can I make this fudge gluten-free?
Very much so! Just substitute regular Oreo cookies with gluten-free chocolate sandwich cookies. This allows everyone to enjoy the festive treat without compromising on flavor.
Is there an option for making this fudge vegan?
Absolutely! You can make a vegan version by using dairy-free white chocolate, coconut condensed milk, and gluten-free cookies. This way, you can share the joy of Christmas Mint Oreo Fudge with everyone, no matter their dietary preferences!
Indulge in Creamy Christmas Mint Oreo Fudge Delight
Ingredients
Equipment
Method
- Prepare the Baking Pan by lining an 8x8-inch baking pan with parchment paper, leaving overhang on sides for easy removal.
- Melt Mixture by combining 2 cups of white chocolate chips and 1 cup of sweetened condensed milk over low heat for 3-4 minutes until smooth.
- Remove from heat and add 1 teaspoon of peppermint extract and a pinch of salt, stirring well. Optionally mix in green food gel or matcha powder.
- Gently fold in 1¼ cups of crushed Oreo cookies until fully combined, leaving some for topping.
- Transfer the fudge mixture into the baking pan, smoothing the top with a spatula.
- Sprinkle reserved Oreo crumbs on top, pressing down gently for better adherence.
- Chill the pan in the refrigerator for at least 45 minutes until firm.
- Once firm, lift the fudge out using the parchment overhang and slice into squares with a warm knife.