

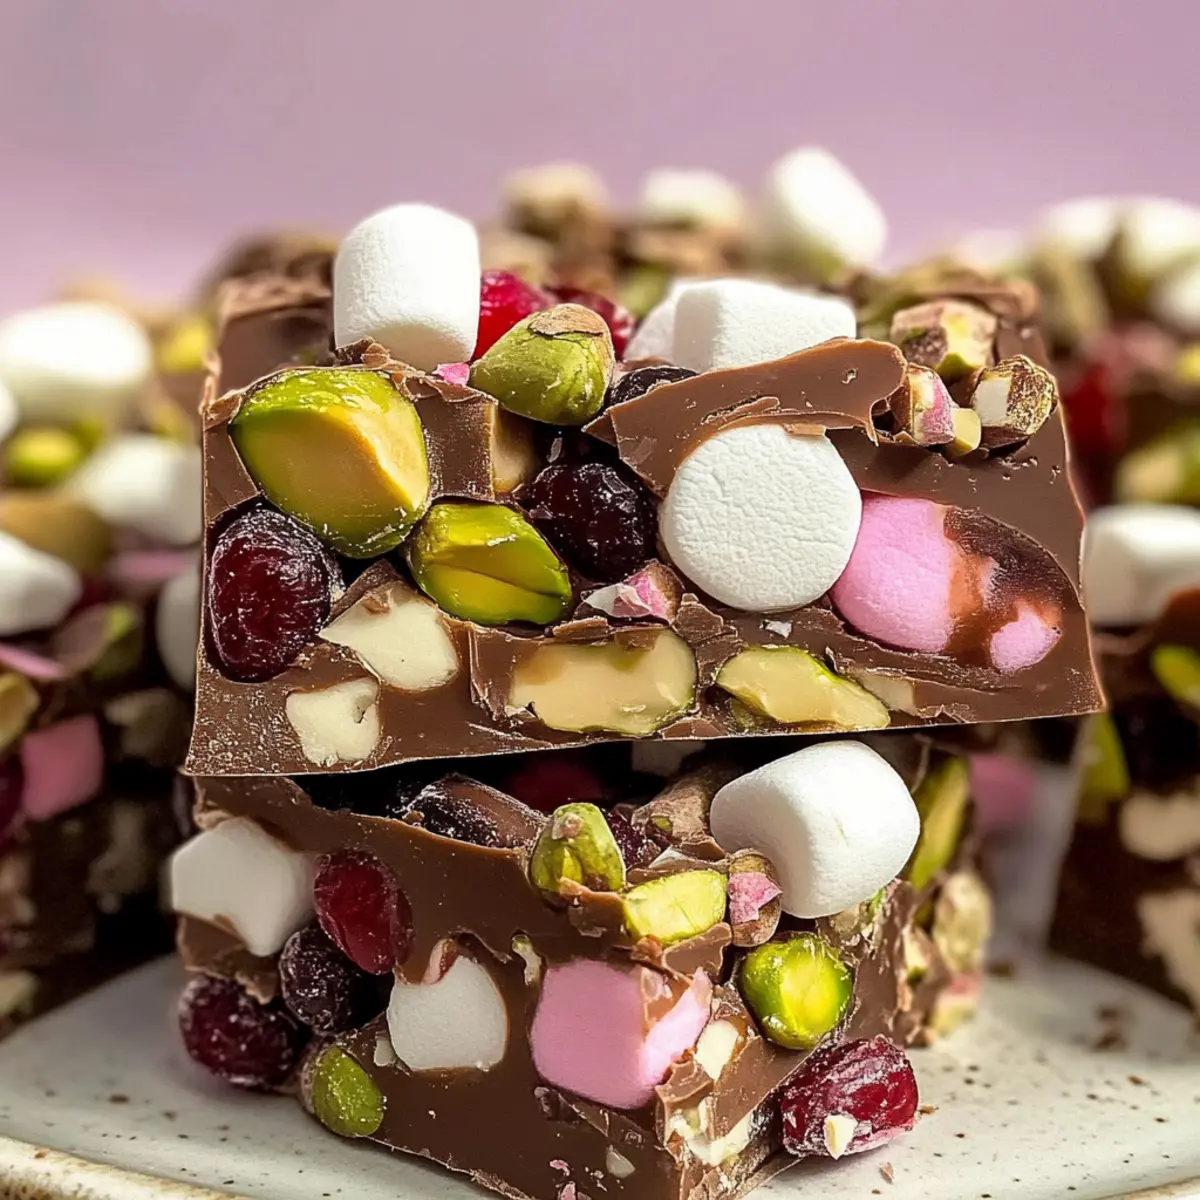
The sounds of laughter and the aroma of delightful treats fill the air as friends and family gather around. One of my absolute favorite holiday desserts is the Easy No-Bake Christmas Rocky Road. This sweet indulgence comes together in just 20 minutes and invites creativity with its customizable ingredients. Picture roasted macadamia nuts, crunchy pistachios, chewy cranberries, and fluffy marshmallows all enveloped in velvety chocolate—a combination that makes every bite feel like a cozy embrace. Not only is this no-bake treat a surefire crowd-pleaser, but it’s also perfect for gifting or bringing to festive gatherings. Ready to whip up a batch and impress your loved ones? Let’s dive into this delightful recipe!

Why is Christmas Rocky Road a Must-Try?
Irresistible flavors meld together in this festive treat, making it an instant holiday favorite. No-Bake Convenience means you can whip it up in just 20 minutes, freeing you to enjoy more time with loved ones. Customizable Ingredients let you tailor the mix-ins to suit your taste, from nuts to dried fruits. Crowd-Pleasing appeal ensures everyone will be asking for seconds, whether at holiday parties or cozy family gatherings. Plus, this delightful dessert can be made ahead and stored, making your holiday planning a breeze. Ready to create memories with this deliciously festive treat?
Christmas Rocky Road Ingredients
Get ready to create a festive masterpiece!
For the Chocolate Mixture
- Milk Chocolate – Provides rich chocolate sweetness; substitute with dark chocolate for a deeper flavor.
- Dark Chocolate – Enhances the chocolate flavor; you can omit this if using only milk chocolate.
For the Mix-Ins
- Roasted Macadamia Nuts – Adds crunch and nutty flavor; substitute with almonds for nut allergy-friendly options or omit for a nut-free version.
- Crispy Pistachios – Contributes texture and salty-sweet balance; sunflower seeds can be used as a nut-free alternative.
- Mini Marshmallows – Provides fluffiness and sweetness; larger marshmallows can be halved for smaller bites.
- Cranberries – Adds sweetness and tartness; substitute with dried cherries or raisins if desired.
- Turkish Delight – Delivers chewy sweetness; replace with chewy candies of your choice.
For Decoration (Optional)
- Extra Nuts or Sprinkles – Enhances flavor and visual appeal; use your favorite nuts, sprinkles, or even crushed candies for a festive touch.
This easy-to-make, customizable Christmas Rocky Road is bound to be the star of your holiday gatherings!
Step‑by‑Step Instructions for Christmas Rocky Road
Step 1: Melt the Chocolate
Chop the milk and dark chocolate into small pieces and place them in a microwave-safe bowl. Microwave the chocolate in 20-second intervals, stirring between each session until it’s fully melted and smooth, about 1-2 minutes total. Look for a glossy texture without any lumps—this is the perfect base for your Christmas Rocky Road.
Step 2: Mix in Ingredients
Once the chocolate is melted, remove it from the microwave and let it cool slightly. Gently fold in the roasted macadamia nuts, crispy pistachios, mini marshmallows, and cranberries using a spatula. Ensure that everything is evenly coated with chocolate, creating a delightful mix. You’ll want to see an even distribution of textures for your festive treat.
Step 3: Prepare the Pan
Take an 8-inch square baking pan and line it with parchment paper, allowing some overhang for easy removal. Carefully pour the chocolate mixture into the prepared pan, spreading it evenly into the corners with a spatula. Make sure the surface is level and looks inviting; this will be the beautiful base of your Christmas Rocky Road.
Step 4: Add Toppings
Before the chocolate mixture sets, sprinkle any extra nuts or colorful sprinkles over the top for added decoration and flair. Press them gently into the mixture to ensure they adhere well. This step adds a festive touch to your Christmas Rocky Road, making it look as delightful as it tastes.
Step 5: Chill to Set
Cover the baking pan with plastic wrap or aluminum foil and place it in the refrigerator. Chill for at least 1 hour, or until the mixture is firm to the touch. You’ll know it’s ready when the surface is set and feels solid—this is crucial for achieving nice, neat squares when serving your Christmas Rocky Road.
Step 6: Cut and Serve
Once chilled, remove the pan from the refrigerator and carefully lift the Rocky Road out using the parchment paper overhang. Place it on a cutting board and slice it into even squares with a sharp knife. For cleaner cuts, dip the knife in hot water between slices. Now your Christmas Rocky Road is ready to be enjoyed by family and friends!
How to Store and Freeze Christmas Rocky Road
Fridge: Keep your Christmas Rocky Road in an airtight container in the refrigerator for up to 2 weeks. This will maintain its freshness and delicious texture.
Freezer: For longer storage, wrap the Rocky Road slices tightly in plastic wrap or aluminum foil and freeze for up to 3 months. Thaw in the fridge before serving to retain its texture.
Room Temperature: If serving fresh, you can leave the Rocky Road at room temperature for a couple of hours, but avoid prolonged exposure to heat or direct sunlight to prevent melting.
Reheating: There’s no need to reheat this no-bake treat! Simply slice and serve directly from the fridge or after thawing for a delightful crunch.
Make Ahead Options
These Easy No-Bake Christmas Rocky Road treats are perfect for meal prep enthusiasts! You can prepare the chocolate mixture and mix in the nuts, marshmallows, and cranberries up to 24 hours in advance; simply cover the bowl tightly with plastic wrap and refrigerate to maintain freshness. However, for best results, it’s ideal to chill the entire mixture in the baking pan and keep it in the fridge for up to 3 days before serving. Just before your gathering, cut the chilled Rocky Road into squares and add any additional toppings. This way, you’ll have a festive dessert ready to impress with minimal last-minute effort, ensuring you can enjoy precious time with family and friends!
What to Serve with Easy No-Bake Christmas Rocky Road?
Indulging in this delightful treat opens the door to a world of luscious pairings that enhance your festive experience.
- Rich Hot Chocolate: This velvety drink complements the sweet, crunchy flavors of the Rocky Road, creating a cozy holiday vibe.
- Vanilla Ice Cream: A scoop of creamy ice cream against the chocolatey goodness adds a refreshing contrast that delights the palate.
- Cherry Tart: A slice of tart balances the sweetness, offering a delightful burst of acidity that enhances your dessert table.
- Spiced Apple Cider: Warm, spiced cider acts as a flavorful drink that envelops your senses in the warmth of the holidays.
- Gingerbread Cookies: The spiced, chewy texture of gingerbread perfectly complements the rich chocolate and adds a festive crunch.
- Fruit Platter: A colorful assortment of fresh fruits lightens your dessert spread, offering a refreshing contrast to the richness of the Rocky Road.
- Peppermint Bark: The minty freshness adds a delightful zing, inviting a joyful twist to your dessert experience while keeping it festive.
- Nutty Biscotti: This crunchy treat pairs excellently with a warm drink, providing a satisfying texture that matches the Rocky Road’s creaminess.
Christmas Rocky Road Variations & Substitutions
Feel free to jazz up your Christmas Rocky Road just the way you like it—let your creativity shine!
-
Nut-Free: Replace nuts with a mix of sunflower seeds and pumpkin seeds for a delightful crunch without the allergens.
If you want a family-friendly version that everyone can enjoy, this swap keeps the spirit of the recipe alive without compromising on texture. -
Dark Chocolate Delight: Substitute all the milk chocolate with dark chocolate to elevate the richness.
The deeper cocoa notes will delight dark chocolate lovers and add a sophisticated twist to this festive treat. -
Fruit Medley: Swap cranberries for chopped dried cherries or apricots for a burst of fruity flavor.
Imagine each bite carrying a sweet tang that complements the chocolate—a taste of holiday joy in every morsel. -
Minty Fresh: Incorporate a few drops of peppermint extract to create a seasonal twist.
This addition will give your Rocky Road a refreshing flavor explosion, perfect for those who love mint during the holidays. -
Spicy Kick: Add a sprinkle of cayenne pepper or chili powder to introduce a subtle heat.
A touch of spice can awaken the senses and create a surprising contrast with the sweetness—perfect for adventurous eaters! -
Festive Sprinkles: Top with colorful holiday-themed sprinkles for a cheerful finish.
Brighten up your dessert and make it even more enticing—everyone loves a pop of color, especially during festive gatherings. -
Cookie Crumble: Mix in crushed gingerbread cookies for an extra layer of flavor and texture.
This twist not only enhances the holiday spirit but also adds a delightful crunch that’s reminiscent of cozy gingerbread moments. -
Caramel Swirl: Drizzle melted caramel over the top before chilling for an indulgent touch.
This creates a luscious layer in each bite, transforming your Rocky Road into an irresistible caramel-chocolate dream.
Get inspired to personalize your creation further! If you’re looking for more delicious no-bake ideas, check out this no-bake cookie recipe or explore how to make no-bake cheesecake for even more delightful desserts.
Expert Tips for Christmas Rocky Road
-
Quality Matters: Ensure you use high-quality chocolate for the best flavor; brands with high cocoa content yield a richer taste in your Christmas Rocky Road.
-
Avoid Overheating: When melting chocolate, microwave in short intervals and stir continuously. This prevents burning and guarantees a smooth consistency.
-
Nut-Free Alternative: If you’re preparing a nut-free version, simply replace nuts with seeds; sunflower seeds work great while offering a similar crunch without allergies.
-
Spreading Smoothly: To prevent a thick chocolate mixture, consider adding a teaspoon of coconut or vegetable oil when melting; it enhances the pourability and texture.
-
Chill Thoroughly: Don’t rush the chilling process; the Rocky Road needs to set completely in the refrigerator to ensure clean cuts when served.
-
Customizable Fun: Feel free to mix and match ingredients based on your preference; this Christmas Rocky Road can be tailored to suit everyone’s taste!
Christmas Rocky Road Recipe FAQs
What is the best way to choose ripe ingredients for my Christmas Rocky Road?
Absolutely! When selecting ingredients like nuts and dried fruits, go for those that are fresh and have not passed their expiration date. Look for nuts that are crisp, with no dark spots, as this indicates freshness. For dried fruits like cranberries, select ones that are plump and vibrant in color, as this suggests they are juicy and flavorful.
How should I store my Christmas Rocky Road, and how long will it last?
Keep your delicious Christmas Rocky Road in an airtight container in the refrigerator for up to 2 weeks. This ensures it stays fresh and maintains its delightful texture. If you want to keep it longer, wrap the slices tightly in plastic wrap and freeze them for up to 3 months. Just be sure to let it thaw in the fridge before serving to preserve the texture!
Can I freeze Christmas Rocky Road, and if so, how?
Yes, you can definitely freeze your Christmas Rocky Road! Simply wrap each piece tightly in plastic wrap or aluminum foil. Place the wrapped pieces in a freezer-safe container or bag to protect them from freezer burn. When you are ready to enjoy, thaw the slices in the refrigerator for a few hours or overnight for the best texture. This guarantees that it retains its delightful crunchiness when you serve it!
What should I do if my chocolate mixture is too thick to pour?
Very! If you find that your chocolate mixture is a bit too thick, this can happen sometimes. To remedy this, simply add a teaspoon of coconut oil or vegetable oil to the chocolate during the melting process. Stir it in until smooth. This should help create a silky texture that’s easier to work with, making it simpler to mix in your wonderful ingredients!
Can I make this Christmas Rocky Road nut-free for allergy concerns?
Absolutely! If you have guests with nut allergies, you can simply omit the nuts altogether or replace them with seeds, like sunflower seeds or pumpkin seeds. These alternatives still offer a lovely crunch without the risk of allergies. Always double-check the labels for cross-contamination warnings, just to be safe!
What if my Christmas Rocky Road doesn’t set in the fridge?
If you find that your Christmas Rocky Road is not setting properly in the fridge, it may be due to the chocolate not being melted correctly or not enough time being allowed to chill. To fix this, simply place it back in the fridge for an additional hour or two. If it still doesn’t firm up, gently reheat the mixture slightly to melt it down and remix, then allow it more time in the fridge to solidify.
Irresistible Christmas Rocky Road for Festive Gatherings
Ingredients
Equipment
Method
- Chop the milk and dark chocolate into small pieces and place them in a microwave-safe bowl. Microwave in 20-second intervals until fully melted, about 1-2 minutes total.
- Remove the melted chocolate from the microwave and cool slightly. Gently fold in roasted macadamia nuts, crispy pistachios, mini marshmallows, and cranberries.
- Line an 8-inch square baking pan with parchment paper. Pour the chocolate mixture into the pan, spreading it evenly.
- Sprinkle any extra nuts or colorful sprinkles over the top before it sets, pressing them gently into the mixture.
- Cover with plastic wrap or aluminum foil and chill in the refrigerator for at least 1 hour until firm.
- Once chilled, lift the Rocky Road out of the pan using the parchment paper and slice into squares.