


Introduction to Ham and Cheese Puff Pastry Pinwheels
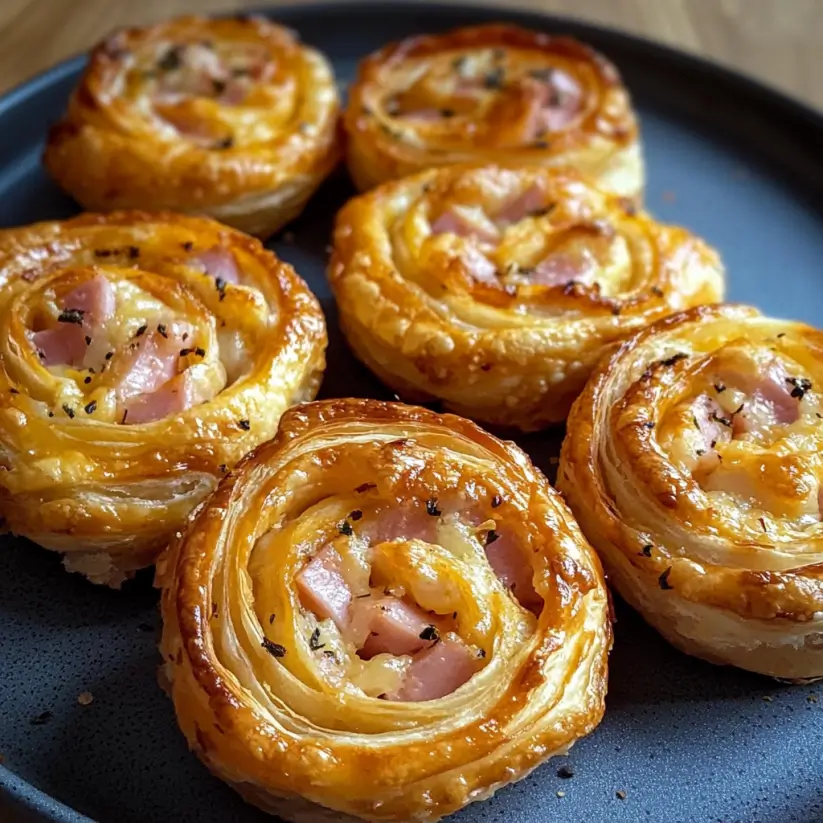
There’s something magical about the aroma of freshly baked Ham and Cheese Puff Pastry Pinwheels wafting through the kitchen. It takes me back to family gatherings, where the snack table was always the star of the show. These delightful pinwheels are not just a treat; they’re a quick solution for busy days or a way to impress your friends at game night. With just a few simple ingredients, you can whip up a batch that’s sure to please everyone. Trust me, once you try these, they’ll become your go-to snack for any occasion!
Why You’ll Love This Ham and Cheese Puff Pastry Pinwheels
These Ham and Cheese Puff Pastry Pinwheels are the ultimate crowd-pleaser. They’re incredibly easy to make, taking just 35 minutes from start to finish. The flaky, buttery pastry pairs perfectly with savory ham and gooey cheese, creating a flavor explosion in every bite. Whether you’re hosting a party or just need a quick snack, these pinwheels deliver on taste and convenience, making them a must-try for any home cook.
Ingredients for Ham and Cheese Puff Pastry Pinwheels
Gathering the right ingredients is the first step to creating these delicious Ham and Cheese Puff Pastry Pinwheels. Here’s what you’ll need:
- Puff Pastry: Two sheets of thawed puff pastry form the flaky base. You can find these in the freezer section of your grocery store.
- Deli Ham: Eight ounces of sliced deli ham adds a savory punch. Feel free to choose your favorite type, whether it’s honey, smoked, or black forest.
- Cheese: Eight ounces of sliced cheese, like Swiss or cheddar, brings that gooey goodness. Experiment with different cheeses for unique flavors!
- Egg: A large beaten egg is used for the egg wash, giving the pinwheels a beautiful golden color when baked.
- Dijon Mustard: This is optional, but a thin layer adds a zesty kick. If you’re not a mustard fan, feel free to skip it.
- Dried Parsley: A sprinkle of dried parsley enhances the flavor and adds a pop of color. You can also use fresh herbs if you have them on hand.
- Salt and Pepper: These basic seasonings elevate the taste. Adjust to your preference for a little extra flavor.
For those looking to mix things up, consider substituting the ham with sautéed spinach and mushrooms for a vegetarian option. You can find the exact quantities for each ingredient at the bottom of the article, ready for printing!
How to Make Ham and Cheese Puff Pastry Pinwheels
Creating these Ham and Cheese Puff Pastry Pinwheels is a breeze! Follow these simple steps, and you’ll have a delicious snack ready in no time. Let’s dive in!
Step 1: Preheat the Oven
First things first, preheat your oven to 400°F (200°C). This ensures that your pinwheels bake evenly and get that perfect golden color. While the oven heats up, line a baking sheet with parchment paper. This will prevent sticking and make cleanup a snap!
Step 2: Prepare the Puff Pastry
Next, take your thawed puff pastry and place it on a lightly floured surface. Roll out each sheet gently to smooth out any creases. This step is crucial for achieving that flaky texture we all love. Don’t worry if it’s not perfect; a little rustic charm adds character!
Step 3: Add the Mustard
If you’re a fan of a little zing, spread a thin layer of Dijon mustard over each sheet of puff pastry. This step is optional, but it adds a delightful kick. If mustard isn’t your thing, feel free to skip it. The pinwheels will still be delicious!
Step 4: Layer the Ham and Cheese
Now, it’s time to layer on the good stuff! Start by placing the sliced ham evenly over the pastry. Follow that with the cheese of your choice. For an extra touch, sprinkle some dried parsley, salt, and pepper on top. This adds flavor and a pop of color!
Step 5: Roll the Pastry
Starting from one edge, carefully roll the pastry tightly into a log. Make sure it’s snug but not too tight, as you want the filling to stay inside. Repeat this process with the second sheet of pastry. You’ll have two delicious logs ready to slice!
Step 6: Slice the Pinwheels
Using a sharp knife, slice each log into 1-inch thick pinwheels. Place them cut side up on the prepared baking sheet. This way, they’ll puff up beautifully in the oven. Don’t worry if they’re not all perfectly even; they’ll still taste amazing!
Step 7: Brush with Egg Wash
To give your pinwheels that gorgeous golden color, brush the tops with the beaten egg. This egg wash is the secret to that shiny finish. It’s a small step that makes a big difference in presentation!
Step 8: Bake
Now, pop the baking sheet into your preheated oven. Bake for 15-20 minutes, or until the pinwheels are puffed and golden brown. Keep an eye on them; every oven is a little different, and you want them just right!
Step 9: Cool and Serve
Once they’re out of the oven, allow the pinwheels to cool slightly before serving. This will help the cheese set a bit, making them easier to handle. Trust me, the wait will be worth it when you take that first bite!
Tips for Success
- Make sure your puff pastry is fully thawed for easy rolling.
- Don’t overload the filling; a little goes a long way!
- Experiment with different cheeses for unique flavors.
- For extra crunch, sprinkle sesame seeds on top before baking.
- Keep an eye on the baking time; ovens can vary.
Equipment Needed
- Baking Sheet: A standard baking sheet works perfectly. If you don’t have one, a large oven-safe dish will do.
- Parchment Paper: This prevents sticking. If you’re out, a silicone baking mat is a great alternative.
- Rolling Pin: Essential for rolling out puff pastry. A wine bottle can work in a pinch!
- Sharp Knife: For slicing the pinwheels. A pizza cutter can also make quick work of this task.
Variations
- Vegetarian Delight: Swap the ham for sautéed spinach and mushrooms, and use your favorite cheese for a delicious meat-free option.
- Spicy Kick: Add sliced jalapeños or a sprinkle of red pepper flakes to the ham and cheese for a spicy twist.
- Herb Infusion: Mix fresh herbs like basil or thyme into the cheese layer for an aromatic flavor boost.
- Sweet and Savory: Incorporate a layer of fig jam or apple slices with the ham for a sweet contrast to the savory elements.
- Cheesy Trio: Use a combination of cheeses like mozzarella, gouda, and pepper jack for a rich, cheesy experience.
Serving Suggestions
- Pair with Dips: Serve with a side of honey mustard or ranch dressing for dipping.
- Fresh Salad: A light green salad with vinaigrette complements the richness of the pinwheels.
- Drink Options: Enjoy with a cold beer or a crisp white wine for a delightful pairing.
- Presentation: Arrange on a platter with fresh herbs for a pop of color and elegance.
FAQs about Ham and Cheese Puff Pastry Pinwheels
Can I make Ham and Cheese Puff Pastry Pinwheels ahead of time?
Absolutely! You can prepare the pinwheels, slice them, and store them in the fridge for up to a day before baking. Just remember to cover them tightly with plastic wrap to keep them fresh.
What can I substitute for puff pastry?
If you don’t have puff pastry, you can use crescent roll dough as a quick alternative. It won’t be quite the same, but it will still yield delicious results!
How do I store leftovers?
Store any leftover pinwheels in an airtight container in the fridge for up to three days. Reheat them in the oven for a few minutes to regain that crispy texture.
Can I freeze Ham and Cheese Puff Pastry Pinwheels?
Yes! You can freeze the unbaked pinwheels. Just place them on a baking sheet to freeze individually, then transfer them to a freezer bag. Bake from frozen, adding a few extra minutes to the cooking time.
What other fillings can I use?
The possibilities are endless! Try using turkey and provolone, or even a mix of roasted vegetables and feta for a tasty twist. Get creative with your favorite ingredients!
Final Thoughts
Making Ham and Cheese Puff Pastry Pinwheels is more than just cooking; it’s about creating moments. The joy of pulling a tray of golden, flaky pinwheels from the oven is unmatched. Each bite is a delightful combination of flavors that brings back memories of family gatherings and friendly get-togethers. Whether you’re enjoying them during a game night or as a quick snack, these pinwheels are sure to impress. So roll up your sleeves, gather your ingredients, and let the aroma of these delicious treats fill your kitchen. You’ll be glad you did!
Ham and Cheese Puff Pastry Pinwheels for Perfect Snacking
Ingredients
Method
- Preheat your oven to 400°F (200°C) and line a baking sheet with parchment paper.
- On a lightly floured surface, roll out each sheet of puff pastry to smooth out creases.
- Spread a thin layer of Dijon mustard over each sheet of puff pastry, if using.
- Layer the sliced ham evenly over the pastry, followed by the cheese. Sprinkle with dried parsley, salt, and pepper if desired.
- Starting from one edge, carefully roll the pastry tightly into a log. Repeat with the second sheet.
- Slice each log into 1-inch thick pinwheels and place them on the prepared baking sheet, cut side up.
- Brush the tops of the pinwheels with the beaten egg to give them a golden color when baked.
- Bake in the preheated oven for 15-20 minutes, or until the pinwheels are puffed and golden brown.
- Allow to cool slightly before serving.
Nutrition
Notes
- For a vegetarian option, substitute the ham with sautéed spinach and mushrooms, and use a cheese of your choice.
- Add a sprinkle of your favorite herbs or spices, such as garlic powder or Italian seasoning, to the cheese layer for extra flavor.