

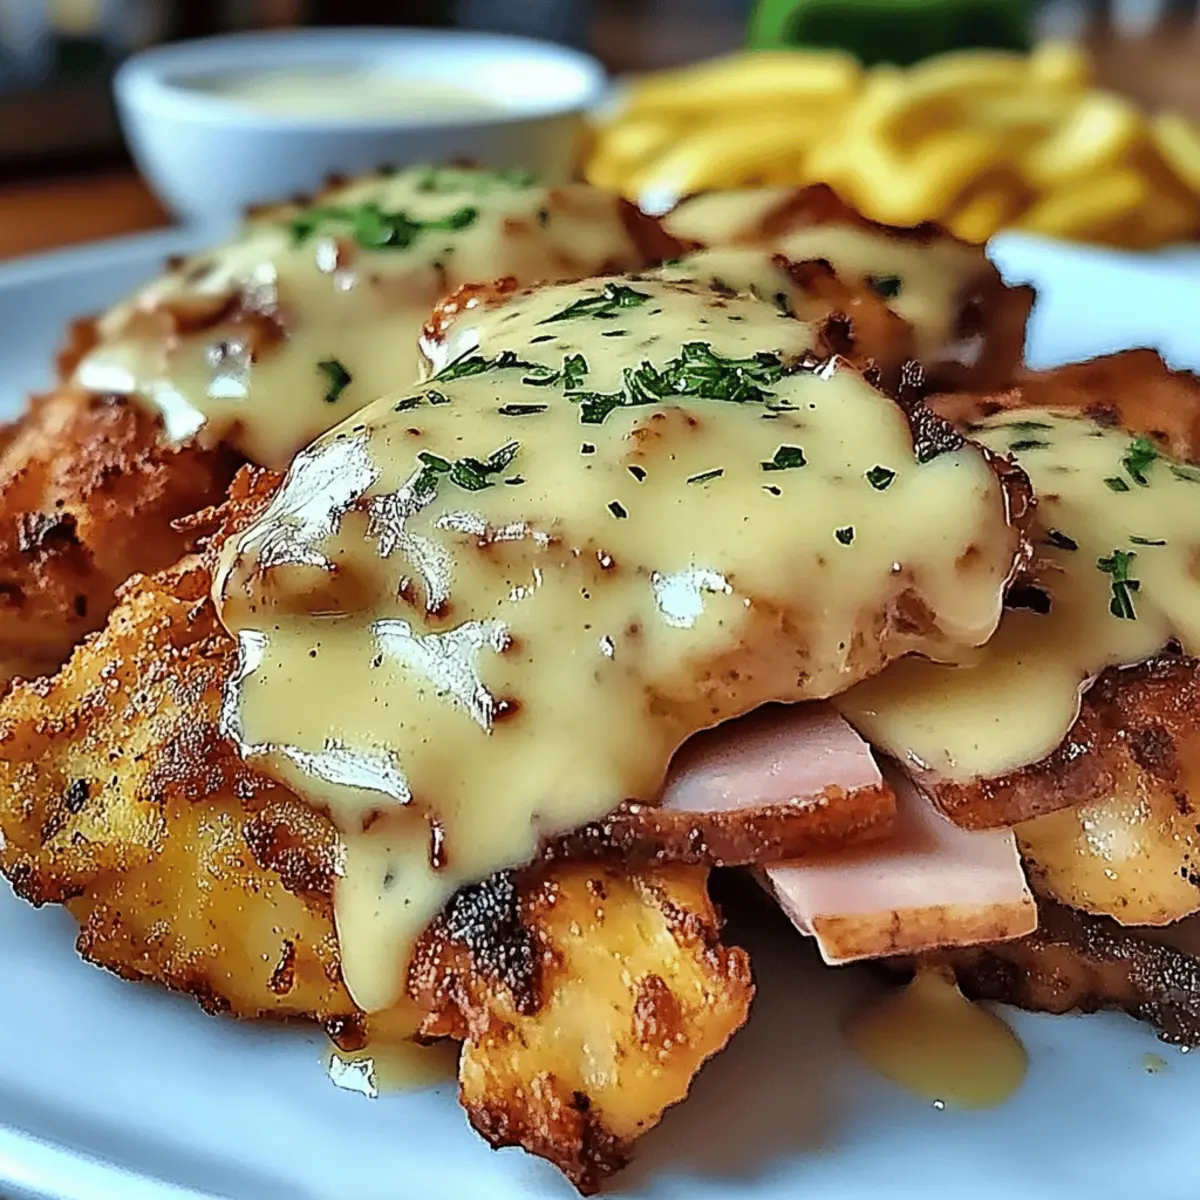
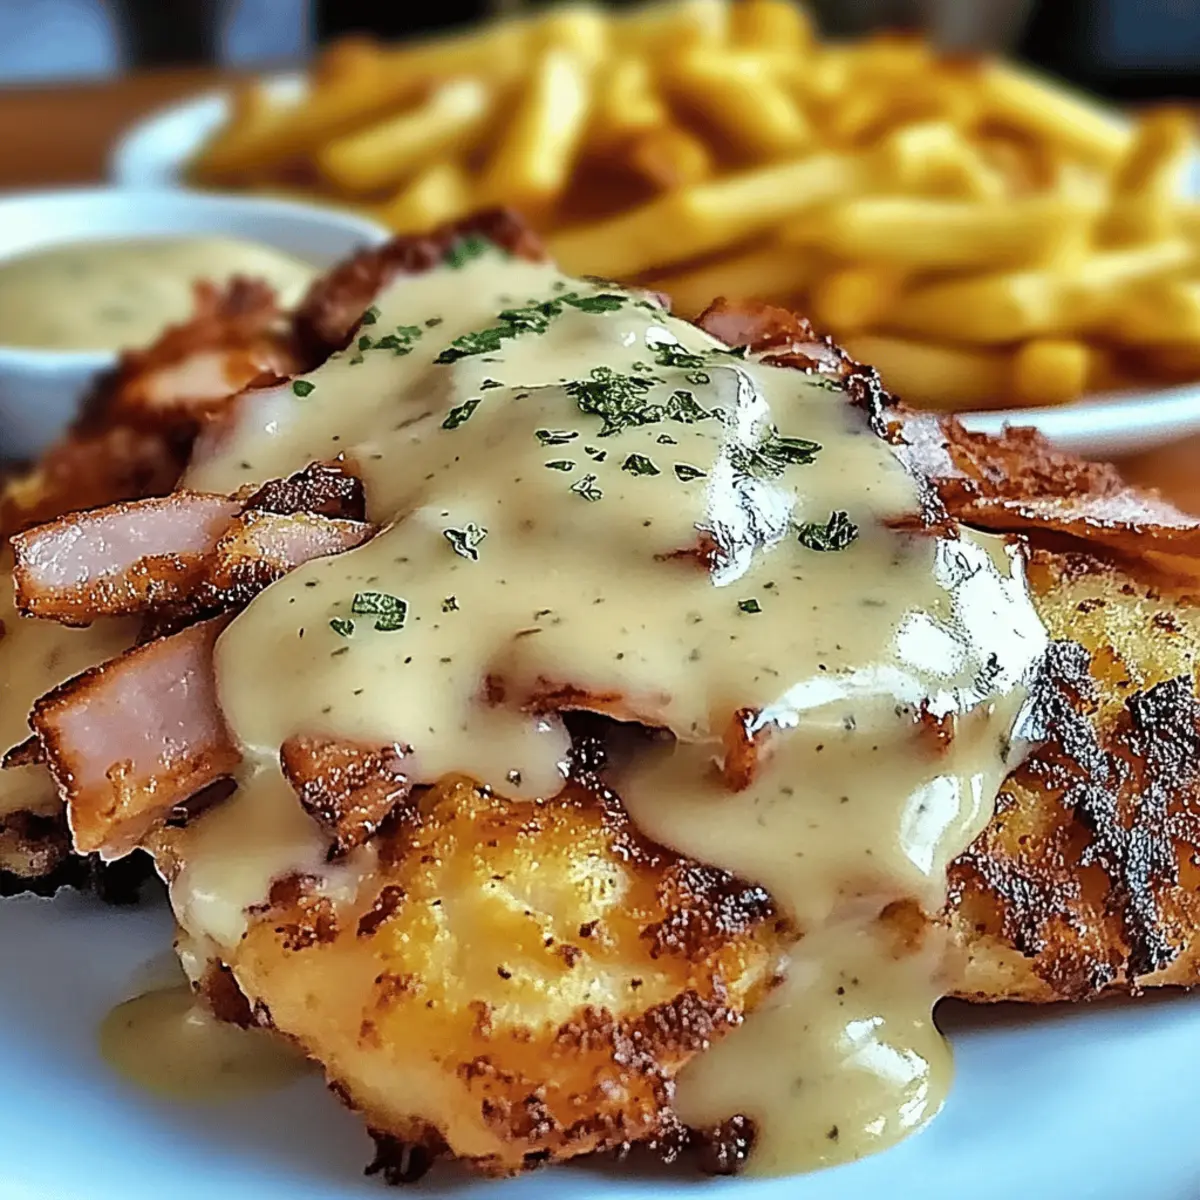
As I flipped through an old family cookbook, the vibrant memories of cozy dinners at home came flooding back, and one dish stood out: Malibu Chicken. This classic comfort food, layered with tender chicken breasts, crispy breading, savory ham, and melty Swiss cheese, always brings my family together. But what truly sets this recipe apart is a creamy mustard sauce that adds a delightful tang, elevating it from simple to spectacular. Malibu Chicken is not only a breeze to prepare, making it an ideal weeknight dinner, but it’s also a guaranteed crowd-pleaser for any gathering. Have you ever wondered how something so satisfying can be so effortless? Let’s dive into this beloved recipe and take your family dinners to new heights!
Why is Malibu Chicken so popular?
Nostalgic Comfort: This dish evokes warm memories of family dinners and restaurant favorites, making it a beloved choice for many.
Easy Preparation: With just a few simple steps, you can whip up this delicious meal and impress your loved ones.
Flavor Explosion: The crispy chicken, savory ham, and creamy mustard sauce create a tantalizing combination that will leave your taste buds dancing.
Versatile Options: Easily adapt it to fit dietary needs with gluten-free substitutes or different cheeses, like provolone or Gruyère.
Perfect for Gatherings: Whether it’s a busy weeknight or a festive occasion, Malibu Chicken is always a noteworthy crowd-pleaser, ready to be served alongside favorites like Creamy Garlic Parmesan Chicken or Tropical Pineapple Chicken.
Malibu Chicken Ingredients
For the Chicken
• Chicken Breasts – Pound thin for tender, juicy bites that cook evenly.
• Ham – Provides savory depth; thin slices of Black Forest, honey, or Virginia ham work beautifully.
• Swiss Cheese – Melts perfectly for creamy goodness; feel free to substitute with provolone or Gruyère for unique flavors.
For the Breading
• All-Purpose Flour – Essential for a crispy coating; swap with gluten-free flour for a gluten-free option.
• Eggs – Binds the breading to the chicken; whisk with a splash of water or milk for a smoother texture.
• Panko Breadcrumbs – Adds that irresistible crunch; gluten-free Panko is also available for those avoiding gluten.
For Cooking
• Olive Oil or Butter – Perfect for pan-frying and adds a rich flavor; a combination enhances taste even more.
For the Creamy Mustard Sauce
• Mayonnaise – Forms the creamy base of the sauce, providing richness.
• Dijon Mustard – Offers heat and tang; adjust according to your taste!
• Honey – Balances the flavors with a touch of sweetness.
• Lemon Juice – Provides acidity to brighten the sauce up.
• Worcestershire Sauce – Adds depth and complexity; don’t skip this one!
This flavorful Malibu Chicken recipe blends nostalgic tradition with a gourmet twist, perfect for meals that make lasting memories.
Step‑by‑Step Instructions for Malibu Chicken
Step 1: Prepare the Chicken
Start by placing the chicken breasts between two sheets of plastic wrap and pound them to ¼ to ½ inch thickness using a meat mallet. This tenderizing process ensures even cooking and juiciness. Once pounded, season both sides generously with salt and pepper to enhance the flavors of your Malibu Chicken.
Step 2: Set Up Breading Station
Create a breading station by arranging three shallow dishes in a row. Fill the first dish with all-purpose flour, the second with whisked eggs mixed with a splash of water, and the third with seasoned Panko breadcrumbs. This organized setup will make breading your chicken efficient and mess-free.
Step 3: Bread the Chicken
Begin the breading process by taking a seasoned chicken breast and dredging it in the flour, ensuring it’s fully coated. Next, dip it into the egg mixture, allowing excess to drip off, and finally press it into the Panko breadcrumbs, ensuring a generous coating. This technique will guarantee the crispy exterior that defines Malibu Chicken.
Step 4: Cook the Chicken
Preheat your oven to 400°F (200°C) while heating a skillet over medium heat and adding olive oil or butter. Once hot, add the breaded chicken breasts and cook for 2-3 minutes on each side, or until they achieve a golden-brown color. This step creates a delicious crust before transferring the chicken to a baking dish.
Step 5: Assemble and Bake
After pan-frying, place each chicken piece in a baking dish. Top them with thin slices of ham and a slice of Swiss cheese. Transfer the baking dish to the preheated oven and bake for 15-20 minutes, or until the chicken is cooked through and the cheese is melted and bubbly, signaling a perfectly prepared Malibu Chicken.
Step 6: Prepare the Sauce
While the Malibu Chicken bakes, combine the mayonnaise, Dijon mustard, honey, lemon juice, and Worcestershire sauce in a bowl. Whisk these ingredients together until smooth, adjusting seasoning as necessary to complement the savory flavors of the dish. This creamy mustard sauce will provide a delightful finishing touch.
Step 7: Serve
Once your Malibu Chicken is fully baked and resting for a few minutes, drizzle the creamy mustard sauce generously over each piece. Garnish as desired, and serve with your favorite sides like mashed potatoes or a fresh salad. This delicious dish will surely delight your family at dinner time!
What to Serve with Classic Malibu Chicken
Elevate your Malibu Chicken experience by pairing it with these delightful side dishes and beverages, creating a balanced meal that warms the soul.
-
Creamy Mashed Potatoes: The buttery smoothness of mashed potatoes complements the crispy chicken, soaking up the tangy mustard sauce beautifully. A dollop of gravy on top takes it to another level!
-
Garlic Green Beans: Fresh, sautéed green beans add a crisp texture and vibrant color, making your plate visually appealing and refreshing with each bite. The slight garlic flavor enhances the overall savory experience.
-
Crispy Roasted Brussels Sprouts: These little gems caramelize to perfection when roasted, offering a delightful contrast to the tender chicken. Their nutty flavors and crispy edges create a lovely balance with the creamy sauce.
-
Simple Garden Salad: A crisp salad made with mixed greens, cucumbers, and cherry tomatoes provides a refreshing crunch that offsets the richness of the chicken. Drizzle with a light vinaigrette for brightness!
-
Herbed Rice Pilaf: Fluffy rice infused with herbs and spices acts as a fantastic canvas for the rich flavors of Malibu Chicken. It soaks up juices splendidly, making every bite incredibly satisfying.
-
Homemade Coleslaw: Crunchy, tangy coleslaw adds a refreshing zing and a delightful crunch to your meal. The cooler temperature offers a lovely contrast to the warm, comforting chicken.
-
Sparkling Lemonade: A glass of homemade sparkling lemonade elevates your dining experience with its zesty flavors, cleansing your palate beautifully between bites of the savory chicken.
-
Chocolate Mousse: End on a sweet note with a light, airy chocolate mousse. Its rich flavors and velvety texture provide a perfect dessert to balance the savory meal.
Each pairing is designed to enhance the heartiness of your Malibu Chicken while creating an inviting dining atmosphere that everyone will love!
Make Ahead Options
These Malibu Chicken pieces are perfect for meal prep enthusiasts! You can bread the chicken and assemble the entire dish up to 24 hours in advance, which saves precious time on busy weeknights. Simply cover the assembled dish with plastic wrap and refrigerate it to keep everything fresh and crispy. Additionally, you can prepare the creamy mustard sauce 2-3 days ahead; just store it in an airtight container in the fridge—this allows the flavors to meld beautifully. When ready to cook, pop the chilled Malibu Chicken into the oven and bake as directed. You’ll enjoy a delightful, homemade meal with minimal last-minute effort, guaranteed to impress your family!
Expert Tips for Malibu Chicken
-
Pound Evenly: Ensure chicken is pounded uniformly to ¼ inch for tender, juicy results and even cooking throughout.
-
Keep One Hand Dry: When breading, designate one hand for wet (egg) and the other for dry (flour and Panko) to minimize mess and improve coating adherence.
-
Check Cheese Melting: If baking without pan-frying, add extra time for the chicken to fully cook; check that cheese is beautifully melted before serving your Malibu Chicken.
-
Sauce Adjustment: Feel free to tweak the mustard sauce ingredients according to taste preferences; a little more honey or lemon juice can elevate the flavor.
-
Prep Ahead: Consider breading the chicken and preparing the sauce the day before; store separately in the fridge to save time on busy weeknights.
Malibu Chicken Variations & Substitutions
Feel free to mix and match flavors and ingredients to make this Malibu Chicken truly your own. The possibilities are endless!
- Gluten-Free: Substitute all-purpose flour and Panko with gluten-free alternatives for a delicious meal that everyone can enjoy. It’s just as crispy and satisfying!
- Ham Alternatives: Try turkey, prosciutto, or even smoked sausage instead of ham for a unique twist that adds different flavor profiles to your dish.
- Cheese Switch: Swap in provolone or mild cheddar if Swiss cheese isn’t your favorite. Each cheese brings its own delightful essence to the final dish.
- Creamy Sauce Boost: Add a hint of sriracha or hot sauce to the creamy mustard sauce for a spicy kick. It’s a fantastic way to heat things up!
- Herb Infusion: Mix in fresh herbs like thyme or rosemary into the breadcrumbs for extra flavor and aroma, which can elevate the entire dish.
- Veggie Crunch: Top your Malibu Chicken with sautéed mushrooms or spinach before adding the cheese for an extra layer of nutrition and taste.
- Baked Variation: For a lighter take, skip the pan-frying and bake the chicken directly in the oven, adjusting the baking time for perfectly cooked chicken.
- Serve with Style: Pair with sides like mashed potatoes, steamed veggies, or a fresh salad to complete your comforting meal. Consider serving alongside dishes like Creamy Garlic Parmesan Chicken or Mediterranean Chicken Tzatziki for a delightful spread!
Storage Tips for Malibu Chicken
Fridge: Store leftover Malibu Chicken in an airtight container for up to 3-4 days to maintain its flavor and freshness.
Freezer: For longer storage, place the cooled, unbaked chicken in a freezer-safe container, where it can last up to 3 months. Thaw overnight in the fridge before baking.
Reheating: To reheat, place the chicken in an oven preheated to 350°F (175°C) for about 15-20 minutes, or until heated through and the cheese is melted again.
Sauce Storage: The creamy mustard sauce can be stored separately in the fridge for 2-3 days; just give it a good stir before serving it over your revitalized Malibu Chicken.
Malibu Chicken Recipe FAQs
What type of chicken breasts should I use for Malibu Chicken?
Absolutely! For the best results, use boneless, skinless chicken breasts. Pounding them to about ¼ to ½ inch thickness ensures even cooking and tenderness. This method is key to achieving the juicy texture that makes this dish so beloved.
How do I store leftover Malibu Chicken?
Refrigerate any leftovers in an airtight container for up to 3-4 days. I recommend ensuring that the chicken has cooled to room temperature before sealing it to prevent condensation from making it soggy. You can also reheat it in the oven for the best texture!
Can I freeze Malibu Chicken?
Yes, you can! To freeze, place the prepared but unbaked chicken in a freezer-safe container or wrap it tightly in plastic wrap, then foil. It can last up to 3 months in the freezer. When you’re ready to enjoy it again, simply thaw it overnight in the fridge before baking.
What should I do if the breading doesn’t stick to the chicken?
Very! If you find that the breading isn’t sticking well, make sure to press the Panko breadcrumbs firmly onto the chicken after dipping it in the egg wash. If you still have issues, a light dusting of flour before the egg can help create a better base for the breadcrumbs to adhere.
Are there gluten-free options for Malibu Chicken?
Absolutely! You can easily substitute all-purpose flour and traditional Panko breadcrumbs with gluten-free alternatives. Many brands offer gluten-free flour blends and Panko that will still give you that delightful crunch without sacrificing flavor.
Can I make the creamy mustard sauce ahead of time?
Yes! You can prepare the creamy mustard sauce 2-3 days in advance. Simply store it in a sealed container in the fridge, and give it a good stir before drizzling it over your Malibu Chicken. This can save you some time on a busy weeknight!
Irresistible Malibu Chicken with Creamy Mustard Delight
Ingredients
Equipment
Method
- Start by placing the chicken breasts between two sheets of plastic wrap and pound them to ¼ to ½ inch thickness using a meat mallet. Season both sides with salt and pepper.
- Create a breading station by arranging three shallow dishes in a row: flour in the first, whisked eggs in the second, and seasoned Panko breadcrumbs in the third.
- Dredge the seasoned chicken breast in flour, dip into the egg mixture, and press into the Panko breadcrumbs for a generous coating.
- Preheat your oven to 400°F (200°C). In a skillet over medium heat, heat olive oil or butter and add the breaded chicken, cooking for 2-3 minutes on each side until golden-brown.
- Place each chicken piece in a baking dish, top with ham and Swiss cheese, and bake for 15-20 minutes until the chicken is cooked through and cheese is melted.
- Combine mayonnaise, Dijon mustard, honey, lemon juice, and Worcestershire sauce in a bowl. Whisk until smooth, adjusting seasoning to taste.
- Once fully baked, drizzle the creamy mustard sauce over each piece and serve with your favorite sides.