

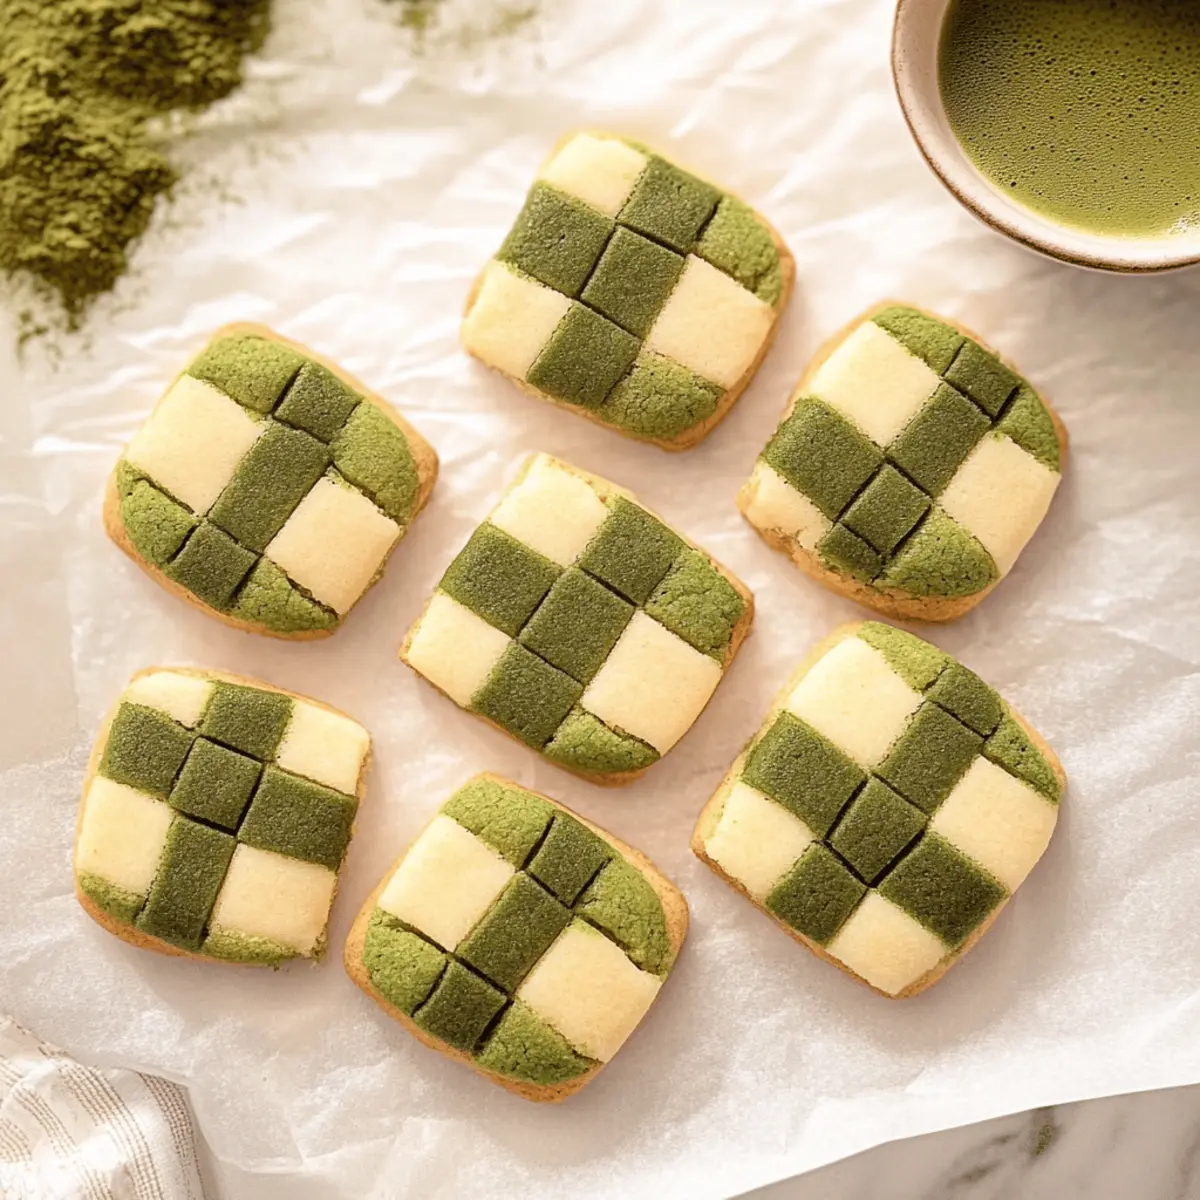
The scent of fresh-baked cookies wafted through the house, transporting me to a cozy winter wonderland. That’s the magic of baking these Matcha Checkerboard Cookies—it’s not just about flavor, but also about the festivity they bring to your gatherings. With their stunning visual appeal and delicate sweetness, these cookies strike the perfect balance between earthy matcha and buttery goodness. Plus, they’re an impressive gift for the holiday season, sure to delight anyone who receives them. And don’t worry about the intricate design; I’ll guide you through each step to create these aesthetic treats effortlessly. Ready to elevate your holiday baking game? Let’s dive in and discover the joy of crafting these stunning cookies together!

Why Are Matcha Checkerboard Cookies Unique?
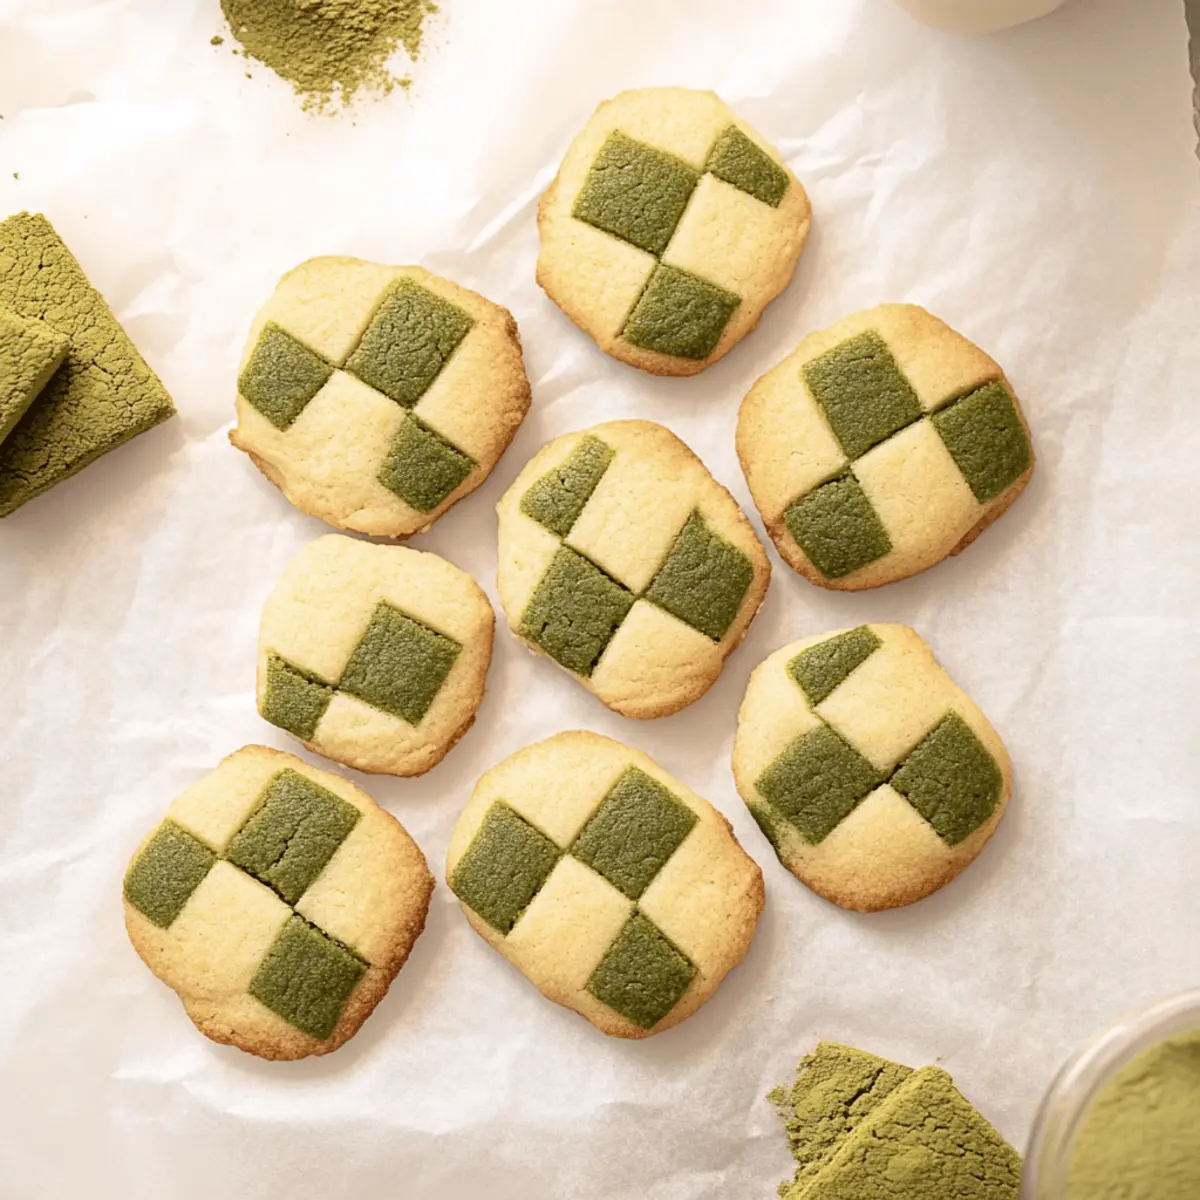
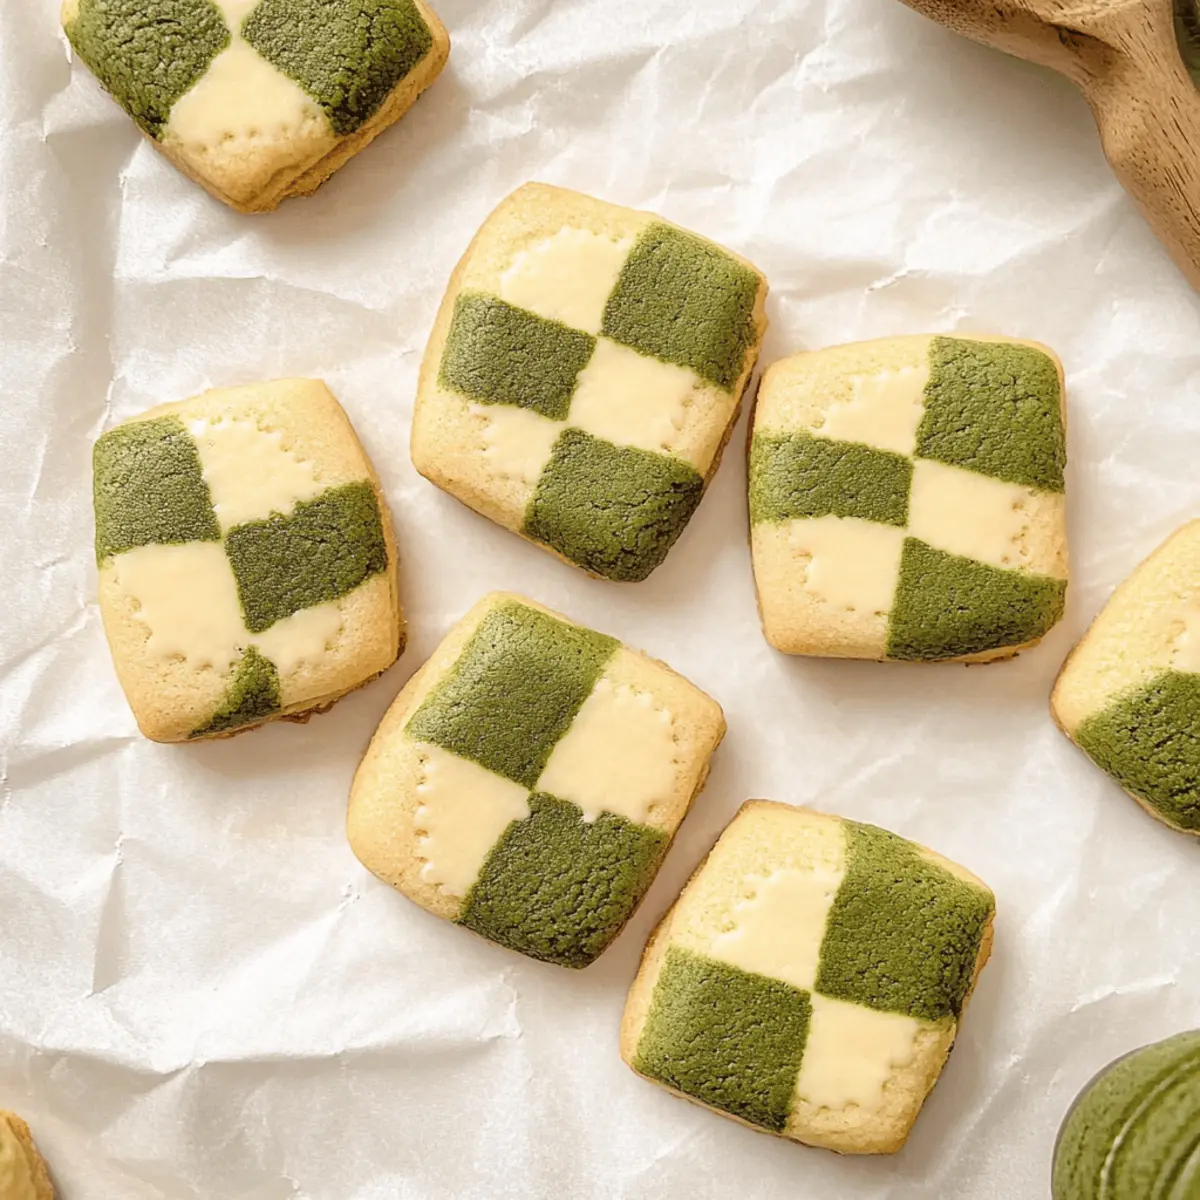
Visual Appeal: The stunning checkerboard pattern not only looks impressive but also showcases your baking skills. Earthy Flavor: Matcha provides a unique twist, delivering a sweet and slightly grassy taste that contrasts beautifully with classic cookie sweetness. Holiday Ready: Perfect for gifting, these cookies are festive delights that will impress friends and family alike. Simple Techniques: Despite their elaborate appearance, the steps are manageable for home bakers, making this a fun project. If you’re in the mood for more cookie inspiration, check out my delightful Patriotic Thumbprint Cookies or my flavorful Chocolate Lava Brownie Cookies.
Matcha Checkerboard Cookies Ingredients
• Get ready to bake!
-
For the Dough
-
All-Purpose Flour – Main structure-building component; feel free to substitute with a gluten-free flour blend if needed.
-
Baking Powder – Provides leavening; make sure it’s fresh for the best texture.
-
Salt – Enhances flavor; for a touch of gourmet, try using sea salt.
-
Unsalted Butter – Adds richness and moisture; bring to room temperature for easy creaming.
-
Powdered Sugar – Sweetens the dough and helps achieve a tender texture; coconut sugar is a less sweet option.
-
Granulated Sugar – Provides sweetness and structure; both sugars work together, so don’t skip one!
-
Egg – Binds the ingredients; a flax egg is a good vegan alternative.
-
Egg Yolk – Enriches the dough; keep the egg white reserved for assembling the cookies.
-
Vanilla Extract – Adds depth to the flavor; you can enhance it with a natural vanilla bean.
-
For the Matcha Flavor
-
Matcha Powder – The star ingredient for that earthy flavor and vibrant color; always opt for high-quality matcha for the best results.
Step‑by‑Step Instructions for Matcha Checkerboard Cookies
Step 1: Prepare Dry Ingredients
In a large mixing bowl, whisk together 2 cups of all-purpose flour, 1 teaspoon of baking powder, and ½ teaspoon of salt until evenly combined. This dry mixture is essential for building the structure of your Matcha Checkerboard Cookies. Make sure there are no lumps and set it aside for the next step.
Step 2: Cream Butter and Sugars
In a separate bowl, beat 1 cup of room temperature unsalted butter using a handheld mixer or stand mixer until creamy and smooth, about 2-3 minutes. Gradually add 1 cup of powdered sugar and ½ cup of granulated sugar, mixing until fluffy. Then, incorporate 1 egg, 1 egg yolk, and 1 teaspoon of vanilla extract, blending until everything is fully combined.
Step 3: Combine Mixtures
Gently fold the dry ingredients into the creamed butter mixture, using a spatula to stir until a thick, cohesive dough forms, about 1-2 minutes. This dough will serve as the base for your cookies. Make sure not to overmix; a few flour streaks are perfectly fine as you work on achieving the ultimate Matcha Checkerboard Cookies.
Step 4: Divide Dough
Once the dough is mixed, divide it in half, placing one portion on a piece of plastic wrap. Wrap the first half securely and leave it plain, while you will be adding matcha to the other half, keeping it safe from contamination.
Step 5: Add Matcha
In the bowl with the second half of the dough, add 2 tablespoons of high-quality matcha powder. Mix well until the dough is an even green color, ensuring the matcha is fully distributed throughout. Once colored, wrap this portion in plastic wrap as well and refrigerate both halves.
Step 6: Chill
Chill the wrapped dough in the refrigerator for about 1 hour to firm it up, making it easier to handle. This step is crucial as it prevents the dough from spreading too much while baking, ensuring those stunning Matcha Checkerboard Cookies retain their shape.
Step 7: Roll and Cut
After chilling, dust your work surface lightly with flour. Roll out both the plain and matcha doughs to a thickness of about ¼ inch. Using a ruler for precision, cut both doughs into equal strips that are around ½ inch wide. This careful cutting technique will create the iconic checkerboard pattern.
Step 8: Make Glue
In a small bowl, whisk together the reserved egg white with 1 teaspoon of water until frothy. This egg wash will act as the “glue” for assembling the Matcha Checkerboard Cookies, helping the strips adhere to each other as you create the beautiful pattern.
Step 9: Assemble Cookies
On a baking sheet lined with parchment paper, alternate the strips of the two dough flavors, applying the egg wash between pieces as you go. This meticulous layering will result in the classic checkerboard design. Ensure that the strips are snugly fit together.
Step 10: Final Chill
Once assembled, return the formed block of dough to the refrigerator for an additional 2 hours. This cooling period sets the dough firmly, enhancing the visual appeal while ensuring your Matcha Checkerboard Cookies keep their shape during baking.
Step 11: Preheat Oven
When ready to bake, preheat your oven to 350°F (177°C). Prepare two baking sheets by lining them with parchment paper, making sure they are ready to accommodate the soon-to-be-baked cookies.
Step 12: Slice and Bake
Remove the chilled block from the refrigerator and slice it into ½ inch cookies using a sharp knife. Place the slices on the prepared baking sheets, ensuring they are spaced evenly apart. Bake in the preheated oven for 13-14 minutes or until the edges are lightly browned and the centers appear just set.
Step 13: Cool
Once baked, let the Matcha Checkerboard Cookies cool on the baking sheets for about 5 minutes. Afterward, carefully transfer them to a wire rack to cool completely before serving or gifting to friends and family. Enjoy the delightful treat!
What to Serve with Aesthetic Matcha Checkerboard Cookies
Indulge in the perfect pairing for your delightful cookies, transforming your holiday gathering into a festive feast.
- Green Tea: This calming beverage enhances the earthy matcha flavor, offering a refreshing balance with each bite of your cookies.
- Vanilla Ice Cream: The creamy sweetness of vanilla ice cream beautifully complements the subtle bitterness of matcha, creating a delightful contrast.
- Fruit Platter: Fresh seasonal fruits, such as strawberries and oranges, provide a burst of freshness that marries well with the cookies’ flavor.
A vibrant fruit platter can bring color to your spread, making it visually appealing and refreshing against the rich cookies. Consider including citrus fruits for a zesty twist alongside.
- Chocolate-Dipped Strawberries: The combination of sweet chocolate and juicy strawberries adds decadence and a festive touch to your cookie platter.
- Coffee: A warm cup of coffee melds wonderfully with the sweet and earthy notes of the cookies, offering a comforting pairing for a cozy treat.
- Nutty Biscotti: These crunchy, nut-filled delights provide a wonderful textural contrast when enjoyed alongside your Matcha Checkerboard Cookies.
- Salted Caramel Sauce: A rich drizzle of salted caramel enhances the sweetness, inviting a unique flavor profile that guests will find irresistible.
- Sparkling Water: A refreshing option that cleanses the palate, ensuring the matcha flavor shines through while keeping your guests hydrated.
Mixing your sweet cookies with these varied options will create a well-rounded dessert experience sure to impress!
How to Store and Freeze Matcha Checkerboard Cookies
Room Temperature: Store your Matcha Checkerboard Cookies in an airtight container at room temperature for up to 1 week to maintain their freshness and flavor.
Fridge: For longer storage, you can keep the cookies in the fridge for up to 2 weeks. Be sure to wrap them tightly to prevent drying out.
Freezer: To freeze, place the cookies in a single layer on a baking sheet until solid. Then transfer them to a freezer-safe bag or container for up to 3 months.
Reheating: When ready to enjoy, simply thaw at room temperature or warm them in the oven at 300°F (150°C) for about 5-7 minutes for that fresh-baked taste!
Expert Tips for Matcha Checkerboard Cookies
-
Room Temperature Butter: Make sure your butter is at room temperature to ensure it creams well with the sugars, leading to a fluffy texture in your cookies.
-
Use a Kitchen Scale: For consistent results, weigh your flour instead of measuring it with cups, as too much flour can make your Matcha Checkerboard Cookies dry.
-
Fresh Matcha Matters: Opt for high-quality, fresh matcha powder as the flavor greatly impacts the overall taste. Subpar matcha can result in bitterness.
-
Thorough Chilling: Don’t skip the chilling step—this is vital for preventing your cookies from spreading and losing that beautiful checkerboard shape.
-
Precise Cutting: Use a ruler for cutting the dough into strips to maintain uniform sizes, which will enhance the aesthetic appeal of your Matcha Checkerboard Cookies.
Make Ahead Options
These Matcha Checkerboard Cookies are perfect for meal prep enthusiasts looking to save time during the busy holiday season! You can prepare the dough up to 24 hours in advance by following the first five steps and refrigerating both dough halves separately. For even longer storage, wrap the dough securely in plastic wrap and freeze for up to 3 months; simply thaw it in the refrigerator overnight before rolling and baking. To maintain their delightful texture, ensure the dough is chilled properly before slicing and baking. When you’re ready to serve, just slice, bake, and enjoy these stunning cookies that are just as delicious as if made fresh!
Matcha Checkerboard Cookies Variations
Feel free to let your creativity shine by customizing these delightful cookies with various twists and swaps!
- Gluten-Free: Substitute all-purpose flour with a gluten-free flour blend to accommodate gluten sensitivities without sacrificing flavor.
- Cocoa Twist: Replace matcha powder with cocoa powder for a delicious chocolatey version of these checkerboard cookies; perfect for chocolate lovers!
- Nutty Texture: Fold in chopped nuts like walnuts or pecans into one of the dough flavors for a delightful crunch in every bite.
- Chocolate Chips: Add semi-sweet chocolate chips to the plain dough for an enticing mix of textures and flavors; who doesn’t love a chocolatey surprise?
- Minty Fresh: Experiment with peppermint extract instead of vanilla in the dough for a refreshing twist; it’s a great holiday flavor!
- Spectacular Sprinkles: Decorate the tops of your cookies with colorful sprinkles after baking for a festive touch that adds extra charm.
- Lavender Essence: Incorporate dried culinary lavender into the dough for an aromatic floral note; a delightful surprise in each bite!
- Matcha Variations: Swap in flavored matcha powders like vanilla or chocolate matcha to expand the flavor palette of your cookies.
If you’re looking for even more cookie inspiration, don’t forget to explore my lovely Chocolate Chip Cookies or try my decadent Lava Brownie Cookies for a sweet treat!
Matcha Checkerboard Cookies Recipe FAQs
How do I choose the right matcha powder?
Absolutely! When selecting matcha powder, look for vibrant green color and a fine texture. High-quality matcha will have a sweet grassiness without bitterness. I recommend brands labeled as ceremonial grade for the best flavor and visual appeal in your Matcha Checkerboard Cookies.
What’s the best way to store Matcha Checkerboard Cookies?
To maintain freshness, store your cookies in an airtight container at room temperature for up to 1 week. For longer shelf life, you can refrigerate them, where they’ll last up to 2 weeks. Remember to wrap them tightly to avoid drying out—nobody likes a crumbly cookie!
Can I freeze Matcha Checkerboard Cookies?
Certainly! To freeze, first place the cookies in a single layer on a baking sheet until they are solid. Then, transfer them into a freezer-safe bag or container, where they can be kept for up to 3 months. When you’re ready to indulge, just thaw at room temperature or warm them in the oven at 300°F (150°C) for about 5-7 minutes for that warm, freshly baked experience!
What should I do if the dough is too sticky?
Very! If your dough seems too sticky to handle, don’t fret! You can sprinkle some additional flour onto your work surface while rolling out. Alternatively, you can chill the dough for another 30 minutes to firm it up further. This allows for easier handling when cutting and assembling the cookies.
Are Matcha Checkerboard Cookies safe for people with allergies?
You bet! However, it’s important to note that these cookies contain flour, butter, and eggs, so they are not suitable for vegans or those with gluten allergies. For a gluten-free option, substitute the all-purpose flour with a gluten-free blend, and for a vegan version, you can replace the egg with a flax egg (1 tbsp ground flaxseed mixed with 2.5 tbsp water).
How can I tell if my cookies are done baking?
To ensure the perfect bake on your Matcha Checkerboard Cookies, watch for those edges to turn a light golden brown while the centers still look slightly soft. This is key, as they will continue to firm up as they cool on the baking sheet. Enjoy your delightful treats!
Matcha Checkerboard Cookies That Will Wow Your Guests
Ingredients
Equipment
Method
- In a large mixing bowl, whisk together 2 cups of all-purpose flour, 1 teaspoon of baking powder, and ½ teaspoon of salt until evenly combined. Set aside.
- In a separate bowl, beat 1 cup of unsalted butter until creamy, then add 1 cup of powdered sugar and ½ cup of granulated sugar, mixing until fluffy. Incorporate 1 egg, 1 egg yolk, and 1 teaspoon of vanilla extract.
- Gently fold the dry ingredients into the creamed butter mixture until a thick dough forms, about 1-2 minutes. Don't overmix.
- Divide the dough in half, wrapping one half in plastic wrap and leaving it plain. Add matcha to the other half and mix well.
- Wrap both halves in plastic wrap and refrigerate for 1 hour.
- Dust your work surface with flour. Roll out both doughs to ¼ inch thick and cut into equal strips around ½ inch wide.
- Whisk together the reserved egg white with 1 teaspoon of water until frothy for the egg wash.
- On a baking sheet lined with parchment paper, alternate strips of the two dough flavors, applying egg wash between pieces.
- Refrigerate the formed block of dough for an additional 2 hours.
- Preheat your oven to 350°F (177°C) and line two baking sheets with parchment paper.
- Slice the chilled block into ½ inch cookies and place them on the prepared baking sheets. Bake for 13-14 minutes until lightly browned.
- Let the cookies cool on the baking sheets for about 5 minutes before transferring to a wire rack to cool completely.