

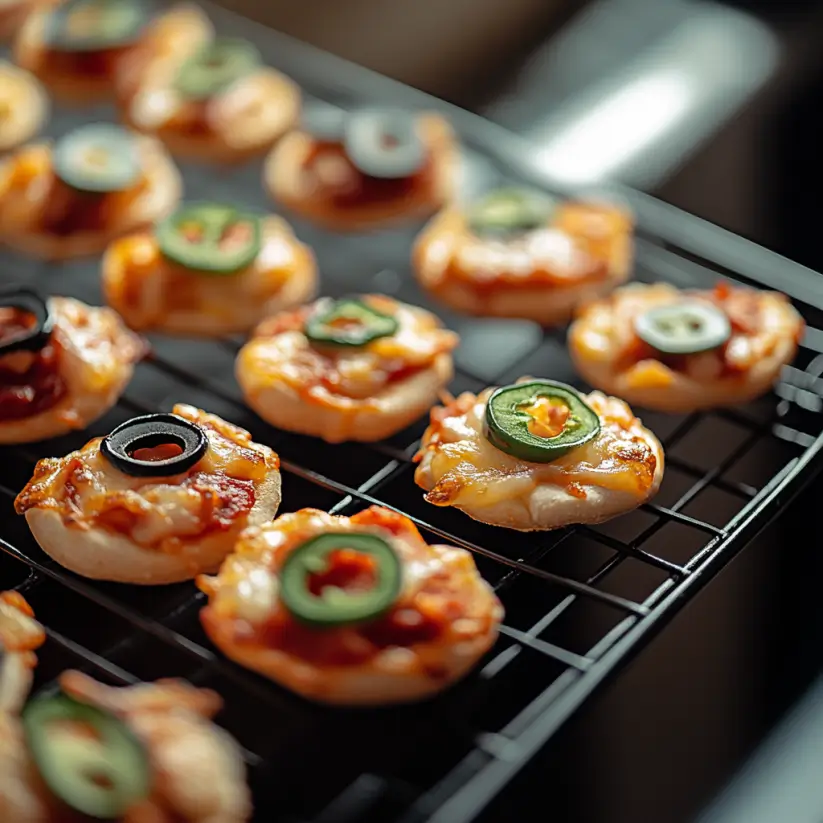
Introduction to Mini Lunchbox Pizzas
There’s something magical about the aroma of freshly baked pizza wafting through the kitchen. Mini Lunchbox Pizzas are not just a meal; they’re a delightful experience that brings back memories of carefree childhood days. Whether you’re packing lunches for your kids or looking for a quick snack for yourself, these little pizzas are a perfect solution for busy days. They’re easy to make, customizable, and oh-so-fun to eat! Plus, who can resist a mini pizza? Let’s dive into this simple recipe that’s sure to impress everyone at the table.
Why You’ll Love This Mini Lunchbox Pizzas
These Mini Lunchbox Pizzas are a game-changer for anyone juggling a busy schedule. They come together in just 30 minutes, making them a quick and satisfying option for lunch or snacks. The best part? You can customize them to suit your taste buds or your kids’ preferences. With endless topping possibilities, every batch can be a new adventure. Plus, they’re a hit with both kids and adults alike!
Ingredients for Mini Lunchbox Pizzas
Gathering the right ingredients is the first step to creating these delightful Mini Lunchbox Pizzas. Here’s what you’ll need:
- All-purpose flour: The base of your dough, providing structure and chewiness.
- Baking powder: This leavening agent helps the dough rise, giving it a light texture.
- Salt: A pinch enhances the flavors and balances the sweetness of the dough.
- Shredded mozzarella cheese: Melts beautifully, adding that classic cheesy goodness.
- Milk: Moistens the dough, making it tender and easy to work with.
- Olive oil: Adds richness and helps create a golden crust.
- Pizza sauce: The flavorful foundation for your toppings; feel free to use store-bought or homemade.
- Additional mozzarella cheese: For topping, because more cheese is always a good idea!
- Toppings of your choice: Get creative! Think pepperoni, bell peppers, olives, or even pineapple.
For those with dietary restrictions, you can substitute all-purpose flour with a gluten-free blend. And if you’re feeling adventurous, try using different sauces like pesto or barbecue for a unique twist. Exact measurements for these ingredients can be found at the bottom of the article, ready for printing!
How to Make Mini Lunchbox Pizzas
Creating these Mini Lunchbox Pizzas is a breeze! Follow these simple steps, and you’ll have a delicious batch ready in no time. Let’s get started!
Step 1: Preheat the Oven
First things first, preheat your oven to 400°F (200°C). This ensures your pizzas bake evenly and come out perfectly golden. While the oven heats up, line a baking sheet with parchment paper. This will prevent sticking and make cleanup a snap!
Step 2: Prepare the Dough
In a mixing bowl, combine the all-purpose flour, baking powder, and salt. Give it a good stir to mix everything together. Then, stir in the shredded mozzarella cheese. This cheesy addition will make your dough extra tasty!
Step 3: Mix Wet Ingredients
Now, it’s time to add the wet ingredients. Pour in the milk and olive oil, mixing until a dough forms. If you find the dough is too sticky, don’t worry! Just sprinkle in a little more flour until it reaches the right consistency.
Step 4: Knead and Roll
Turn the dough out onto a floured surface. Knead it gently for about 1 minute. This helps develop the gluten, giving your pizzas a nice texture. After kneading, roll the dough out to about 1/4-inch thickness. Aim for a nice, even layer!
Step 5: Cut Dough Circles
Using a round cookie cutter or a glass, cut out circles of dough. Place them on the prepared baking sheet. Don’t worry if they’re not perfect; they’ll still taste amazing!
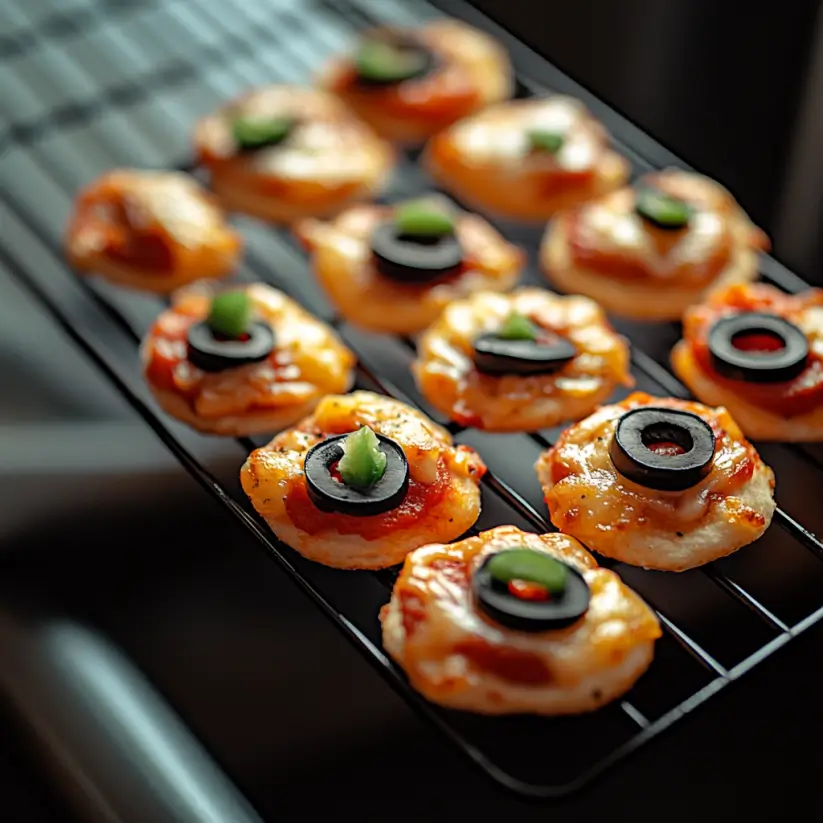
Step 6: Add Sauce and Toppings
Now comes the fun part! Spoon a small amount of pizza sauce onto each dough circle, spreading it evenly. Top with additional mozzarella cheese and your choice of toppings. Get creative! This is where you can let your imagination run wild.
Step 7: Bake the Pizzas
Pop the baking sheet into the preheated oven. Bake the pizzas for 12-15 minutes, or until the edges are golden brown and the cheese is bubbly. The smell will be irresistible!
Step 8: Cool and Serve
Once they’re out of the oven, allow the mini pizzas to cool for a few minutes. This will help the cheese set a bit. Then, serve them up and enjoy the smiles on everyone’s faces!
Tips for Success
- Measure your ingredients accurately for the best results.
- Don’t skip preheating the oven; it’s crucial for even baking.
- Experiment with different cheeses for unique flavors.
- Let the dough rest for a few minutes if it feels too elastic.
- Use a variety of toppings to keep things exciting for the kids.
Equipment Needed
- Baking sheet: A standard one works great, but a pizza stone can enhance crispiness.
- Parchment paper: Use it for easy cleanup; aluminum foil is a good alternative.
- Mixing bowl: Any size will do, but a large bowl gives you more room to mix.
- Rolling pin: If you don’t have one, a wine bottle can work in a pinch!
- Cookie cutter or glass: For cutting dough circles; any round object will suffice.
Variations
- Gluten-Free: Substitute all-purpose flour with a gluten-free flour blend for a delicious gluten-free option.
- Whole Wheat: Use whole wheat flour instead of all-purpose for a healthier twist with added fiber.
- Veggie Delight: Load up on veggies like spinach, mushrooms, or zucchini for a nutritious boost.
- Spicy Kick: Add jalapeños or crushed red pepper flakes for a spicy version that packs a punch.
- Cheesy Variations: Experiment with different cheeses like cheddar, gouda, or feta for unique flavors.
- Sweet Treat: For a dessert twist, use Nutella or fruit preserves instead of pizza sauce, topped with sliced bananas or strawberries.
Serving Suggestions
- Fresh Salad: Pair your mini pizzas with a crisp garden salad for a balanced meal.
- Fruit Skewers: Add colorful fruit skewers for a fun and healthy side.
- Dipping Sauces: Serve with ranch or garlic dipping sauce for extra flavor.
- Fun Plates: Use colorful plates to make lunchtime more exciting for kids.
FAQs about Mini Lunchbox Pizzas
Can I make Mini Lunchbox Pizzas ahead of time?
Absolutely! You can prepare the dough and cut out the circles in advance. Just store them in the fridge for a day or two. When you’re ready, add the sauce and toppings, then bake!
What toppings work best for Mini Lunchbox Pizzas?
The beauty of these mini pizzas is their versatility! Classic options like pepperoni and bell peppers are always a hit. But feel free to get creative with olives, mushrooms, or even pineapple for a sweet twist!
Can I freeze Mini Lunchbox Pizzas?
<pYes, you can! After baking, let them cool completely, then freeze them in an airtight container. When you’re ready to eat, just reheat them in the oven for a quick snack or lunch.
Are Mini Lunchbox Pizzas healthy?
They can be! By using whole wheat flour and loading up on veggies, you can make them a nutritious option. Plus, you control the toppings, so you can keep it healthy or indulge a little!
What can I serve with Mini Lunchbox Pizzas?
These mini pizzas pair wonderfully with a fresh salad or some fruit skewers. You can also add dipping sauces like ranch or marinara for extra flavor. It’s all about making lunchtime fun!
Final Thoughts
Making Mini Lunchbox Pizzas is more than just cooking; it’s about creating joyful moments. The laughter around the kitchen as you roll out the dough, the excitement of choosing toppings, and the delightful aroma filling your home all contribute to a memorable experience. These little pizzas are perfect for busy days, offering a quick and satisfying meal that everyone loves. Whether you’re packing them for your kids or enjoying them yourself, each bite is a reminder of the simple pleasures in life. So, roll up your sleeves and let the pizza-making fun begin!
Mini Lunchbox Pizzas: Easy Recipe for Fun Lunches!
Ingredients
Method
- Preheat your oven to 400°F (200°C) and line a baking sheet with parchment paper.
- In a mixing bowl, combine the flour, baking powder, and salt. Stir in the shredded mozzarella cheese.
- Add the milk and olive oil to the dry ingredients and mix until a dough forms. If the dough is too sticky, add a little more flour.
- Turn the dough out onto a floured surface and knead gently for about 1 minute. Roll the dough out to about 1/4-inch thickness.
- Use a round cookie cutter or a glass to cut out circles of dough and place them on the prepared baking sheet.
- Spoon a small amount of pizza sauce onto each dough circle, spreading it evenly. Top with additional mozzarella cheese and your choice of toppings.
- Bake in the preheated oven for 12-15 minutes, or until the edges are golden brown and the cheese is bubbly.
- Allow the mini pizzas to cool for a few minutes before serving.
Nutrition
Notes
- For a gluten-free option, substitute the all-purpose flour with a gluten-free flour blend.
- Experiment with different sauces like pesto or barbecue sauce for a unique flavor twist.