

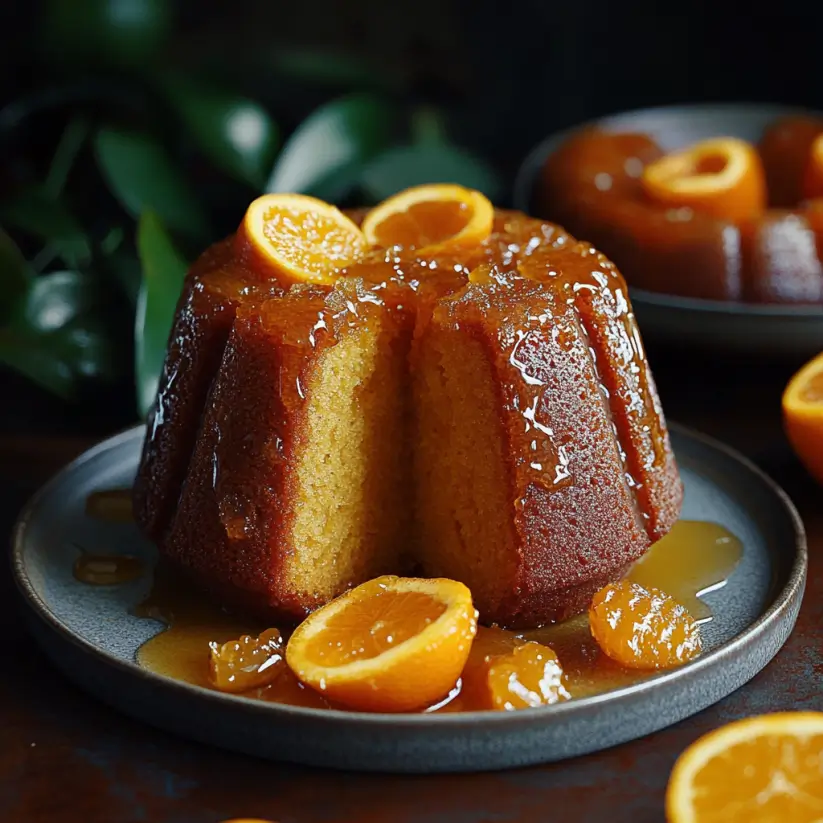
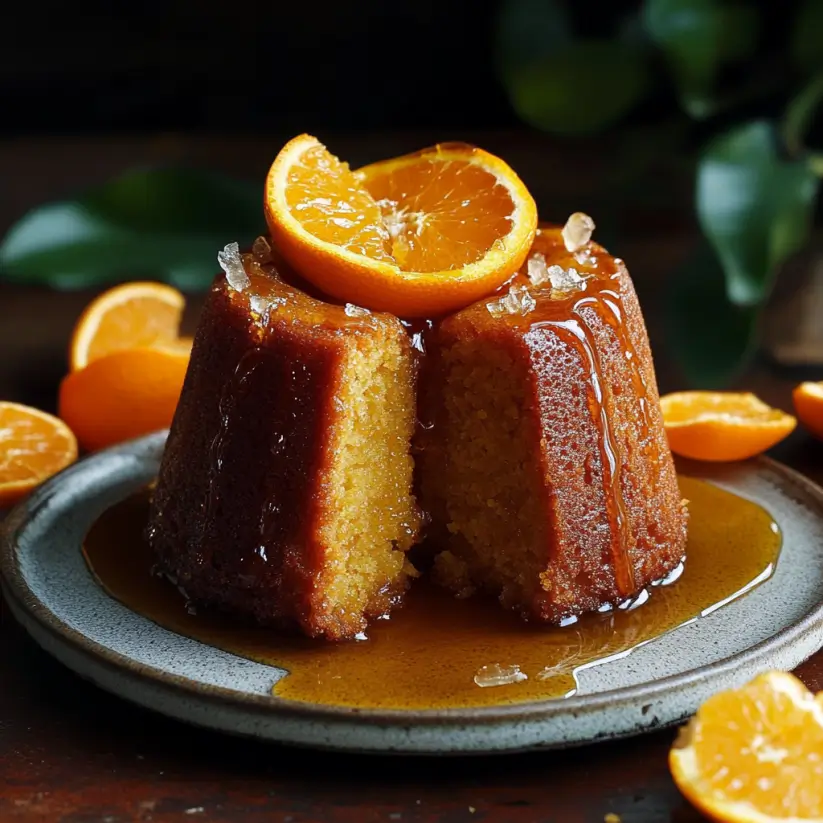
Introduction to Orange Ginger Honey Cakes
There’s something magical about the aroma of freshly baked goods wafting through the house. It takes me back to my childhood, where my mom would whip up delightful treats on lazy Sunday afternoons. One of my favorites was her Orange Ginger Honey Cakes. These little gems are not just easy to make; they’re a quick solution for a busy day or a sweet way to impress your loved ones. With a perfect balance of zesty orange and warm ginger, this recipe is sure to become a staple in your kitchen. Let’s dive into this delicious adventure!
Why You’ll Love This Orange Ginger Honey Cakes
These Orange Ginger Honey Cakes are a delightful blend of flavors that come together effortlessly. They’re quick to whip up, making them perfect for those busy weeknights or last-minute gatherings. The combination of sweet honey and zesty orange creates a taste that’s both refreshing and comforting. Plus, they’re versatile enough to serve as a simple dessert or a charming addition to your brunch spread. You’ll find yourself reaching for this recipe time and again!
Ingredients for Orange Ginger Honey Cakes
Gathering the right ingredients is the first step to creating these delightful Orange Ginger Honey Cakes. Here’s what you’ll need:
- All-purpose flour: The backbone of your cake, providing structure and texture.
- Baking powder: This leavening agent helps the cake rise, giving it that light and fluffy feel.
- Baking soda: Another leavening agent that works in tandem with the baking powder for a perfect rise.
- Salt: Just a pinch enhances the flavors and balances the sweetness.
- Ground ginger: Adds a warm, spicy kick that pairs beautifully with the orange.
- Ground cinnamon: This spice brings a cozy warmth, making each bite feel like a hug.
- Unsalted butter: For richness and moisture, ensuring your cake is tender and flavorful.
- Granulated sugar: Sweetens the cake and helps create that lovely golden crust.
- Honey: A natural sweetener that adds depth and a hint of floral notes.
- Large eggs: They bind the ingredients together and contribute to the cake’s structure.
- Vanilla extract: A classic flavor enhancer that rounds out the sweetness.
- Fresh orange juice: Provides the zesty flavor that makes this cake shine.
- Orange zest: The aromatic outer peel of the orange, intensifying the citrus flavor.
For those looking to elevate the flavor, consider adding chopped crystallized ginger for an extra zing. You can find all the exact measurements at the bottom of the article, ready for printing. Happy baking!
How to Make Orange Ginger Honey Cakes
Now that you have your ingredients ready, let’s get to the fun part—making these delightful Orange Ginger Honey Cakes! Follow these simple steps, and you’ll have a delicious dessert in no time.
Step 1: Preheat the Oven
Start by preheating your oven to 350°F (175°C). This step is crucial because it ensures your cake bakes evenly. While the oven warms up, prepare your 9-inch round cake pan by greasing and flouring it or lining it with parchment paper. This will help your cake release easily once it’s baked.
Step 2: Mix Dry Ingredients
In a medium bowl, whisk together the all-purpose flour, baking powder, baking soda, salt, ground ginger, and ground cinnamon. This step is essential because it evenly distributes the leavening agents and spices throughout the flour. A well-mixed dry mixture leads to a uniform rise and flavor in your cake.
Step 3: Cream Butter and Sugar
In a large bowl, cream the softened unsalted butter and granulated sugar together until the mixture is light and fluffy, about 3-4 minutes. This process incorporates air into the batter, which is key for a light texture. You want it to look pale and creamy—this is where the magic begins!
Step 4: Combine Wet Ingredients
Add the honey, large eggs, and vanilla extract to the butter mixture. Mix until everything is well combined. It’s important to ensure that the eggs are fully incorporated, as they help bind the ingredients together and contribute to the cake’s structure.
Step 5: Combine Wet and Dry Ingredients
Now, it’s time to bring it all together! Gradually add the dry ingredients to the wet mixture, alternating with the fresh orange juice. Start with a third of the dry mix, then add half the orange juice, and repeat until everything is combined. This technique helps achieve the right batter consistency, preventing lumps and ensuring a smooth texture.
Step 6: Add Orange Zest
Gently fold in the orange zest. This step is where the flavor really shines! The zest adds a burst of citrus aroma and enhances the overall taste of your cake. It’s like adding a secret ingredient that elevates the entire dish.
Step 7: Bake the Cake
Pour the batter into your prepared cake pan and smooth the top with a spatula. Bake for 25-30 minutes, or until a toothpick inserted into the center comes out clean. Keep an eye on it towards the end of the baking time. Once done, allow the cake to cool in the pan for about 10 minutes before transferring it to a wire rack to cool completely. This cooling step is vital for the cake to set properly.
Tips for Success
- Use room temperature ingredients for better mixing and texture.
- Don’t overmix the batter; stop as soon as you see no dry flour.
- Check for doneness a few minutes early to avoid overbaking.
- Let the cake cool completely before frosting or serving.
- Store leftovers in an airtight container to keep them fresh.
Equipment Needed
- 9-inch round cake pan (or an 8-inch square pan for a different shape)
- Mixing bowls (a large and a medium one)
- Whisk (or a fork if you’re in a pinch)
- Spatula (a rubber spatula works best for folding)
- Measuring cups and spoons (or a kitchen scale for precision)
Variations
- For a spicier kick, add 1/4 cup of chopped crystallized ginger to the batter.
- Substitute half of the all-purpose flour with whole wheat flour for a nuttier flavor and added fiber.
- Try using maple syrup instead of honey for a different sweet profile.
- For a gluten-free option, replace the all-purpose flour with a gluten-free flour blend.
- Add a handful of chopped nuts, like walnuts or pecans, for extra crunch and flavor.
Serving Suggestions
- Pair with a dollop of whipped cream for a creamy contrast.
- Serve alongside a scoop of vanilla ice cream for an indulgent treat.
- Drizzle with extra honey for added sweetness and shine.
- Accompany with a cup of herbal tea or coffee for a cozy experience.
FAQs about Orange Ginger Honey Cakes
As you embark on your baking journey with these delightful Orange Ginger Honey Cakes, you might have a few questions. Here are some common queries that can help you along the way:
Can I use other types of flour for this recipe?
Absolutely! You can substitute half of the all-purpose flour with whole wheat flour for a nuttier flavor. For a gluten-free option, try using a gluten-free flour blend.
How can I store leftover Orange Ginger Honey Cakes?
Store any leftovers in an airtight container at room temperature for up to three days. If you want to keep them longer, refrigerate them for up to a week.
Can I freeze these cakes?
Yes! These cakes freeze beautifully. Wrap them tightly in plastic wrap and then in aluminum foil. They can be frozen for up to three months. Just thaw them in the fridge before serving.
What can I serve with Orange Ginger Honey Cakes?
These cakes pair wonderfully with a dollop of whipped cream or a scoop of vanilla ice cream. A drizzle of honey or a side of fresh fruit can also enhance the experience.
Can I make this recipe ahead of time?
Definitely! You can prepare the batter a day in advance and store it in the fridge. Just remember to bring it to room temperature before baking for the best results.
Final Thoughts
Creating these Orange Ginger Honey Cakes is more than just baking; it’s about crafting memories and sharing joy. The delightful aroma that fills your kitchen, the anticipation as it bakes, and the smiles around the table make it all worthwhile. Each bite offers a perfect blend of sweetness and spice, transporting you to a cozy café or a sunlit afternoon. Whether you’re celebrating a special occasion or simply treating yourself, this recipe is a reminder that good food brings people together. So, roll up your sleeves and enjoy the delicious journey of baking these delightful cakes!
Orange Ginger Honey Cakes: Discover This Easy Recipe!
Ingredients
Method
- Preheat the oven to 350°F (175°C). Grease and flour a 9-inch round cake pan or line it with parchment paper.
- In a medium bowl, whisk together the flour, baking powder, baking soda, salt, ginger, and cinnamon. Set aside.
- In a large bowl, cream the softened butter and sugar together until light and fluffy, about 3-4 minutes.
- Add the honey, eggs, and vanilla extract to the butter mixture, mixing until well combined.
- Gradually add the dry ingredients to the wet ingredients, alternating with the orange juice. Mix until just combined.
- Fold in the orange zest gently.
- Pour the batter into the prepared cake pan and smooth the top.
- Bake for 25-30 minutes or until a toothpick inserted into the center comes out clean.
- Allow the cake to cool in the pan for 10 minutes before transferring it to a wire rack to cool completely.
Nutrition
Notes
- For a richer flavor, consider adding 1/4 cup of chopped crystallized ginger to the batter.
- Serve with a dollop of whipped cream or a scoop of vanilla ice cream for an indulgent dessert.