

As I set out to create a new twist on a classic dish, I stumbled upon the delightful idea of Pumpkin Patch Deviled Eggs. This simple yet stunning recipe transforms a familiar appetizer into a festive centerpiece perfect for autumn gatherings. Not only are these deviled eggs visually charming with their playful pumpkin design, but they also pack a creamy, tangy punch that promises to be a crowd-pleaser. Open the door to a kitchen filled with warmth and nostalgia as you prepare this easy recipe that’s ideal for Halloween parties or Thanksgiving feasts. Ready to impress your friends and family while embracing the flavors of fall? Let’s dive into the world of Pumpkin Patch Deviled Eggs and make your next gathering unforgettable!
Why Are These Deviled Eggs Special?
Festive Presentation: These Pumpkin Patch Deviled Eggs are not just tasty—they’re a visual delight that brings cheer to any autumn gathering.
Crowd-Pleasing Flavor: With a perfect blend of creamy mayonnaise and a hint of tangy mustard, each bite is rich and satisfying.
Easy to Make: This simple recipe requires minimal ingredients and straightforward steps, ideal for both novice cooks and seasoned chefs.
Versatile Options: Feel free to switch up ingredients; try using Greek yogurt instead of mayonnaise for a lighter twist, or add a spicy kick with your favorite hot sauce.
Perfect for Fall Celebrations: Whether it’s a spooky Halloween bash or a cozy Thanksgiving dinner, these deviled eggs elevate the appetizer table and leave guests raving.
Make Ahead Convenience: Prepare them a day in advance for stress-free hosting. Just chill before serving to enhance flavors! Get more tips on festive fall flavors with our Roasted Pumpkin Yogurt for a complete autumn spread.
Pumpkin Patch Deviled Eggs Ingredients
• Add a festive touch to your gatherings with these Pumpkin Patch Deviled Eggs that are easy to whip up!
For the Filling
- Eggs – Six large eggs are essential for creating the base of these creamy deviled eggs; use slightly older eggs (7-10 days past packing) for easier peeling.
- Mayonnaise – 1/4 cup adds richness and creaminess to the yolk filling; Greek yogurt is a great substitute if you’re looking for a lighter option.
- Yellow Mustard – 1 teaspoon provides the tangy flavor that defines classic deviled eggs.
- Salt – 1/4 teaspoon enhances the overall flavor of the filling.
- Black Pepper – 1/8 teaspoon adds a mild spice; tweak according to your taste preferences.
- Paprika – 1/2 teaspoon, plus extra for dusting, brings warmth and color; consider using smoked paprika for additional depth.
- Orange Food Coloring – A tiny dash (optional) gives the filling a vibrant hue that mimics a pumpkin.
For the Garnish
- Fresh Chives – 2 tablespoons finely chopped form the “stems” for your pumpkin-shaped eggs; dill or parsley can be substituted if desired.
Now you’re ready to create a show-stopping autumn appetizer that will leave everyone asking for seconds!
Step‑by‑Step Instructions for Pumpkin Patch Deviled Eggs
Step 1: Boil Eggs
Begin by placing six large eggs in a medium saucepan, ensuring they are in a single layer. Cover the eggs with cold water, about an inch above the eggs. Bring the water to a rapid boil over medium-high heat; once boiling, remove the saucepan from the heat, cover it, and let the eggs sit for 10 minutes to cook gently.
Step 2: Ice Bath
While your eggs are cooking, prepare an ice bath by filling a large bowl with cold water and ice. This step is crucial for stopping the cooking process and ensuring the eggs are cool enough to handle, setting you up for easy peeling later on.
Step 3: Cool Eggs
After 10 minutes, carefully transfer the hot eggs into the ice bath using a slotted spoon. Allow them to chill for at least 5 minutes, or until completely cooled. This will make peeling easier and help maintain the creamy texture of the yolks for your Pumpkin Patch Deviled Eggs.
Step 4: Peel Eggs
Once the eggs have cooled, gently tap each egg on the countertop to crack the shell. Under running water, roll each egg between your hands to help loosen the shell and carefully peel them. Rinsing them will also remove any stubborn bits of shell, ensuring your eggs are pristine for the presentation.
Step 5: Prepare Filling
Slice each egg in half lengthwise, gently removing the yolks and placing them in a mixing bowl. To the yolks, add 1/4 cup mayonnaise, 1 teaspoon yellow mustard, 1/4 teaspoon salt, 1/8 teaspoon black pepper, and 1/2 teaspoon paprika. If desired, add a tiny dash of orange food coloring. Mix everything until smooth and creamy, creating a delightful filling for your Pumpkin Patch Deviled Eggs.
Step 6: Pipe Filling
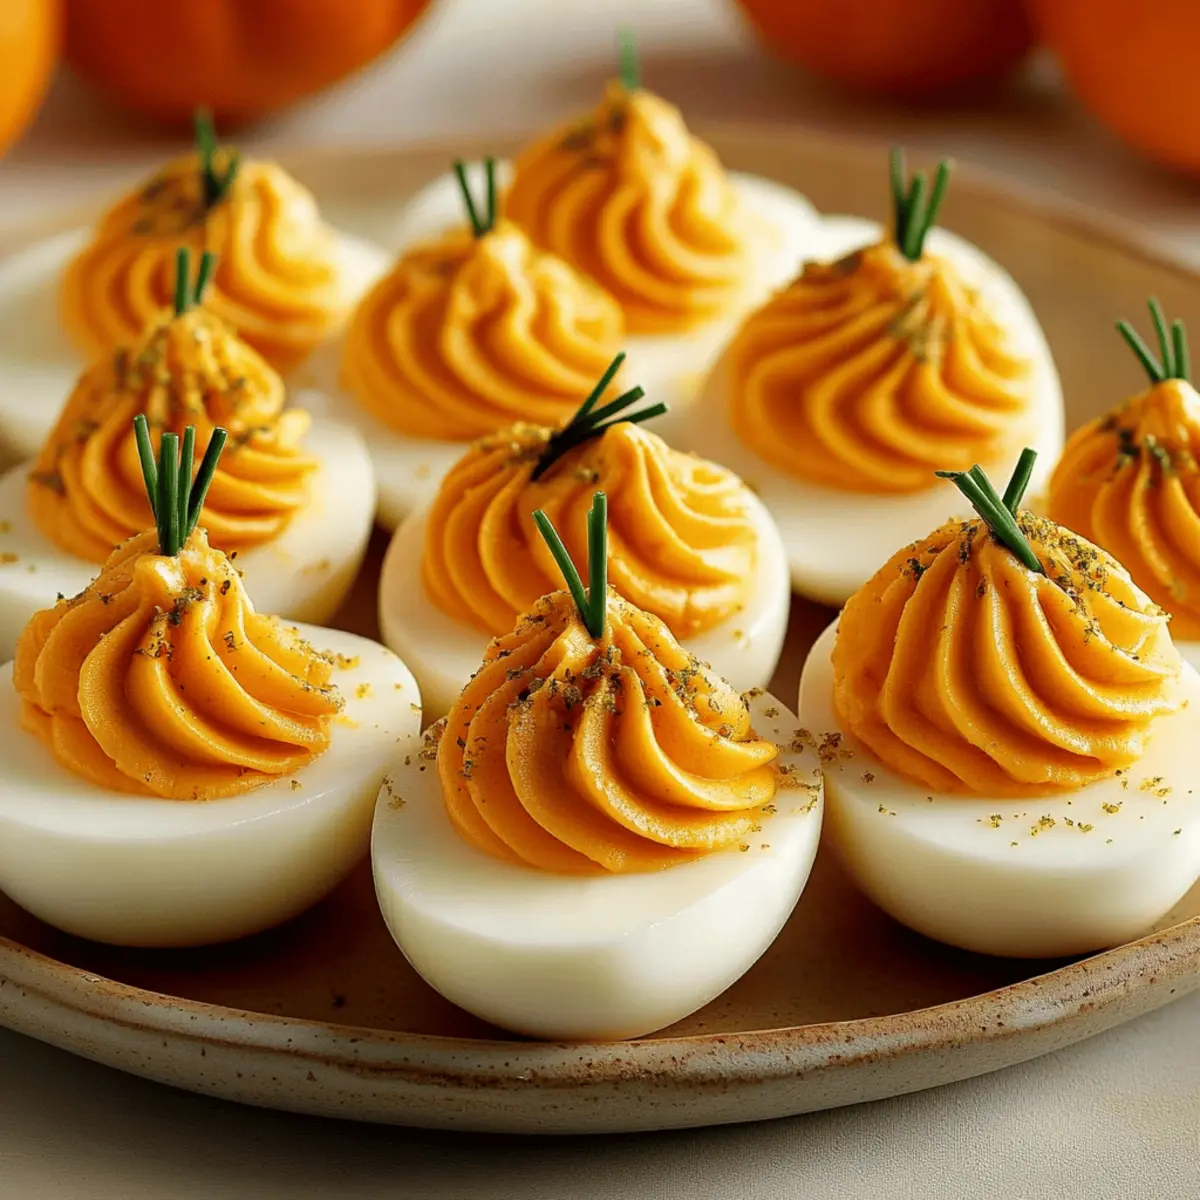
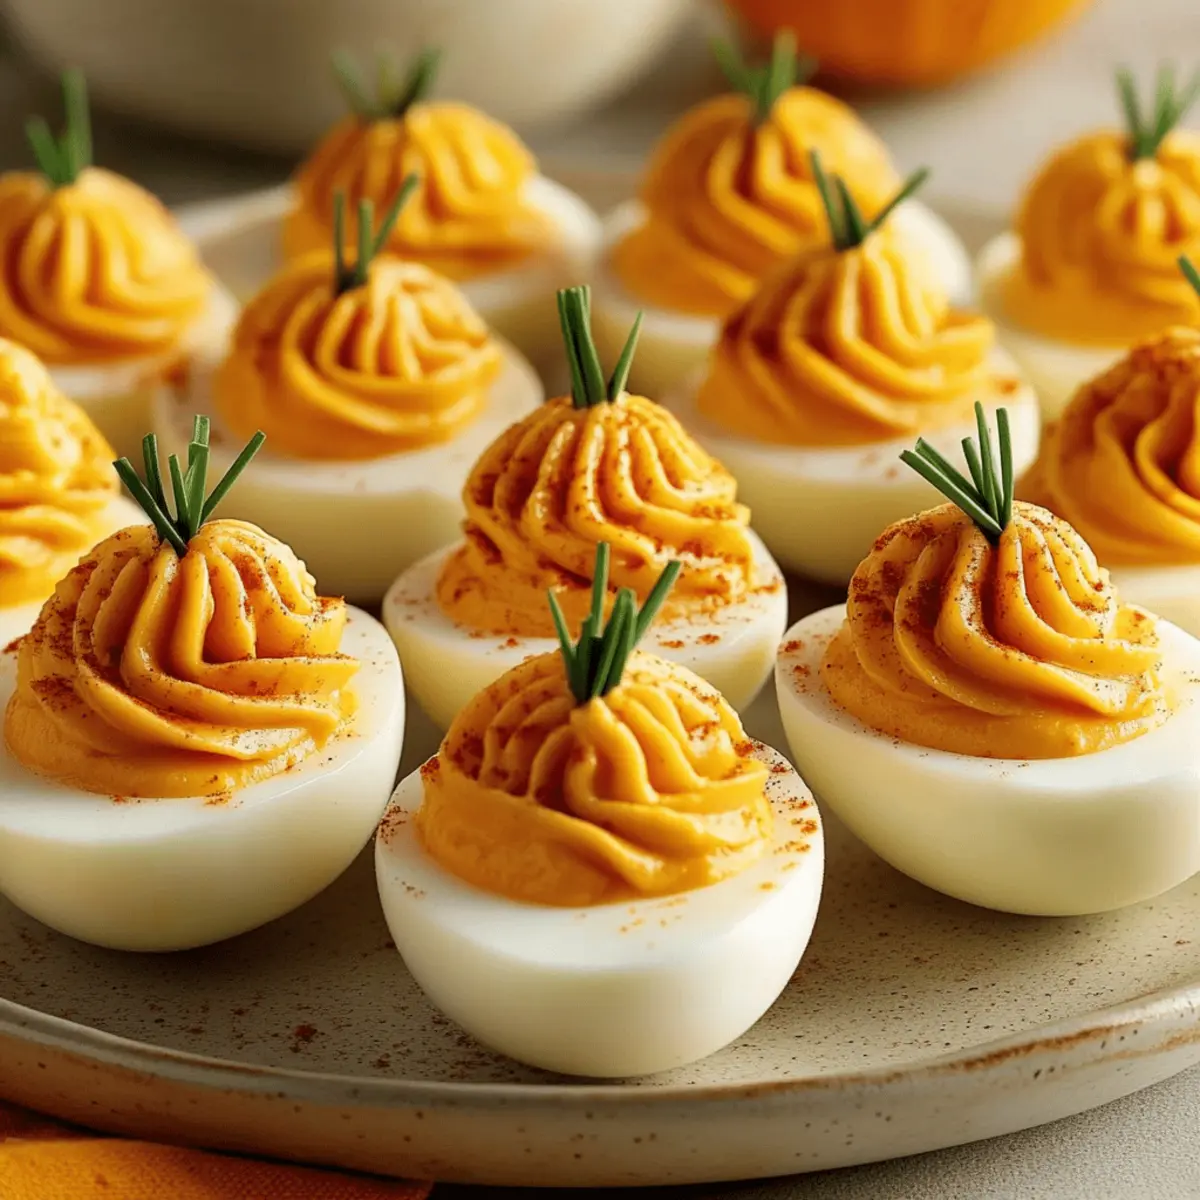
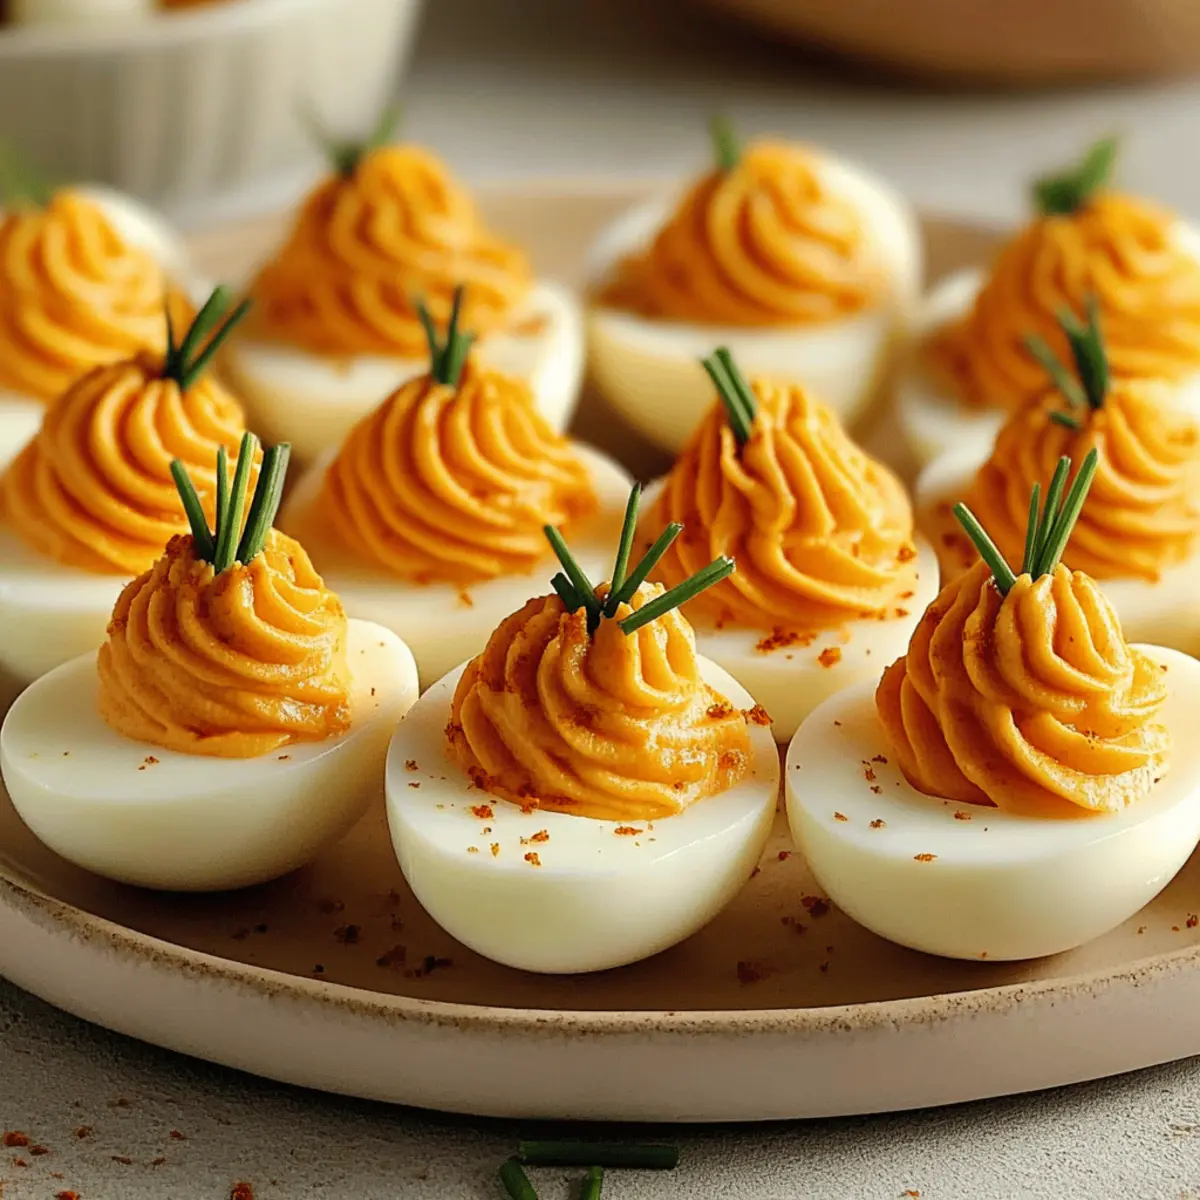
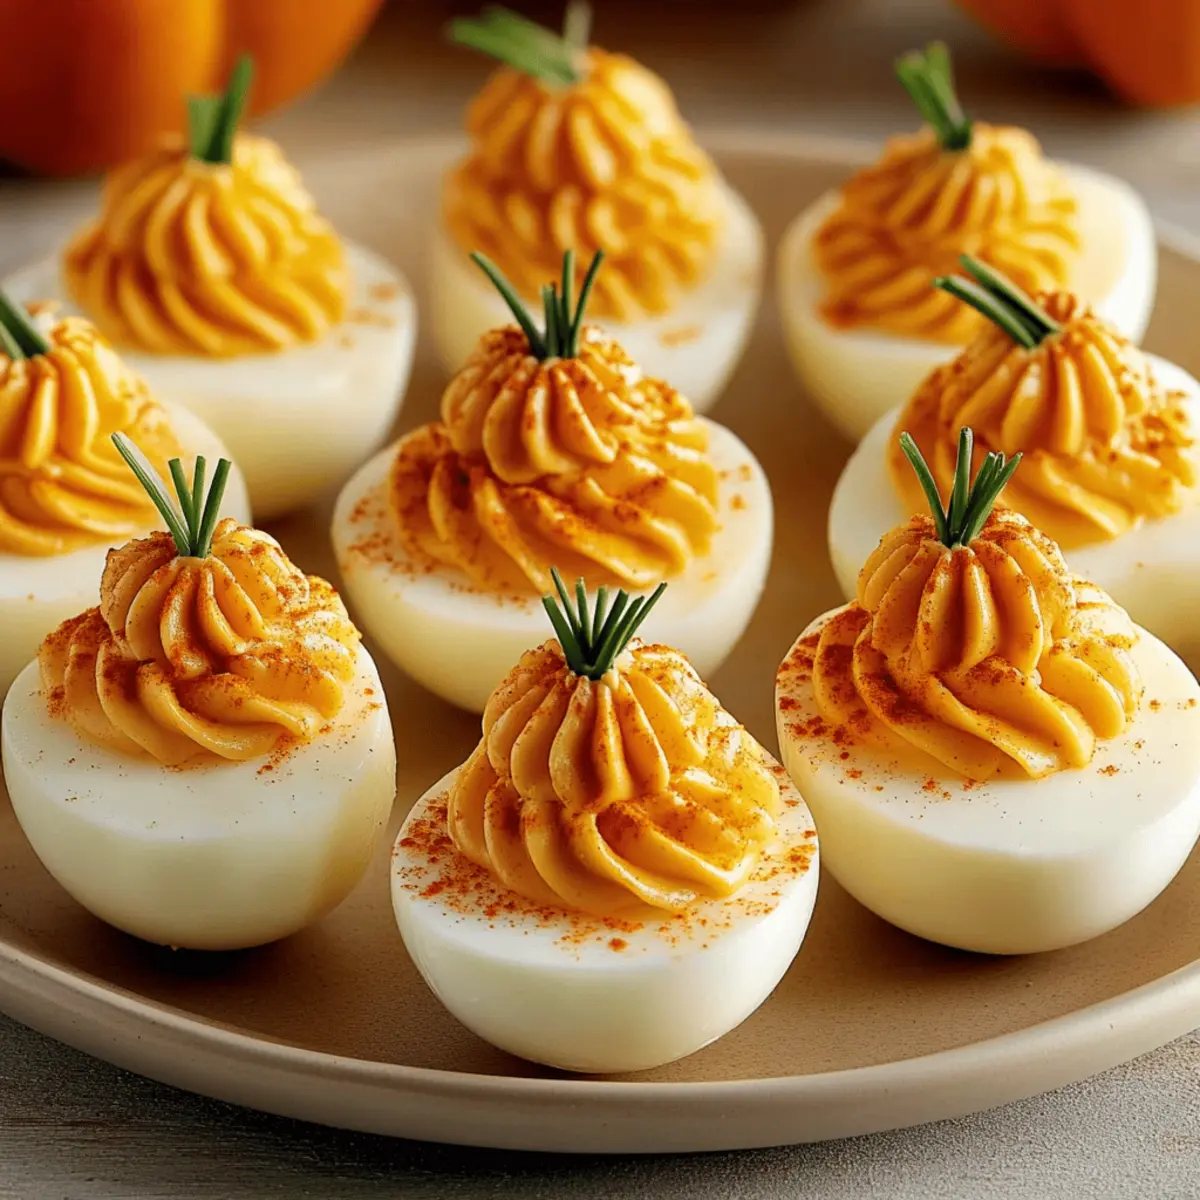
Transfer the yolk mixture into a piping bag fitted with a star tip. If you don’t have a piping bag, use a zip-top bag with a cut corner as an alternative. Carefully pipe the creamy filling into each egg white half, giving it a nice swirl to mimic the look of a pumpkin.
Step 7: Create Pumpkin Shape
With a knife or toothpick, gently create ridges on the piped filling to enhance the pumpkin appearance. This adds texture and visual appeal to your Pumpkin Patch Deviled Eggs, making them a standout dish for your fall celebrations.
Step 8: Add Stems
Finely chop 2 tablespoons of fresh chives and take small bundles to insert into the tops of each piped filling, resembling stems. This step not only enhances the aesthetic but also adds a fresh, mild flavor that complements the creamy filling beautifully.
Step 9: Garnish
Finally, dust the tops of the Pumpkin Patch Deviled Eggs with a sprinkle of paprika for color and a touch of warmth. Arrange the decorated eggs on a serving platter and sprinkle additional chopped chives around them for a final touch of freshness.
Step 10: Chill Before Serving
Refrigerate your beautifully crafted Pumpkin Patch Deviled Eggs for at least 30 minutes before serving. This chilling time helps the flavors meld together while allowing the filling to firm up, ensuring that your autumn appetizer is both delicious and visually appealing for your guests.
What to Serve with Pumpkin Patch Deviled Eggs
As you prepare your delightful Pumpkin Patch Deviled Eggs, consider these delicious accompaniments that will create a memorable autumn feast.
-
Crispy Bacon-Wrapped Asparagus: The salty and savory taste of bacon pairs wonderfully with the creamy filling of the deviled eggs, elevating your appetizer spread.
-
Roasted Butternut Squash Soup: This warm, velvety soup adds a comforting touch to your meal, creating a cozy atmosphere at the table.
-
Apple-Cranberry Salad: Fresh apples and tart cranberries bring a bright, refreshing contrast to the rich flavors of the deviled eggs, enhancing the autumnal vibe.
-
Sourdough Bread: The tangy flavor and crusty texture of sourdough slices make a perfect vehicle for scooping up any leftover filling, bringing delightful interactions to your gathering.
-
Pumpkin Spice Latte: Blend sweet and spicy coffee goodness with your appetizers, creating a seasonal drink pairing that embraces the fall spirit.
-
Braised Brussels Sprouts: Rich, caramelized brussels sprouts introduce a delightful crunch, giving your meal an earthy note that complements the eggs perfectly.
-
Cheese Platter: Curate a selection of tangy cheeses to provide a delightful accompaniment; they pair marvelously with the creamy and subtly spiced filling.
-
Honey-Glazed Carrots: The sweetness of honey-glazed carrots brings joy to your table, creating a beautifully balanced plate with savory and sweet.
-
Sparkling Cider: A refreshing glass of sparkling cider perfectly complements the richness of the deviled eggs, enhancing the festive atmosphere of your gathering.
-
Pumpkin Pie Bites: End your meal on a sweet note with these delightful bites that mimic the seasonal flavors, reinforcing the fall theme throughout your menu.
How to Store and Freeze Pumpkin Patch Deviled Eggs
Fridge: Store leftover Pumpkin Patch Deviled Eggs in an airtight container for up to 2 days to maintain freshness. For the best flavor, enjoy them within 24 hours.
Make Ahead: You can boil and peel the eggs 2-3 days in advance; store the whites and yolk filling separately in the refrigerator to keep them fresh until assembly.
Freezer: These deviled eggs are not suitable for freezing, as the texture of the eggs and filling may change once thawed. Enjoy them fresh for the best experience.
Reheating: If you need to serve them at room temperature, simply take them out of the fridge 15-20 minutes before enjoying, allowing flavors to blend beautifully.
Make Ahead Options
These Pumpkin Patch Deviled Eggs are perfect for meal prep enthusiasts! You can boil and peel the eggs up to 3 days in advance, storing them in the refrigerator in an airtight container to keep them fresh. The creamy filling can be prepared 24 hours ahead; just refrigerate it separately to ensure it stays flavorful and maintains its texture. When you’re ready to serve, simply pipe the filling into the egg whites, create the pumpkin shape, and add the chive “stems.” By prepping in advance, you’ll save time on busy days while still serving a crowd-pleasing, festive appetizer that’s just as delicious!
Pumpkin Patch Deviled Eggs: Fun Variations Ahead!
Feel free to explore these delightful twists that can make your Pumpkin Patch Deviled Eggs even more special for your celebrations.
- Greek Yogurt: Replace mayonnaise with Greek yogurt for a tangy, healthier filling that’s just as creamy and delicious.
- Avocado Swap: For a richer texture, mash ripe avocado into the yolks instead of using mayo. It adds a lovely creaminess and a hint of green goodness.
- Smoky Flavor: Switch out regular paprika for smoked paprika to infuse a deeper flavor that pairs beautifully with the pumpkin theme.
- Herb Garnish: Instead of chives, try fresh dill or parsley for a different touch. Both herbs add a fresh taste and vibrant pop.
- Spicy Kick: Incorporating a dash of cayenne pepper or your favorite hot sauce into the filling can give these deviled eggs the perfect spicy bite.
- Dijon Mustard: For a unique tang, swap in Dijon mustard instead of yellow mustard to add a punch of flavor that elevates the classic taste.
- Playful Color: If you want to get creative, use food coloring to give the filling a variety of autumn hues, like a blend of orange and yellow, for a fun visual effect.
- Roasted Garlic: Stir in a teaspoon of roasted garlic for a subtle sweetness and a hint of earthiness that enhances the overall flavor profile.
Don’t forget to check out our Roasted Pumpkin Yogurt as a great fall-inspired dip to accompany your deviled eggs, making your appetizer spread even more inviting! Enjoy celebrating the flavors of autumn with your loved ones!
Expert Tips for Pumpkin Patch Deviled Eggs
Perfect Peeling: Start with eggs that are 7-10 days old for easier peeling; fresher eggs can be more challenging to handle.
Cool Quickly: Ensure your ice bath is ready before boiling; transferring eggs directly after cooking helps avoid overcooking and aids peeling.
Smooth Filling: For a silky texture, aggressively mash yolks or press them through a fine-mesh sieve before mixing with other ingredients.
Piping Technique: Use a sturdy piping bag for filling; if you’re in a pinch, a zip-top bag with a cut corner also works well for controlled piping.
Add Spice: To elevate your Pumpkin Patch Deviled Eggs, consider mixing in a dash of cayenne pepper or your favorite hot sauce for an exciting kick.
Pumpkin Patch Deviled Eggs Recipe FAQs
How do I choose the right eggs for deviled eggs?
Absolutely! For the best results, select eggs that are slightly older, around 7-10 days past packing. Those will peel much easier compared to fresher eggs, helping you achieve that perfect presentation for your Pumpkin Patch Deviled Eggs.
How should I store leftover deviled eggs?
Store any leftover Pumpkin Patch Deviled Eggs in an airtight container in the refrigerator for up to 2 days. For optimal flavor and freshness, it’s best to enjoy them within 24 hours. Make sure to keep them chilled until serving!
Can I make Pumpkin Patch Deviled Eggs ahead of time?
Very! You can boil and peel the eggs 2-3 days before your gathering. Just store the egg whites and yolk mixture separately in the fridge. When you’re ready, simply assemble your deviled eggs and chill them before serving to enhance those delicious flavors!
Can I freeze the deviled egg filling?
It’s better to avoid freezing. Unfortunately, these deviled eggs don’t hold up well in the freezer as their texture may change once thawed. For the best taste, enjoy them fresh!
What can I do if my yolk filling is too thick?
If you find that your yolk filling is too thick for piping, consider adding a little more mayonnaise or Greek yogurt to achieve your desired consistency. Mix well until smooth, and taste as you go; this will help you make a perfect filling for your Pumpkin Patch Deviled Eggs.
Are there any allergy considerations with this recipe?
Definitely! If you’re concerned about allergies, be sure to check the labels on your mayonnaise and ensure it’s allergy-friendly, especially for egg allergies. You can use avocado or a dairy-free yogurt as healthier alternatives, making this recipe more inclusive for everyone!
Pumpkin Patch Deviled Eggs: A Fun, Festive Fall Treat
Ingredients
Equipment
Method
- Begin by placing six large eggs in a medium saucepan. Cover with cold water, about an inch above the eggs, and bring to a boil over medium-high heat.
- Once boiling, remove from heat, cover, and let sit for 10 minutes.
- Prepare an ice bath in a large bowl with cold water and ice.
- Transfer the hot eggs to the ice bath using a slotted spoon and let chill for at least 5 minutes.
- Once cooled, gently crack and peel the eggs under running water.
- Slice each egg in half lengthwise, removing the yolks into a mixing bowl.
- To the yolks, add mayo, mustard, salt, pepper, and paprika, mixing until smooth.
- Transfer the yolk mixture into a piping bag and pipe into egg whites.
- Using a knife or toothpick, gently create ridges to enhance the pumpkin appearance.
- Insert chopped chives into the tops of the piped filling to resemble stems.
- Dust with paprika and arrange on a platter. Chill for at least 30 minutes before serving.