

Introduction
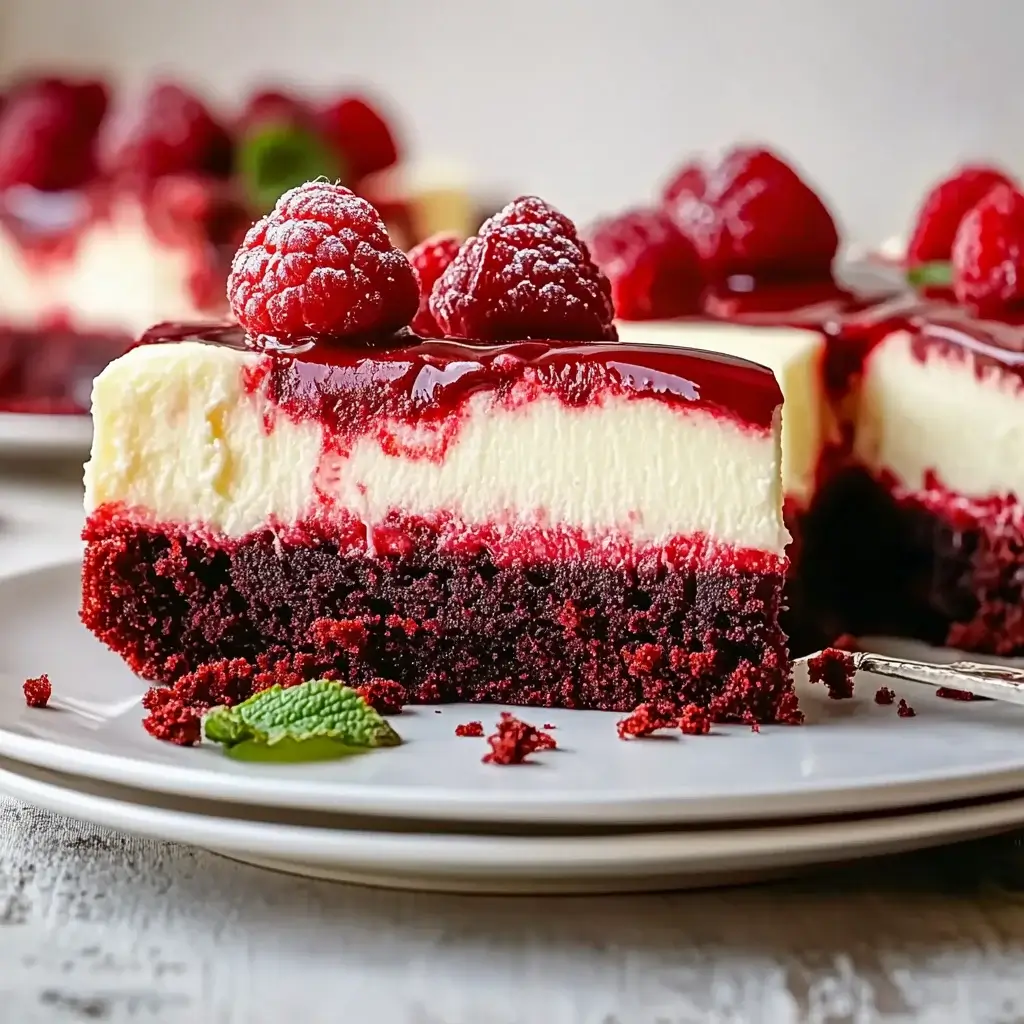
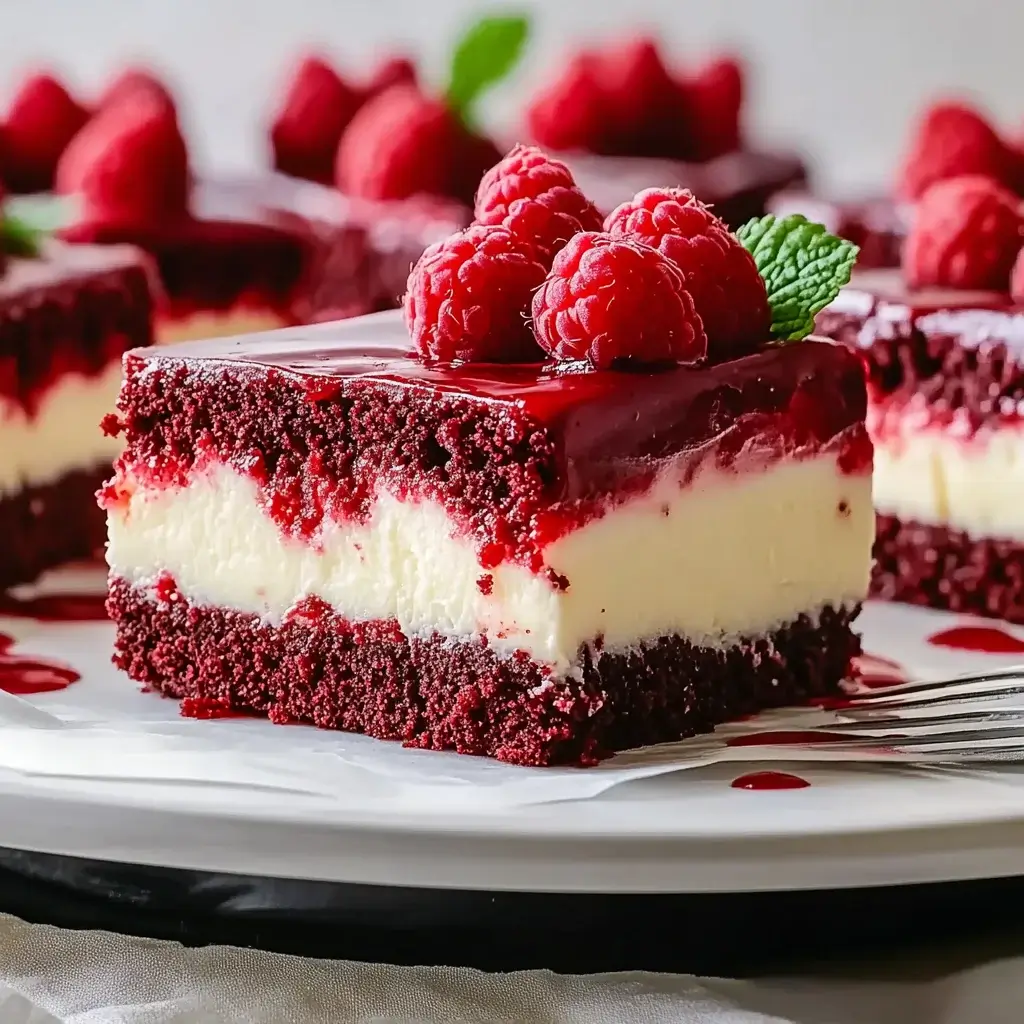
Bold, beautiful, and irresistibly creamy, Red Velvet Cheesecake Bars are the ultimate dessert mashup. With a fudgy red velvet base and a smooth, tangy cheesecake topping, these bars offer the perfect balance of rich flavor and melt-in-your-mouth texture. They’re easy to slice, serve, and share—making them ideal for parties, holidays, or anytime you want to impress with minimal effort. One bite, and you’ll understand why this recipe is a true crowd-pleaser.
Why You’ll Love This Red Velvet Cheesecake Bars
- Stunning Presentation: The vibrant red velvet layer paired with creamy cheesecake makes for a visually striking dessert.
- Rich and Creamy Flavor: A delicious combination of cocoa-infused red velvet and smooth, tangy cheesecake.
- Perfect for Any Occasion: Great for holidays, parties, or a sweet treat just because.
- Easy to Make: Simple ingredients and straightforward steps make this recipe beginner-friendly.
- Ideal for Sharing: Slice into bars for easy serving—no forks or plates required!
Ingredients for Red Velvet Cheesecake Bars
Here’s what you’ll need to make these decadent Red Velvet Cheesecake Bars:
- Graham cracker crumbs: These form the base of your crust, providing a sweet and crunchy texture.
- Unsalted butter: Melted butter binds the crumbs together, adding richness to the crust.
- Granulated sugar: A touch of sweetness enhances the crust and balances the flavors.
- Cream cheese: The star of the cheesecake layer, it gives that creamy, luscious texture.
- Powdered sugar: This sweetens the filling and helps achieve a smooth consistency.
- Vanilla extract: A splash of vanilla adds depth and warmth to the flavor profile.
- Eggs: They provide structure and help the cheesecake set perfectly.
- Sour cream: This adds tanginess and creaminess, making the filling even more decadent.
- Cocoa powder: Just a tablespoon gives a subtle chocolate flavor that complements the red velvet.
- Red food coloring: Essential for that iconic red hue, making your bars visually stunning.
- White vinegar: A secret ingredient that enhances the red color and balances flavors.
- Baking soda: This helps the cheesecake rise slightly, creating a light texture.
- Salt: A pinch of salt enhances all the flavors, making them pop.
For those looking to customize, consider substituting sour cream with Greek yogurt for a tangier taste. You can also add a layer of chocolate ganache on top for an extra indulgent treat. All ingredient quantities are listed at the bottom of the article for easy reference and printing.
How to Make Red Velvet Cheesecake Bars
Step 1: Preheat and Prepare
Let’s kick things off by preheating your oven to 325°F. This is crucial for achieving that perfect bake. While the oven warms up, grab a 9×13-inch baking dish. You can either grease it with some cooking spray or line it with parchment paper for easy removal later. Trust me, this little step will save you a lot of hassle when it’s time to cut those beautiful bars.
Step 2: Make the Crust
Now, it’s time to create that delicious crust. In a medium bowl, combine the graham cracker crumbs, melted butter, and granulated sugar. Mix until everything is well combined and resembles wet sand. Press this mixture firmly into the bottom of your prepared baking dish. Bake it for about 10 minutes, just until it’s set and slightly golden. Let it cool slightly before adding the cheesecake filling.
Step 3: Prepare the Cheesecake Filling
In a large mixing bowl, beat the softened cream cheese until it’s smooth and creamy. Gradually add the powdered sugar, mixing until well combined. Then, stir in the vanilla extract for that lovely flavor boost. Next, add the eggs one at a time, mixing well after each addition. Now, it’s time to bring in the sour cream, cocoa powder, red food coloring, white vinegar, baking soda, and salt. Mix everything until it’s silky smooth.
Step 4: Combine and Bake
Pour that luscious cheesecake batter over your cooled crust, spreading it evenly with a spatula. This is where the colors and flavors come together beautifully. Place it in the oven and bake for 30-35 minutes. You want the center to be set but still slightly jiggly. Once done, turn off the oven and leave the cheesecake inside for an additional 10 minutes. This helps it finish cooking gently.
Step 5: Cool and Refrigerate
After baking, let the bars cool to room temperature. This is important for the texture. Once cooled, cover the dish and refrigerate for at least 4 hours, or even better, overnight. This chilling time allows the flavors to meld beautifully. When you’re ready to serve, cut them into squares and enjoy the delightful layers of red velvet and creamy cheesecake.
Tips for Success
- Make sure your cream cheese is at room temperature for easy mixing.
- Don’t skip the chilling time; it enhances the flavor and texture.
- Use a sharp knife to cut the bars for clean edges.
- For a fun twist, add a sprinkle of chocolate chips to the filling.
- Keep leftovers in an airtight container in the fridge for up to a week.
Equipment Needed
- 9×13-inch baking dish: A standard size for these bars; you can use a similar-sized dish if needed.
- Mixing bowls: A set of various sizes will help with mixing ingredients.
- Electric mixer: A hand mixer works well, but a stand mixer can save time.
- Spatula: Essential for spreading the cheesecake batter evenly.
- Measuring cups and spoons: Accurate measurements are key for perfect results.
Variations
- Chocolate Swirl: Add a swirl of melted chocolate to the cheesecake batter before baking for a rich chocolate flavor.
- Nutty Crunch: Mix in chopped pecans or walnuts into the crust for an added crunch and flavor.
- Gluten-Free Option: Substitute graham cracker crumbs with gluten-free cookie crumbs to make it suitable for gluten-sensitive friends.
- Vegan Version: Use vegan cream cheese and a flaxseed egg substitute for a plant-based twist.
- Fruit Topping: Top with fresh raspberries or strawberries for a fruity contrast to the rich cheesecake.
Serving Suggestions
- Pair with a scoop of vanilla ice cream for a delightful contrast in temperature and texture.
- Serve alongside fresh berries to add a burst of color and freshness.
- Drizzle with chocolate or caramel sauce for an extra indulgent touch.
- Garnish with whipped cream and a sprinkle of cocoa powder for a beautiful presentation.
FAQs about Red Velvet Cheesecake Bars
Can I make Red Velvet Cheesecake Bars ahead of time?
Absolutely! These bars actually taste better after chilling in the fridge for a few hours or overnight. This allows the flavors to meld beautifully, making them perfect for prepping ahead of a gathering.
What can I substitute for cream cheese?
If you’re looking for a lighter option, you can use Greek yogurt or a vegan cream cheese alternative. Both will give you a creamy texture, but the flavor may vary slightly.
How do I store leftovers?
Keep any leftover Red Velvet Cheesecake Bars in an airtight container in the fridge. They should stay fresh for up to a week, but they won’t last that long.
Can I freeze these bars?
Yes, you can freeze them. Just wrap the bars tightly in plastic wrap and then in aluminum foil. They can be frozen for up to three months. Thaw them in the fridge before serving.
What’s the best way to cut these bars?
For clean cuts, use a sharp knife and wipe it clean between cuts. This will help you achieve those perfect squares without any messy edges.
Final Thoughts
Creating these Red Velvet Cheesecake Bars is more than just baking; it’s about crafting a moment of joy. The vibrant red color and creamy layers bring a sense of celebration to any occasion. Each bite is a delightful blend of flavors that can transport you back to cherished memories or create new ones with loved ones. Whether you’re sharing them at a gathering or enjoying a quiet evening at home, these bars are sure to bring smiles. So, roll up your sleeves, embrace the process, and let the magic of these bars brighten your day.
Red Velvet Cheesecake Bars: A Delicious Easy Recipe!
Ingredients
Method
- Preheat the oven to 325°F. Grease a 9×13-inch baking dish or line it with parchment paper.
- In a medium bowl, combine the graham cracker crumbs, melted butter, and granulated sugar. Press into the bottom of the prepared baking dish to form the crust. Bake for 10 minutes and let cool slightly.
- In a large mixing bowl, beat the softened cream cheese until smooth. Gradually add the powdered sugar and vanilla extract, mixing until well combined.
- Add the eggs one at a time, mixing well after each addition. Then, add the sour cream, cocoa powder, red food coloring, white vinegar, baking soda, and salt. Mix until smooth.
- Pour the cheesecake batter over the cooled crust and spread evenly.
- Bake for 30-35 minutes, until the center is set but slightly jiggly. Turn off the oven and leave the cheesecake in for an additional 10 minutes.
- Let cool to room temperature, then refrigerate for at least 4 hours or overnight.
- Cut into squares and serve chilled.
Nutrition
Notes
- For a richer flavor, add a layer of chocolate ganache on top before serving.
- Substitute sour cream with Greek yogurt for a tangier taste.
- Sprinkle crushed nuts or chocolate shavings on top for a festive touch.