

Introduction to Chocolate Lava Brownie Cookies
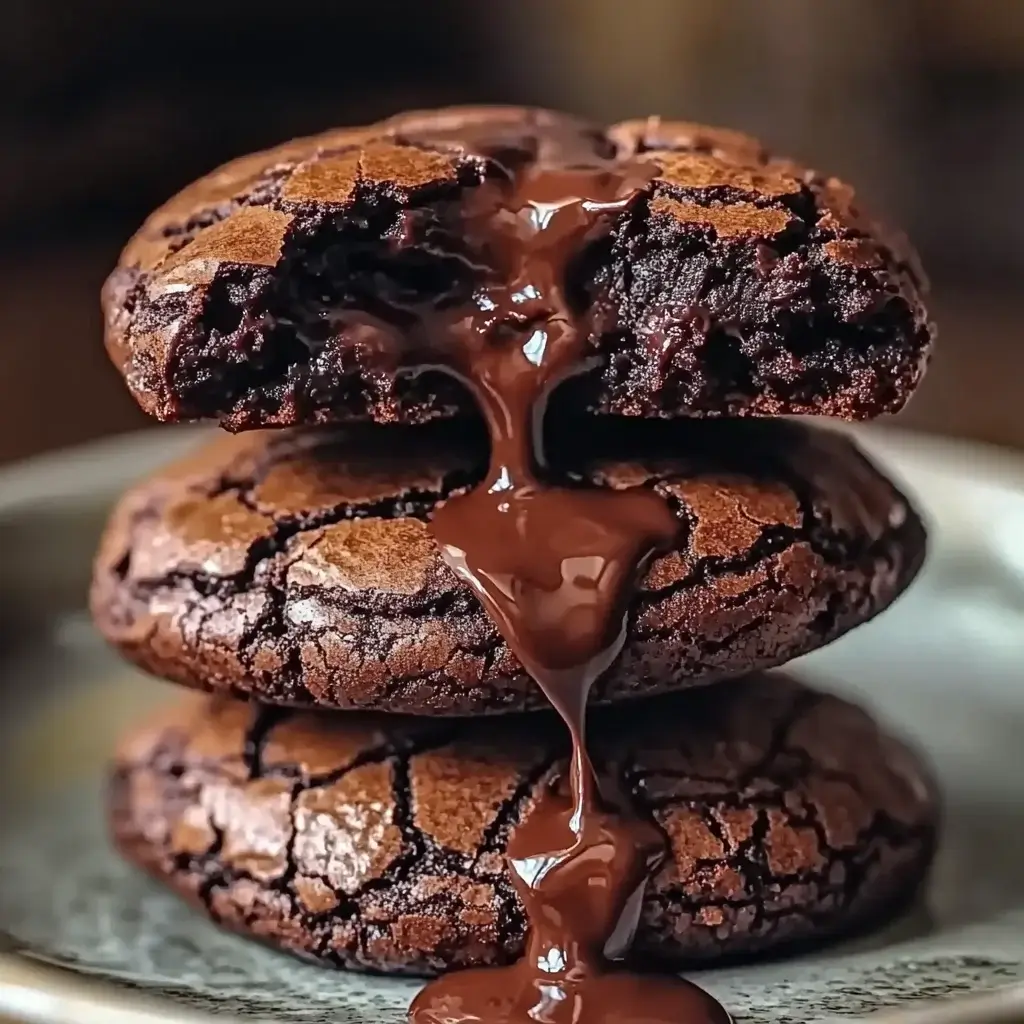
Imagine the rich, fudgy center of a molten lava cake wrapped inside the crackly top and chewy edges of a brownie—all in the form of a cookie. These Chocolate Lava Brownie Cookies are the ultimate dessert mashup for chocolate lovers who just can’t decide between a cookie and a brownie. With their gooey, melted centers and deep cocoa flavor, they’re perfect for everything from cozy nights in to impressing guests at a dinner party. One bite in, and you’ll understand why these indulgent treats never last long on the plate.
Why You’ll Love This Chocolate Lava Brownie Cookies
-
Ultimate Chocolate Fix: Deep, intense chocolate flavor with a molten surprise in every bite.
-
Best of Both Worlds: Combines the chewy goodness of brownies with the hand-held convenience of cookies.
-
Impressively Easy: Looks bakery-worthy, but comes together with simple pantry ingredients.
-
Crowd-Pleaser: Whether it’s for a party, holiday tray, or late-night snack, these cookies always disappear fast.
-
Freezer-Friendly: Make a batch ahead and bake them fresh anytime the craving hits.
-
Versatile Treat: Serve warm with ice cream, drizzle with caramel, or enjoy them just as they are—pure chocolate heaven.
Ingredients for Chocolate Lava Brownie Cookies
The magic of these Chocolate Lava Brownie Cookies begins with a few irresistible ingredients. Here’s what you’ll need to bring them to life:
- Semi-sweet chocolate chips: These provide the rich chocolate flavor that makes the cookies irresistible.
- Unsalted butter: Adds moisture and richness, ensuring a soft texture.
- Granulated sugar: Sweetens the cookies and helps create that perfect chewy bite.
- Large eggs: Essential for binding the ingredients together and adding structure.
- Vanilla extract: A splash of this enhances the overall flavor, making it more aromatic.
- All-purpose flour: The base of the cookie, providing structure and stability.
- Unsweetened cocoa powder: Deepens the chocolate flavor, giving it that brownie-like essence.
- Salt: Just a pinch balances the sweetness and enhances the chocolate taste.
- Baking powder: Helps the cookies rise slightly, creating a tender texture.
- Milk chocolate or white chocolate chips: These are the stars of the show, creating that gooey lava center that oozes with every bite.
For those looking to switch things up, consider using dark chocolate chips for a richer flavor. You can also add a pinch of espresso powder to the batter for a delightful mocha twist. Exact measurements for these ingredients can be found at the bottom of the article, ready for printing!
How to Make Chocolate Lava Brownie Cookies
Creating these Chocolate Lava Brownie Cookies is a delightful journey. Follow these simple steps, and you’ll be rewarded with cookies that are crispy on the outside and gooey on the inside. Let’s get started!
Step 1: Preheat and Prepare
First things first, preheat your oven to 350°F (175°C). This ensures even baking. While that’s heating up, line a baking sheet with parchment paper. This will prevent sticking and make cleanup a breeze. Trust me, your future self will thank you!
Step 2: Melt Chocolate and Butter
In a medium saucepan, melt the semi-sweet chocolate chips and unsalted butter over low heat. Stir gently until smooth. This melting process is crucial; it creates a silky texture that makes your cookies rich and decadent. Don’t rush it—patience pays off here!
Step 3: Mix Sugar, Eggs, and Vanilla
In a large mixing bowl, whisk together the granulated sugar, large eggs, and vanilla extract. Mix until well combined and slightly frothy. This step is essential for incorporating air, which helps your cookies rise and gives them that delightful chewiness.
Step 4: Combine Chocolate Mixture
Now, gradually add the melted chocolate mixture to the sugar mixture. Stir until everything is smooth and well blended. This is where the magic happens! The chocolate adds depth and richness, making your cookies truly irresistible.
Step 5: Sift and Fold Dry Ingredients
In another bowl, sift together the all-purpose flour, unsweetened cocoa powder, salt, and baking powder. Sifting helps eliminate lumps and ensures even distribution. Gently fold the dry ingredients into the chocolate mixture until just combined. Overmixing can lead to tough cookies, so be gentle!
Step 6: Add Chocolate Chips
Now it’s time to fold in the milk chocolate or white chocolate chips. These will create that gooey lava center we all crave. Make sure they’re evenly distributed throughout the dough. Each bite should be a delightful surprise of melted chocolate!
Step 7: Shape and Bake
Using a tablespoon, drop balls of dough onto the prepared baking sheet, spacing them about 2 inches apart. This allows room for spreading. Bake for 10-12 minutes, until the edges are set but the centers remain soft. Remember, don’t overbake—soft centers are key!
Step 8: Cooling Process
Once baked, let the cookies cool on the baking sheet for about 5 minutes. This helps them firm up a bit. Then, transfer them to a wire rack to cool completely. This cooling process is vital; it allows the gooey center to settle just right!

Tips for Success
- Use room temperature eggs for better mixing and texture.
- Don’t skip the parchment paper; it makes for easy removal and cleanup.
- Keep an eye on the baking time; every oven is different!
- For extra gooeyness, slightly underbake the cookies.
- Let the cookies cool completely for the best lava effect.
Equipment Needed
- Medium saucepan: A small pot works too for melting chocolate and butter.
- Baking sheet: Use any flat baking tray; just ensure it’s lined with parchment.
- Mixing bowls: A large bowl for wet ingredients and a smaller one for dry.
- Whisk: A fork can substitute if you don’t have one handy.
- Cookie scoop or tablespoon: A spoon works just fine for shaping the dough.
Variations
- Nutty Delight: Add chopped walnuts or pecans for a crunchy texture that complements the gooey center.
- Gluten-Free Option: Substitute all-purpose flour with a gluten-free blend for a delicious alternative.
- Mint Chocolate: Incorporate mint extract or crushed peppermint candies for a refreshing twist.
- Spicy Kick: Add a pinch of cayenne pepper or chili powder for a surprising heat that pairs well with chocolate.
- Fruit Fusion: Mix in dried cherries or raspberries for a fruity contrast to the rich chocolate.
Serving Suggestions
- Pair these cookies with a scoop of vanilla ice cream for a delightful contrast.
- Serve with a drizzle of chocolate sauce for an extra indulgent touch.
- Enjoy alongside a hot cup of coffee or a glass of cold milk.
- For a fancy presentation, dust with powdered sugar before serving.
FAQs about Chocolate Lava Brownie Cookies
Can I make these cookies ahead of time?
Absolutely! You can prepare the dough in advance and refrigerate it for up to 3 days. Just scoop the dough onto the baking sheet when you’re ready to bake. This way, you can enjoy fresh Chocolate Lava Brownie Cookies whenever the craving strikes!
What should I do if my cookies are too flat?
If your cookies spread too much, it could be due to melted butter or not enough flour. Make sure to measure your ingredients accurately. Chilling the dough for about 30 minutes before baking can also help them hold their shape better.
Can I use different types of chocolate for the lava center?
Definitely! While milk chocolate and white chocolate are popular choices, you can experiment with dark chocolate or even flavored chocolates. Each will give a unique twist to your Chocolate Lava Brownie Cookies!
How do I store leftover cookies?
Store any leftover cookies in an airtight container at room temperature for up to 3 days. If you want to keep them longer, consider freezing them. Just make sure to separate layers with parchment paper to prevent sticking.
What can I serve with these cookies?
These cookies pair wonderfully with a scoop of vanilla ice cream or a dollop of whipped cream. A hot cup of coffee or a glass of cold milk also complements the rich chocolate flavor perfectly!
Final Thoughts
There’s a certain joy that comes from baking, especially when it involves these Chocolate Lava Brownie Cookies. The aroma of melting chocolate fills the kitchen, creating an inviting atmosphere that draws everyone in. Each bite is a delightful surprise, with that gooey center oozing out like a warm hug. Whether you’re sharing them with friends or savoring them solo, these cookies bring a sense of comfort and indulgence. They’re not just a dessert; they’re a moment of happiness in a busy day. So, roll up your sleeves and treat yourself to this sweet adventure—you deserve it!
Chocolate Lava Brownie Cookies: Indulge in a Decadent Treat!
Ingredients
Method
- Preheat your oven to 350°F (175°C) and line a baking sheet with parchment paper.
- In a medium saucepan, melt the semi-sweet chocolate chips and butter over low heat, stirring until smooth. Remove from heat and let cool slightly.
- In a large mixing bowl, whisk together the granulated sugar, eggs, and vanilla extract until well combined.
- Gradually add the melted chocolate mixture to the sugar mixture, stirring until smooth.
- In another bowl, sift together the flour, cocoa powder, salt, and baking powder. Gradually fold the dry ingredients into the chocolate mixture until just combined.
- Gently fold in the milk chocolate or white chocolate chips.
- Drop tablespoon-sized balls of dough onto the prepared baking sheet, spacing them about 2 inches apart.
- Bake for 10-12 minutes, until the edges are set but the centers are still soft. Do not overbake.
- Allow the cookies to cool on the baking sheet for 5 minutes before transferring them to a wire rack to cool completely.
Nutrition
Notes
- For a richer flavor, try using dark chocolate chips instead of semi-sweet.
- Add a pinch of espresso powder to the batter for a mocha twist.