

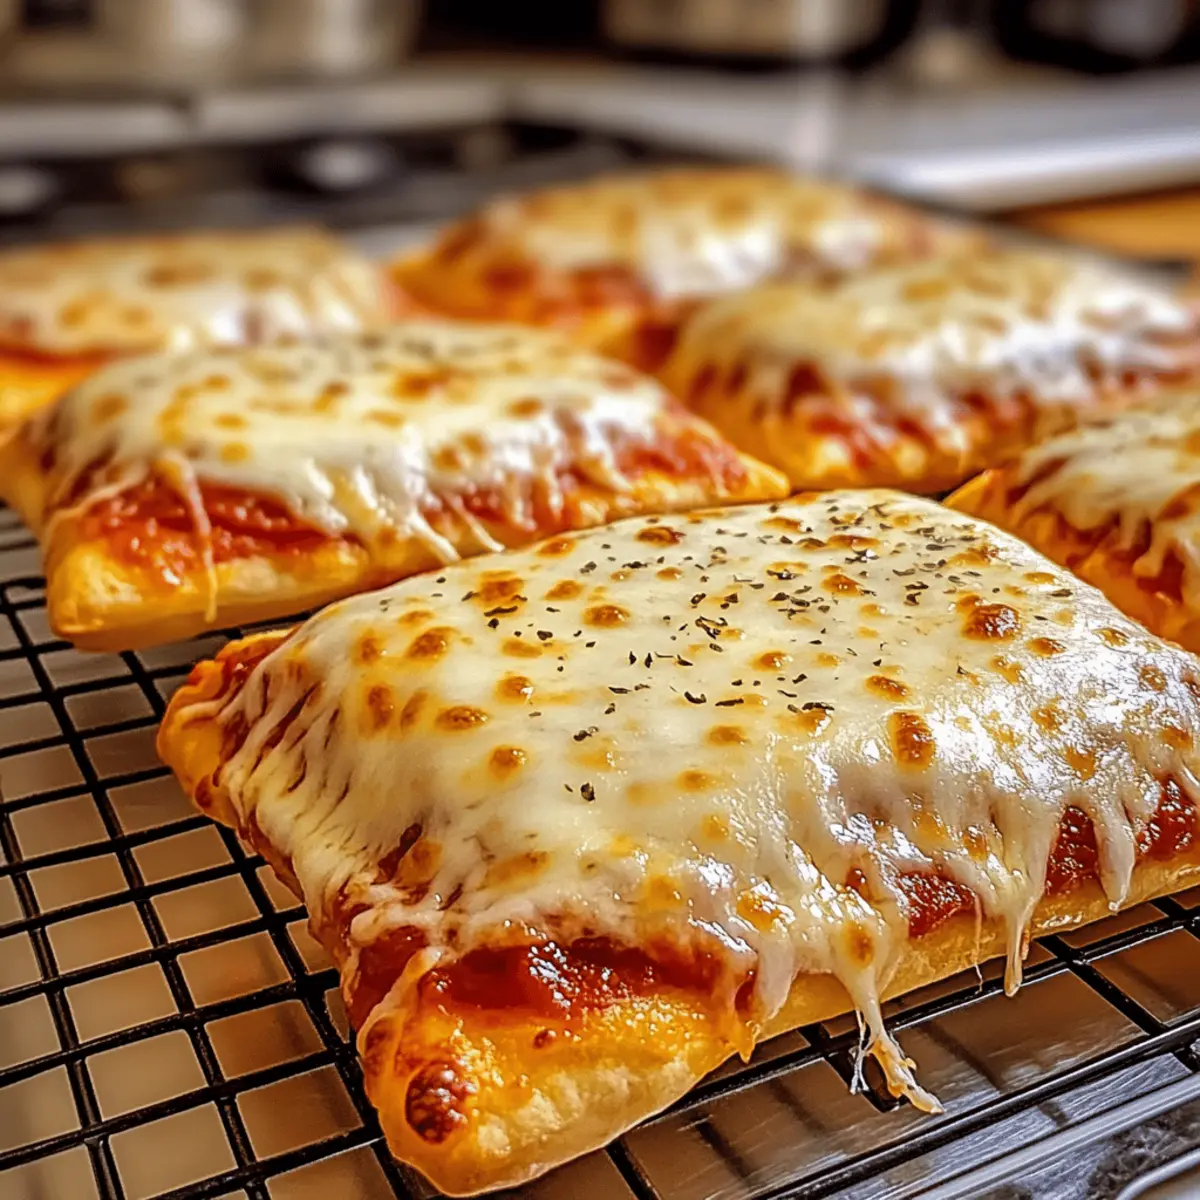
As I was rummaging through my fridge one lazy Sunday afternoon, I stumbled upon a few leftover pizza ingredients just waiting to be transformed. That’s when I decided to whip up these ultimate Cheesy Pizza Pockets! Bursting with melted cheese and delicious fillings, they’re an easy, family-friendly snack that makes for a great addition to lunchboxes or your next game night. Plus, the beauty of these pockets lies in their customizable nature—use what you have on hand or let your creativity shine with funky fillings! Whether you’re craving comfort food or just looking for a quick bite, these cheesy marvels will have everyone coming back for seconds. Ready to dive into making your own? Let’s get cooking!

Why Are Cheesy Pizza Pockets So Loved?
Deliciously Versatile: No two cheesy pizza pockets need to be the same! You can fill them with your favorite ingredients, whether it’s classic pepperoni or a veggie-packed delight.
Quick and Easy: With minimal prep time and simple steps, you can whip up these pockets in no time—perfect for busy weekdays!
Crowd-Pleasing Snack: Whether for game night or kid’s lunch, these bites will have everyone asking for more, making them a hit with family and friends.
Customizable Goodness: Switch up the fillings based on what’s in your fridge; consider trying out our delicious Mini Fruit Pizzas for a sweet treat afterward!
Mess-Free Convenience: Each pocket is neatly sealed, making them a tidy option for travel or finger food at parties.
Dive into the irresistible world of cheesy pizza pockets, and let your culinary creativity shine!
Cheesy Pizza Pockets Ingredients
• Let’s gather the essentials for these delightful treats!
For the Dough
- Refrigerated Pizza Crust – This ready-to-use crust provides the perfect base; for a healthier option, try whole wheat or cauliflower crust.
For the Filling
- Pasta or Marinara Sauce – Adds a zesty punch of flavor; consider using pesto for a fresh herb twist or BBQ sauce for a unique smokiness.
- Shredded Mozzarella Cheese – Delivers that classic gooey texture when melted; blend in some cheddar or provolone for an extra flavor boost.
- Pepperoni Slices – A popular filling that brings a savory element; switch it up with ground beef, diced veggies, or other meats for variety.
For the Garnish
- Dried Oregano – Optional, but a sprinkle enhances the flavor; fresh herbs can elevate the taste even further.
- Olive Oil – Brushing the tops with this gives a golden finish; feel free to use melted butter for added richness.
Step‑by‑Step Instructions for Cheesy Pizza Pockets
Step 1: Preheat the Oven
Start by preheating your oven to 425°F (220°C). While the oven is heating, line a baking sheet with parchment paper to prevent the cheesy pizza pockets from sticking. This will make your cleanup easier and ensure even cooking, allowing the bottoms to crisp up beautifully.
Step 2: Prepare the Dough
On a lightly floured surface, unroll the refrigerated pizza crust and use a sharp knife or pizza cutter to slice it into 6 equal squares. Aim for about 4 inches on each side for perfect pocket size. As you work, keep the dough lightly dusted to avoid sticking, ensuring a smooth process while making your cheesy pizza pockets.
Step 3: Add the Fillings
Take each square of dough and add 1 tablespoon of pasta or marinara sauce onto one half. Next, generously sprinkle about 2 tablespoons of shredded mozzarella cheese on top of the sauce, followed by 2 pepperoni slices (or your choice of filling). This blend of ingredients will create the delicious, gooey center that makes cheesy pizza pockets so irresistibly tasty.
Step 4: Fold and Seal
Gently fold each square in half to create a triangle, enclosing the fillings securely. Use a fork to press down along the edges, sealing the pockets tightly to prevent any gooey goodness from escaping during baking. You should see a nice crimped edge, which adds a rustic charm and helps keep everything inside.
Step 5: Brush and Season
To achieve a golden and crispy exterior, brush the tops of the sealed pizza pockets with olive oil. For added flavor, sprinkle a little dried oregano over the tops, along with some extra shredded cheese if desired. This small touch will elevate the savory aromas and create a pleasing presentation.
Step 6: Bake Your Pockets
Place the prepared cheesy pizza pockets on the lined baking sheet, ensuring they have a little space between them for even cooking. Bake in the preheated oven for 10 to 13 minutes, or until they are puffed and golden brown. Keep an eye on them towards the end to catch that perfect shade of golden perfection!
Step 7: Cool and Serve
Once baked, remove the cheesy pizza pockets from the oven and let them cool for a couple of minutes. This resting period allows the cheese to set a bit, making them easier to handle. Serve warm with your favorite dipping sauces like marinara or ranch for an ultimate snacking experience.
Cheesy Pizza Pockets Variations
Let your creativity flow and discover delightful ways to customize your cheesy pizza pockets!
-
Dairy-Free: Swap out the cheese for a plant-based alternative like cashew cheese or vegan mozzarella for a creamy, dairy-free delight. It’s just as satisfying without the lactose!
-
Spicy Kick: Substitute pepperoni with spicy sausage or add jalapeños to your filling. This gives your pockets a zesty, fiery twist that will awaken your taste buds!
-
Breakfast Treat: Fill your pockets with scrambled eggs, diced peppers, and crispy bacon for an irresistible breakfast option. Who says pizza is just for dinner?
-
Mediterranean Flair: Switch up the sauce for hummus and fill with spinach, olives, and feta cheese. It’s a fresh take that will transport you to sunny shores!
-
Meaty Medley: Instead of pepperoni, use shredded rotisserie chicken mixed with a BBQ sauce for a smoky, savory flavor. Tie it all together with mozzarella for that gooey experience.
-
Veggie Delight: Load your cheesy pizza pockets with a mix of sautéed mushrooms, bell peppers, and zucchini for a nutritious vegetarian option. It’s a delicious way to sneak in those veggies!
-
Asian-Inspired: Fill with cooked chicken, soy sauce, and finely chopped green onions. You can even drizzle a bit of sweet chili sauce inside for a delightful surprise!
For a sweet treat after dinner, why not try a recipe like Mini Fruit Pizzas? The possibilities are endless, so have fun exploring different flavor combinations!
Storage Tips for Cheesy Pizza Pockets
Room Temperature: Allow baked pizza pockets to cool completely before storing; they can be kept in an airtight container at room temperature for up to 2 days.
Fridge: Store leftover cheesy pizza pockets in the refrigerator in an airtight container for up to 3 days. Reheat in the oven or microwave until heated through.
Freezer: For longer storage, freeze assembled but unbaked cheesy pizza pockets. Wrap each pocket tightly in plastic wrap and place them in a freezer-safe bag for up to 3 months. Bake directly from frozen, adding a few extra minutes to the cooking time.
Reheating: When ready to enjoy, reheat in the oven at 375°F (190°C) for about 10-15 minutes until hot and crispy, making every bite memorable!
What to Serve with Cheesy Pizza Pockets
There’s nothing quite like a spread of delightful pairings to elevate your cheesy pizza pockets experience.
-
Garlic Butter Dip: A rich and aromatic choice that complements the cheesy flavors while adding a delightful garlicky kick. Drizzle this warm, velvety butter over each bite for added indulgence.
-
Fresh Salad: A mixed greens salad dressed lightly with vinaigrette brings a refreshing contrast to the warm pockets, balancing the meal beautifully. The crispness of the veggies offers a crunch that perfectly pairs with the soft dough.
-
Marinara Sauce: This classic dip is a must-have companion for cheesy pizza pockets. Its rich tomato flavor enhances the savory fillings and provides a tangy contrast that keeps each bite exciting.
-
Sweet Baby Carrots: Serve these crunchy, naturally sweet veggies on the side to add a pop of color and a healthy element to your snack. Their sweet tang balances out the cheesiness delightfully.
-
Smoothies: A fruity, refreshing smoothie can finish off your meal nicely. Consider a strawberry-banana mix for a sweet touch or a green smoothie for something more nourishing and vibrant.
-
Mozzarella Sticks: If you’re craving extra cheese, these fried delights add a crunchy texture and gooey goodness, making them a cheesy companion worthy of your meal.
-
Baked Potato Wedges: Crispy on the outside and fluffy inside, these tasty wedges make a hearty side, perfect for dipping into sauces alongside your cheesy pizza pockets.
Every option enhances the cheesy pizza pockets in a unique way, turning a simple snack into a delightful feast!
Make Ahead Options
These Cheesy Pizza Pockets are perfect for meal prep enthusiasts looking to save time during busy weeknights! You can assemble the pockets and refrigerate them for up to 24 hours before baking. Simply prepare them as directed, seal, and place them in an airtight container or cover with plastic wrap to maintain their freshness. If you want to get even further ahead, consider freezing the assembled pockets for up to 3 months. When you’re ready to enjoy, bake them straight from the freezer—just add a few extra minutes to the cooking time. This way, you’ll still have that delicious, homemade taste with minimal fuss on those hectic days!
Expert Tips for Cheesy Pizza Pockets
Avoid Overfilling: Keep it Light: To prevent soggy crusts, avoid packing your cheesy pizza pockets too full with sauce and toppings.
Seal It Well: Crimp Those Edges: Make sure to press the edges with a fork to securely seal your pockets, preventing any delicious filling from leaking out.
Experiment with Flavors: Get Creative: Don’t hesitate to swap out fillings; try a mix of cheeses or add fresh vegetables for your customized cheesy pizza pockets.
Watch the Bake Time: Stay Alert: Keep a close eye on your pockets during the last few minutes of baking to ensure they reach that perfect golden color without burning.
Let Them Cool: Easy to Handle: Allow your cheesy pizza pockets to cool slightly before serving; this helps the gooey cheese set for mess-free enjoyment.
Cheesy Pizza Pockets Recipe FAQs
How do I choose the right pizza crust for cheesy pizza pockets?
Absolutely! I recommend using a refrigerated pizza crust for convenience, but you can also try whole wheat or cauliflower crust for a healthier option. When selecting, look for a fresh, pliable dough that doesn’t have dark spots or a strong odor. This ensures a delicious and properly baked pocket, where the crust turns golden and crisp!
What’s the best way to store leftover cheesy pizza pockets?
After letting your baked pizza pockets cool completely, you can store them in an airtight container at room temperature for up to 2 days. For longer-lasting freshness, keep them in the fridge for up to 3 days. Reheating the pockets in the oven or microwave will keep them tasting just as scrumptious!
Can I freeze cheesy pizza pockets, and what’s the best method?
Absolutely! To freeze, assemble but do not bake the cheesy pizza pockets. Wrap each pocket tightly in plastic wrap to prevent freezer burn, and place them in a freezer-safe bag. They can be kept frozen for up to 3 months. When you’re ready to enjoy them, simply bake them straight from the freezer, adding an extra few minutes to the baking time.
What should I do if my pizza pockets leak during baking?
If you notice leakage while baking, it’s probably because they were overfilled or not sealed well. Next time, take care to keep the fillings light and ensure the edges are crimped tightly with a fork. If you’re still struggling, consider adding a little cornstarch to your sauce to thicken it slightly, making it less runny!
Are cheesy pizza pockets safe for pets?
It’s best to keep cheesy pizza pockets away from pets. Ingredients like cheese and spices might not sit well with their digestive systems. If you want to share a treat with your furry friends, consider offering them plain cooked chicken or veggies instead!
What are some easy dietary substitutions for allergies?
Very! If you’re looking for alternatives, you can use dairy-free cheese for lactose intolerance or gluten-free pizza crusts for gluten sensitivity. If you have nut allergies, be cautious with sauces like pesto that may contain nuts. Always check the ingredient labels for safety, ensuring a delicious yet safe treat for everyone.
Cheesy Pizza Pockets: Easy Homemade Comfort for All
Ingredients
Equipment
Method
- Preheat the oven to 425°F (220°C) and line a baking sheet with parchment paper.
- On a floured surface, unroll the pizza crust and cut into 6 equal squares.
- Add 1 tablespoon of pasta or marinara sauce to one half of each square, top with 2 tablespoons of mozzarella cheese and 2 pepperoni slices.
- Fold each square in half, seal the edges with a fork.
- Brush the tops with olive oil and sprinkle with oregano and extra cheese.
- Bake for 10 to 13 minutes until puffed and golden brown.
- Cool for a few minutes before serving with dipping sauces.