

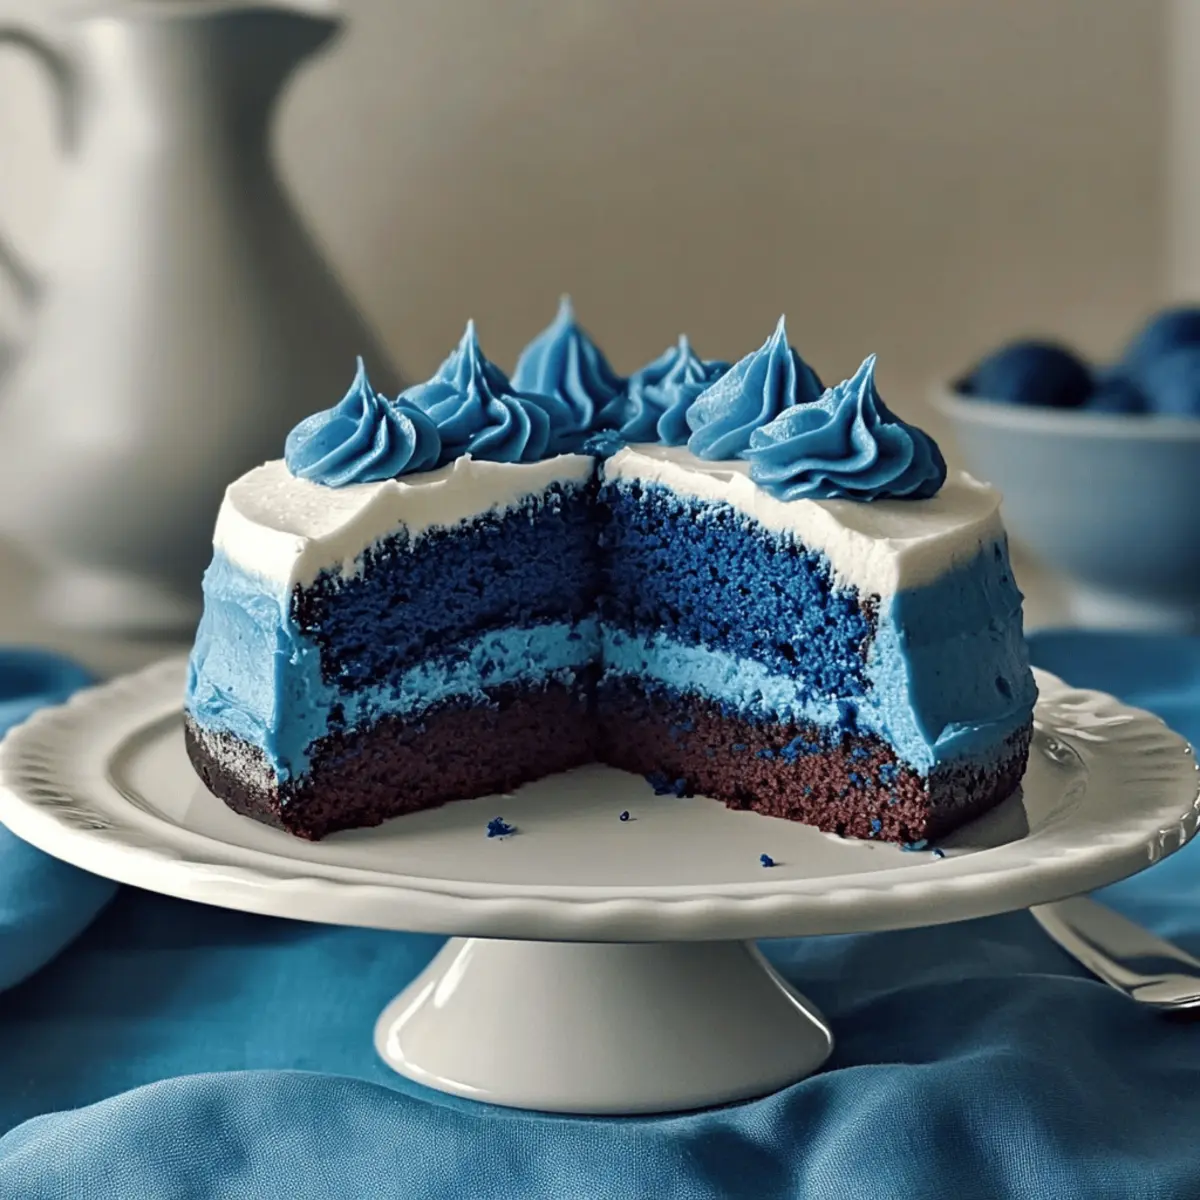
The first time I sliced into a Blue Velvet Cake, the vibrant hue took my breath away. With its moist texture and creamy cream cheese frosting, this dessert not only dazzles the eyes but also brings joy to every table. This Blue Velvet Cake Recipe is perfect for birthdays, anniversaries, or simply a sweet treat for yourself on a cozy afternoon. The best part? It’s surprisingly easy to whip up with simple ingredients, so you can impress your guests without the stress. Plus, its unique twist on the classic red velvet means your dessert will stand out at any gathering. Are you ready to bring a touch of magic to your next celebration? Let’s dive into this delightful recipe that’s sure to become a family favorite!
Why Choose This Blue Velvet Cake?
Visual Appeal: This cake’s vibrant blue hue makes it an eye-catching centerpiece for any celebration.
Irresistible Flavor: With a moist texture complemented by rich cream cheese frosting, every bite is pure bliss.
Effortless Preparation: The recipe features simple ingredients and straightforward steps, making it approachable for both beginners and seasoned bakers.
Versatile Delight: Whether it’s a birthday, anniversary, or just a cozy night in, this cake is perfect for any occasion.
Unique Twist: A fresh take on the classic red velvet, it’s certain to impress your guests and spark conversation.
For more delightful ideas, consider pairing this cake with a dollop of whipped cream or fresh berries, just like with our delicious Berry Icebox Cake!
Blue Velvet Cake Ingredients
• This Blue Velvet Cake recipe is as delightful to make as it is to eat!
For the Cake
- All-purpose flour – Provides structure and texture; use cake flour for a lighter cake.
- Granulated sugar – Adds sweetness and moisture; can substitute with a sugar alternative if desired.
- Buttermilk – Keeps the cake moist and adds slight tanginess; substitute with milk and a teaspoon of vinegar if buttermilk isn’t available.
- Vegetable oil – Ensures a tender cake; can use melted coconut oil for a healthier option.
- Large eggs – Binds ingredients and aids in rising; no suitable substitute recommended.
- Blue food coloring – Provides the vibrant blue hue; use gel for a more vivid color.
- Vanilla extract – Enhances flavor; almond extract can be used as an alternative.
- Baking soda – Acts as a leavening agent; ensure it’s fresh for effective rising.
- Salt – Balances sweetness and enhances flavor.
- White vinegar – Reacts with baking soda to help the cake rise.
For the Frosting
- Cream cheese (8 oz) – Forms the base of the frosting, adding creaminess; can substitute with mascarpone for a different flavor.
- Butter (½ cup) – Provides richness and smoothness in frosting; use vegan butter for a dairy-free alternative.
- Powdered sugar – Sweetens frosting and provides smooth texture; can use sugar alternatives for a healthier frosting.
- Vanilla extract (1 tsp) – Adds depth to frosting flavor.
Step‑by‑Step Instructions for Blue Velvet Cake
Step 1: Preheat the Oven
Begin by preheating your oven to 350°F (175°C). While the oven warms up, take two 9-inch round cake pans and generously grease and flour them to ensure the cake releases easily after baking. This initial prep is crucial for achieving a beautifully baked Blue Velvet Cake.
Step 2: Combine Dry Ingredients
In a large mixing bowl, whisk together 2 cups of all-purpose flour, 1 ½ cups of granulated sugar, 1 teaspoon of baking soda, and ½ teaspoon of salt until well blended. The mixture should have a uniform, light texture. This dry blend will provide the foundation for your cake, so make sure the baking soda is fresh to ensure the cake rises properly.
Step 3: Mix Wet Ingredients
In a separate bowl, mix together 1 cup of buttermilk, ½ cup of vegetable oil, 2 large eggs, and 1 teaspoon of vanilla extract. Whisk these ingredients until they are smooth and well combined, creating a creamy mixture. This step infuses moisture and flavor into your Blue Velvet Cake, setting the stage for a rich texture.
Step 4: Add Blue Food Coloring
Gently fold in 1 tablespoon of blue food coloring to the wet mixture, stirring until the color is evenly distributed throughout. The vibrant blue hue is what gives this cake its name and standout appearance, so make sure it’s blended well, achieving a beautiful shade.
Step 5: Combine Dry and Wet Mixtures
Gradually pour the wet mixture into the bowl with the dry ingredients, using a gentle folding motion to combine them. Once incorporated, add 1 tablespoon of white vinegar. It’s important to mix just until no dry flour remains—overmixing can lead to a dense cake. The final batter should be smooth and slightly thick.
Step 6: Pour Batter into Pans
Carefully divide the Blue Velvet cake batter evenly between the prepared cake pans. Use a spatula to smooth the tops for an even bake. Make sure the batter reaches roughly the same height in both pans to ensure uniform cake layers. This helps in achieving the perfect stacking once cooled.
Step 7: Bake the Cakes
Place the pans in your preheated oven and bake for 25-30 minutes. Keep an eye on them, and check for doneness by inserting a toothpick into the center; it should come out clean. The cake should spring back when lightly touched. This is the crucial moment when your Blue Velvet Cake transforms in the oven.
Step 8: Cool the Cakes
Once baked, remove the cake pans from the oven and let them cool for about 10 minutes. Then, gently turn the cakes out onto wire racks to cool completely. This cooling period is essential to prevent melting the frosting later and to ensure a perfect, fluffy cake texture.
Step 9: Make the Frosting
While the cakes cool, prepare the frosting by beating together 8 oz of cream cheese and ½ cup of softened butter in a mixing bowl until it’s fluffy and creamy. Gradually add in 4 cups of powdered sugar and 1 teaspoon of vanilla extract, mixing until everything is smooth and well combined. This rich frosting will complement the Blue Velvet Cake beautifully.
Step 10: Frost the Cakes
Once the cake layers are completely cool, spread a generous amount of frosting between the two layers. Then, use the remaining frosting to coat the top and sides of the cake, smoothing it out with a spatula for a polished look. Your impressive Blue Velvet Cake is now ready to be sliced and served!
Blue Velvet Cake Variations & Substitutions
Feel free to put your own spin on this delightful cake with these fun variations!
- Dairy-Free: Substitute buttermilk with almond milk mixed with a tablespoon of vinegar for a similar tanginess. Your guests won’t miss the dairy!
- Gluten-Free: Use a 1:1 gluten-free flour blend in place of all-purpose flour for a cake that’s friendly to gluten sensitivities. You can still achieve that fluffy texture everyone loves.
- Fruit-Filled: Add a layer of raspberry or blueberry preserves between the cake layers for a beautiful flavor contrast and extra moisture. It’s like a surprise burst of fruit in every bite!
- Chocolate Twist: Incorporate 1/4 cup of cocoa powder into the dry ingredients for a chocolaty version of this cake while maintaining its stunning color. A chocolate lover’s dream come true!
- Lemon Zest: Stir in a teaspoon of lemon zest into the batter for a refreshing citrus twist. This bright, zesty flavor can elevate your Blue Velvet Cake to a whole new level!
- Nutty Crunch: Add 1/2 cup of toasted walnuts or pecans to the batter for a delightful crunch and rich flavor. This will add both texture and a nutty aroma that tantalizes the senses.
- Sprinkles Galore: For a festive touch, sprinkle colorful confetti or edible glitter on top of your frosted cake. It’s a surefire way to make any celebration more fun!
- Alternative Frosting: Swap cream cheese frosting for a light whipped cream or chocolate ganache for a different flavor profile that still pleases the palate. Each choice brings its own charm to this dessert!
As you explore these variations, you might also enjoy trying other delightful desserts like our Oreo Cake Pops or a seasonal Red White Blue Pasta Salad. Who knows, you might discover your new favorite twist!
What to Serve with Stunning Blue Velvet Cake?
Every bite of this enchanting dessert feels like a celebration, perfect for special gatherings or sweet indulgences at home.
- Whipped Cream: A dollop of light whipped cream adds a fluffy texture and balances the sweetness, enhancing the cake’s moistness.
- Fresh Berries: Strawberries or blueberries offer a tart contrast, elevating the cake’s flavor profile while adding a pop of color.
- Chocolate Sauce: Drizzling rich chocolate sauce brings a delightful twist that pairs beautifully with the creamy frosting and satisfying crumb.
- Coconut Macaroons: These chewy, sweet treats add a tropical hint and slight crunch, making for a delightful contrast with the cake’s softness.
- Vanilla Ice Cream: The creamy, coolness of vanilla ice cream elevates each slice, providing a classic pairing that your guests will love.
- Sparkling Wine: A glass of bubbly complements the dessert’s festive aura perfectly, making any celebration feel even more special.
- Coffee or Espresso: The rich flavor of coffee enhances the cake’s sweetness while providing a warm counterpoint to the chilled frosting.
- Fruit Sorbet: A fruity sorbet offers a refreshing burst that cleanses the palate – an excellent finishing touch after indulging in cake.
- Chocolate-Covered Strawberries: The decadence of chocolate-covered strawberries pairs seamlessly with the Blue Velvet Cake, creating a mouthwatering treat.
Tips for the Best Blue Velvet Cake
-
Use Gel Food Coloring: Opt for gel food coloring instead of liquid to achieve a more vibrant blue hue that stands out beautifully in your cake.
-
Room Temperature Ingredients: Allow all ingredients to come to room temperature before mixing. This ensures better incorporation and a fluffier texture in your Blue Velvet Cake.
-
Mix Gently: Be careful not to overmix the batter after combining the wet and dry ingredients. This can result in a dense cake rather than the tender, light texture you’d want.
-
Check for Doneness: Always test your cake’s doneness with a toothpick. Insert it into the center; it should come out clean when your cake is perfectly baked.
-
Cool Before Frosting: Make sure your cake layers are completely cool before frosting them. This prevents the frosting from melting and helps maintain that irresistibly creamy look.
How to Store and Freeze Blue Velvet Cake
Room Temperature: Store leftover Blue Velvet Cake in an airtight container at room temperature for up to 2 days. This keeps it just moist enough to enjoy without refrigeration.
Fridge: You can keep the cake in the fridge for up to 1 week. Make sure it’s well wrapped or in an airtight container to maintain its delicious flavor and texture.
Freezer: If you want to keep the cake longer, freeze it for up to 3 months. Wrap the cake layers tightly in plastic wrap and then aluminum foil before placing them in a freezer-safe bag.
Reheating: To enjoy your frozen Blue Velvet Cake, thaw in the fridge overnight and let it come to room temperature before serving. Add a fresh frosting layer if desired!
Make Ahead Options
These Blue Velvet Cakes are perfect for busy home cooks looking to save time! You can prepare the cake layers up to 24 hours in advance. Simply bake the cakes, then allow them to cool completely before wrapping them tightly in plastic wrap. This prevents dryness and keeps them moist until you’re ready to frost. You can also make the cream cheese frosting up to 3 days ahead; just store it in an airtight container in the refrigerator. When ready to serve, let the frosting come to room temperature before spreading it over the chilled cake layers. This way, your Blue Velvet Cake remains just as delicious and luscious, simplifying your dessert creation process for any occasion!
Blue Velvet Cake Recipe FAQs
How do I choose the right ingredients for my Blue Velvet Cake?
Absolutely! When selecting ingredients for your Blue Velvet Cake, look for all-purpose flour that has not expired, as this will ensure the best structure. For the best flavor, choose fresh eggs and high-quality vanilla extract. For the blue food coloring, I recommend using gel for a more vibrant result, as liquid colors often yield a paler hue.
How should I store leftover Blue Velvet Cake?
You can store leftover Blue Velvet Cake in an airtight container at room temperature for up to 2 days. If you plan to keep it longer, the fridge is the next best option, where it will stay fresh for up to a week. Just make sure it’s well-wrapped to prevent drying out!
Can I freeze Blue Velvet Cake?
Of course! To freeze your Blue Velvet Cake, first let it cool completely. Wrap the cake layers tightly in plastic wrap followed by aluminum foil to prevent freezer burn. Then place them in a freezer-safe bag. You can keep it in the freezer for up to 3 months. When you’re ready to enjoy it, thaw in the refrigerator overnight and serve at room temperature.
What should I do if my cake doesn’t rise properly?
Very! If your Blue Velvet Cake doesn’t rise, it could be due to fresh baking soda or vinegar. Always check the expiration date on your baking soda; it should be active for the reaction with vinegar. Overmixing the batter can also lead to a dense result, so mix just until combined. If your cake still fails to rise, it may be time to invest in fresh ingredients.
Is this Blue Velvet Cake suitable for those with dietary restrictions?
Absolutely! For those avoiding gluten, you can use a 1:1 gluten-free flour blend in place of all-purpose flour. If you’re looking for a dairy-free option, substitute buttermilk with a milk alternative mixed with a teaspoon of vinegar. The cake is easily adaptable to various dietary needs, making it a versatile option for everyone!
Can pets eat Blue Velvet Cake?
No, it’s best to keep this Blue Velvet Cake away from pets! Ingredients like sugar and butter aren’t suitable for them, and chocolate, which some might consider adding, can be toxic to dogs and cats. Always opt for pet-safe treats when spoiling your furry friends.
Irresistible Blue Velvet Cake with Creamy Frosting Bliss
Ingredients
Equipment
Method
- Preheat your oven to 350°F (175°C) and grease and flour two 9-inch round cake pans.
- In a large mixing bowl, whisk together the all-purpose flour, granulated sugar, baking soda, and salt.
- In a separate bowl, mix the buttermilk, vegetable oil, eggs, and vanilla extract until smooth.
- Fold in the blue food coloring until evenly distributed.
- Gradually pour the wet mixture into the dry ingredients; add white vinegar and mix until just combined.
- Divide the batter evenly between the prepared pans and smooth the tops.
- Bake for 25-30 minutes or until a toothpick comes out clean.
- Let the cakes cool for 10 minutes, then turn them out onto wire racks to cool completely.
- Beat together cream cheese and butter until fluffy; gradually add powdered sugar and vanilla extract.
- Spread frosting between the layers, then frost the top and sides.