

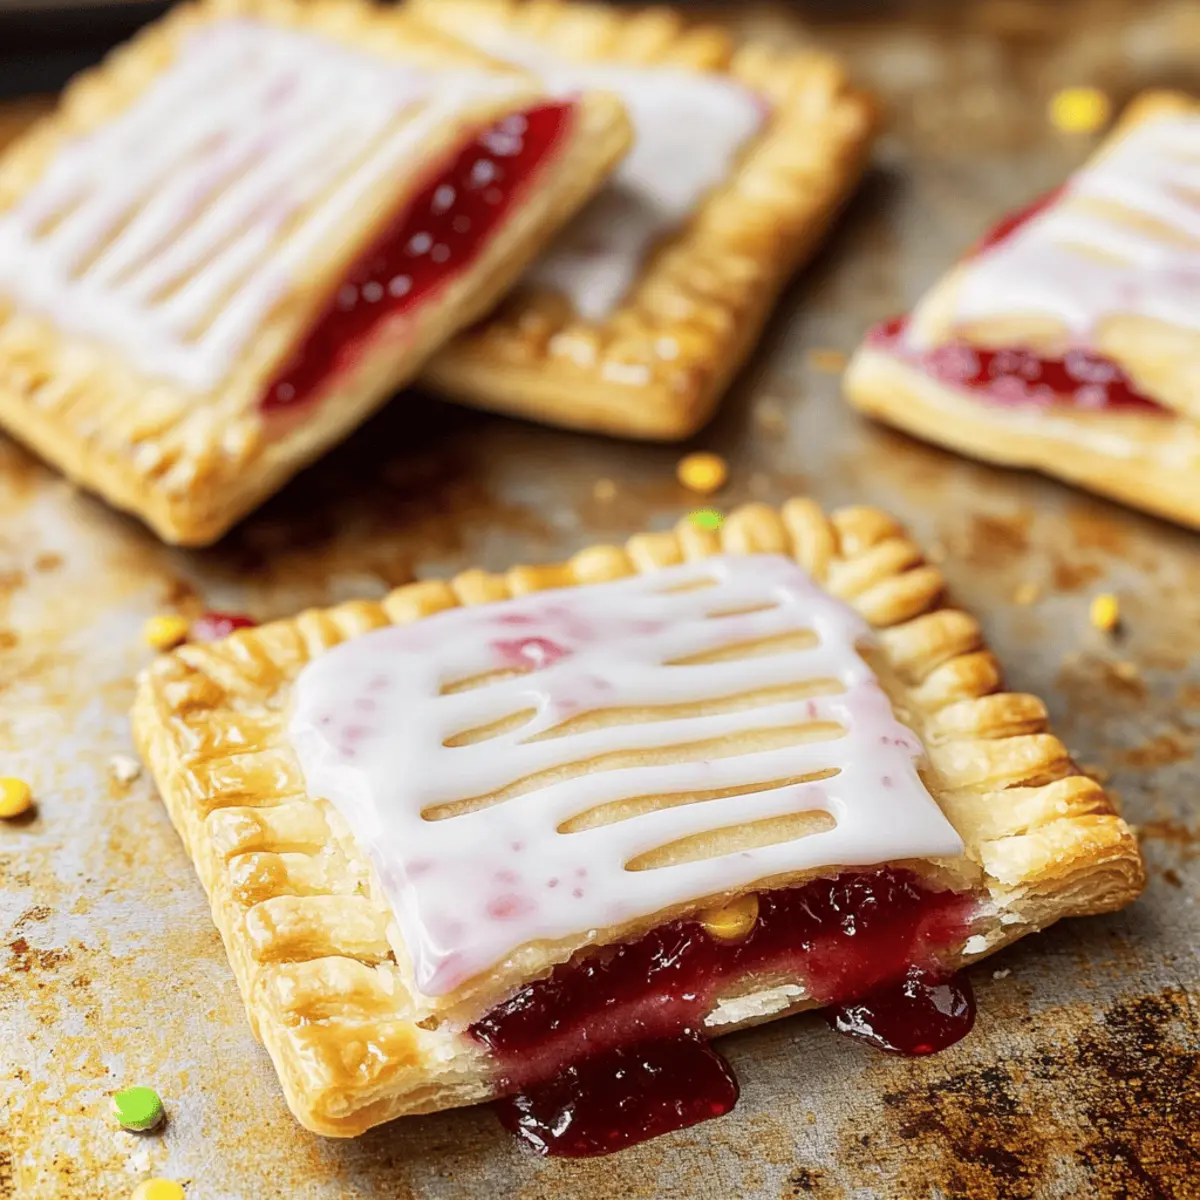
Stumbling upon a box of childhood memories, I found myself reminiscing about the sweet joy of pop tarts on lazy Saturday mornings. These homemade gluten-free pop tarts with strawberry jam perfectly capture that nostalgia while offering a flavorful treat tailored for gluten-free diets. With a flaky, buttery pastry that hugs a luscious strawberry filling, these delightful pastries are not just a blast from the past—they’re also a quick and easy way to treat yourself and your loved ones. Imagine biting into a warm pop tart, topped with a smooth vanilla glaze, and feeling that comforting connection to simpler times. Ready to bring a taste of nostalgia into your kitchen? Let’s dive into the whimsical world of gluten-free baking and create something truly special together!
Why Try Homemade Gluten-Free Pop Tarts?
Nostalgia: Relive your childhood mornings with these delightful pastries—each bite brings back sweet memories!
Easy to Make: Simple steps mean you don’t need to be a pro to whip up these tasty treats.
Customizable Flavors: Swap in your favorite jams, like raspberry or apricot, for a personal touch!
Healthier Option: You control the ingredients, so these pop tarts can be made with less sugar or vegan alternatives.
Perfect for Sharing: Ideal for breakfast or snacks, they’re sure to impress friends and family—try serving them with a cup of coffee!
Gluten-Free Pop Tarts Ingredients
For the Pastry
• Gluten-Free All-Purpose Rice Flour Blend – Provides structure; ensure it contains xanthan gum for proper texture.
• Granulated Sugar – Adds sweetness; coconut sugar is a great substitute for a less refined option.
• Salt – Enhances flavors; opt for kosher salt or sea salt for the best results.
• Unsalted Butter – Contributes to flakiness and flavor; Smart Balance butter works as a dairy-free alternative.
• Shortening – Keeps the pastry moist and flaky; avoid replacing it with butter as it affects texture.
• Large Eggs – Binds the ingredients together; for egg-free, use flax eggs or aquafaba.
• Apple Cider Vinegar – Aids dough elasticity; can be substituted with lemon juice.
• Ice Cold Water – Hydrates the flour for the dough; ensure it’s ice-cold for optimal results.
For the Filling
• Gluten-Free Seedless Strawberry Jam – Sweet filling; feel free to substitute with any other seedless fruit jam, like raspberry or apple.
For the Glaze
• Egg Wash – Ensures a golden brown finish on the pastries; for a vegan option, use almond or soy milk.
• Powdered Sugar – Sweetens and adds glaze; powdered erythritol is a sugar-free substitute.
• Pure Vanilla Extract – Enhances the glaze’s flavor; be sure to use natural extract for the best results.
• Water (for glaze) – Thins out the glaze for spreading; milk or a dairy-free alternative can add flavor.
Step‑by‑Step Instructions for Homemade Gluten-Free Pop Tarts
Step 1: Prepare the Dough
Start by freezing your unsalted butter and shortening until very cold, about 30 minutes. In a large mixing bowl, whisk together the gluten-free all-purpose flour blend, granulated sugar, and salt. Once your fats are chilled, cut them into the flour mixture using a pastry cutter until the mixture resembles coarse crumbs.
Step 2: Combine Ingredients
Next, mix in the large eggs, apple cider vinegar, and ice-cold water. Stir until the dough comes together; it should be sticky and slightly tacky. Shape the dough into a ball, wrap it in plastic wrap, and chill in the refrigerator for 45 minutes to allow the flavors to meld and the dough to firm up.
Step 3: Shape and Cut the Dough
While the dough is chilling, preheat your oven to 350°F (175°C). Once chilled, roll out half of the dough on a lightly floured surface to about 1/4 inch thick. Use a sharp knife or a pizza cutter to cut the rolled dough into 3×4-inch rectangles. Repeat this process with the remaining dough to create the tops for your gluten-free pop tarts.
Step 4: Assemble the Pop Tarts
Take half of the rectangles and spread 2 teaspoons of gluten-free seedless strawberry jam in the center of each. Place the remaining rectangles on top, pressing gently around the edges to seal. Use a fork to crimp the edges securely and poke a few holes in the tops for steam release, ensuring your pop tarts maintain a flaky texture.
Step 5: Bake and Cool
Brush the tops of each assembled pop tart with an egg wash for a golden finish. Place them on a baking sheet lined with parchment paper and bake in the preheated oven for 20-25 minutes, or until they are golden brown and fragrant. Allow the pop tarts to cool on the baking sheet for 5 minutes before transferring them to a wire rack.
Step 6: Prepare the Glaze
While the pop tarts cool, whisk together the powdered sugar, pure vanilla extract, and water in a bowl until smooth and glossy. Once the pastries have cooled completely, pour or spread the glaze over the tops of each pop tart, letting it drip down the sides for a delightful finish. Allow the glaze to set for a few minutes before serving.
Expert Tips for Gluten-Free Pop Tarts
- Accurate Measurements: Use the “spoon & level” method for measuring gluten-free flour to ensure the right consistency; too much flour can lead to dry pop tarts.
- Chill Time Matters: Don’t skip the chilling step; allowing the dough to chill helps create that flaky texture we all crave in gluten-free pop tarts.
- Filling Fun: Experiment with different fillings like Nutella, apple preserves, or even lemon curd to tailor your pop tarts to your family’s preferences.
- Avoid Dough Puffing: If you notice dough puffing up during baking, roll it out thinner or use a fork to knock it down slightly before baking—a trick to maintain structure!
- Creative Glazes: For a unique touch, add food coloring or flavored extracts to the glaze, enhancing both appearance and taste of your homemade treat!
Gluten-Free Pop Tarts Variations
Feel free to unleash your creativity and make these pop tarts your own with these fun twists!
-
Fruity Fillings: Substitute strawberry jam with raspberry, apricot, or even blueberry for a delightful taste of summer.
-
Chocolate Lovers: Incorporate cocoa powder into the dough for a chocolatey base, then use chocolate spread as the filling for a decadent treat.
-
Nutty Delights: Add crushed nuts like almonds or pecans into the dough for an extra crunch and nutty flavor that pairs beautifully with any fruit jam.
-
Festive Sprinkles: Top with gluten-free sprinkles over the glaze for a festive vibe, perfect for special occasions or just to brighten your day!
-
Savory Twist: Turn these into savory pastries by swapping jam for a creamy cheese filling with herbs for a brunch delight.
-
Dairy-Free Alternative: Use coconut oil instead of butter to create a delightful dairy-free version without sacrificing flavor.
-
Vegan-Friendly: Replace eggs with flax eggs or aquafaba, and use plant-based milk for the glaze to cater to your vegan friends.
-
Zesty Lemon Glaze: Switch to a lemon glaze by substituting some water with fresh lemon juice for a tangy twist that brightens the taste!
Don’t forget, these pop tarts are a canvas for your imagination. For more deliciously creative ideas, check out my Oreo Cake Pops and explore different flavor combinations!
What to Serve with Homemade Gluten-Free Pop Tarts?
Serve these delightful pastries with a variety of delicious sides that make breakfast or snack time even more special!
-
Fresh Berries: A medley of strawberries, blueberries, and raspberries adds a burst of freshness that complements the sweet pop tarts beautifully.
-
Whipped Cream: Light and airy, whipped cream elevates every bite, providing a luscious contrast to the flaky pastry.
-
Greek Yogurt: A dollop of Greek yogurt brings a creamy, tangy element that balances the sweetness of the pop tarts perfectly.
-
Coffee or Tea: A warm cup of coffee or a soothing herbal tea makes for a comforting pairing, enhancing the nostalgic experience.
-
Fruit Salad: A colorful bowl of mixed fruit brings bright and refreshing flavors that soften the sweetness of the pop tarts.
-
Nut Butter: Spread a thin layer of almond or peanut butter for a satisfying crunch and added protein. It transforms your treat into a more wholesome option.
-
Ice Cream: For dessert lovers, a scoop of vanilla or strawberry ice cream turns your pop tarts into a decadent sweet indulgence.
-
Milk: A classic pairing that adds a comforting element, perfect for dipping!
-
Chocolate Drizzle: For a touch of decadence, a drizzle of melted dark chocolate adds a rich finish that takes your pop tarts to the next level.
Make Ahead Options
These delightful gluten-free pop tarts are perfect for meal prep enthusiasts! You can prepare the dough up to 24 hours in advance by wrapping it tightly in plastic wrap and refrigerating it, which helps to develop the flavors. Additionally, you can assemble the filled pop tarts (without the egg wash) and refrigerate them for up to 3 days; just be sure to cover them to prevent drying out. When ready to bake, preheat the oven and brush on the egg wash, then bake as instructed. By making ahead, you save time on busy mornings while still enjoying fresh, homemade treats that are just as delicious as when made from scratch!
How to Store and Freeze Gluten-Free Pop Tarts
Room Temperature: Store cooled pop tarts in an airtight container at room temperature for up to 3 days to maintain freshness.
Fridge: If you prefer, keep them in the fridge for up to 6 days. Just be sure they’re wrapped well to prevent drying out.
Freezer: For longer storage, freeze pop tarts once cooled, ensuring they’re in an airtight container or tightly wrapped in plastic wrap. They can last up to 3 months.
Reheating: To enjoy a warm pop tart again, simply thaw in the fridge overnight, then reheat in a toaster oven at 350°F for about 5-7 minutes until warm.
Gluten-Free Pop Tarts Recipe FAQs
What is the best way to select ripe fruit for my filling?
Absolutely! When choosing ripe fruit for your filling, look for fruits that are fragrant and slightly soft to the touch. For strawberries, they should be vibrant red with no dark spots. Always opt for seedless jam for a smoother texture in your gluten-free pop tarts.
How should I store leftover pop tarts?
You can store your cooled gluten-free pop tarts in an airtight container at room temperature for up to 3 days. If you want to keep them fresh for a longer period, place them in the refrigerator where they will stay good for up to 6 days. Just make sure they’re wrapped nicely to avoid drying out.
Can I freeze homemade gluten-free pop tarts? If so, how?
Very! To freeze your homemade gluten-free pop tarts, first ensure they have cooled completely after baking. Then, wrap each pop tart individually in plastic wrap and place them in a freezer-safe container. They can be frozen for up to 3 months. When you’re ready to enjoy one, thaw it in the fridge overnight, then reheat in a toaster oven at 350°F for about 5-7 minutes until warm.
What can I do if my pop tart pastry is too crumbly?
If your gluten-free pop tart pastry turns out crumbly, it could be due to too much flour or insufficient moisture. Next time, try using the “spoon & level” method for accurate flour measurement, and consider adding a bit more cold water or even a few extra drops of vinegar to improve the dough’s elasticity.
Can I use non-gluten-free ingredients if I don’t need them to be gluten-free?
Yes, you can! If gluten isn’t a concern for you or you’re making pop tarts for friends or family who aren’t gluten-free, you can absolutely use regular all-purpose flour and traditional butter. However, it’s vital to adjust all measurements accordingly since gluten-free flours can behave differently in recipes.
Are there dietary considerations I should be aware of for pets or allergies?
Definitely! Always be cautious when sharing pastries with pets; dogs, for example, should avoid consumption of sugary foods. Additionally, for people with nut allergies, ensure the ingredients like almond or soy milk for the glaze are safe or substitute with an allergy-friendly milk alternative. Always double-check the ingredient labels for potential allergens.
Deliciously Easy Homemade Gluten-Free Pop Tarts Recipe
Ingredients
Equipment
Method
- Start by freezing your unsalted butter and shortening until very cold, about 30 minutes. In a large mixing bowl, whisk together the gluten-free all-purpose flour blend, granulated sugar, and salt. Cut the chilled fats into the flour mixture until it resembles coarse crumbs.
- Mix in the large eggs, apple cider vinegar, and ice-cold water. Stir until the dough comes together; it should be sticky. Shape into a ball, wrap in plastic wrap, and chill in the refrigerator for 45 minutes.
- Preheat your oven to 350°F (175°C). Roll out half of the dough on a lightly floured surface to about 1/4 inch thick. Cut into 3x4-inch rectangles. Repeat with the remaining dough for the tops.
- Take half the rectangles and spread 2 teaspoons of gluten-free seedless strawberry jam in the center. Place the remaining rectangles on top, sealing the edges by crimping with a fork and poking holes in the tops for steam.
- Brush the tops with an egg wash, place on a baking sheet lined with parchment paper, and bake for 20-25 minutes until golden brown. Cool on the baking sheet for 5 minutes before transferring.
- Whisk together the powdered sugar, pure vanilla extract, and water until smooth. Once cooled, pour or spread the glaze over the pop tarts and let it set before serving.