On a chilly evening, as I stand in my kitchen, the warming scent of honey and baked goodness fills the air, beckoning me back to cherished memories. This irresistible Russian Honey Cake is more than just a dessert; it’s a comforting embrace on a plate. With its rich, honey-infused sponge and luxurious creamy frosting, it quickly transforms any gathering into a celebration or turns a quiet night into something special. What I love most is that it’s both a crowd-pleaser and an incredibly straightforward recipe, making it perfect for both seasoned bakers and novices alike. Are you ready to dive into the delightful world of this multi-layered wonder and create some sweet memories of your own?

What makes Russian Honey Cake so special?
Warm, Nostalgic Flavors: Each bite of this cake brings back comforting memories, evoking a sense of home and love.
Simple Yet Elegant: With straightforward steps, even novice bakers can achieve impressive results without stress.
Versatile for Occasions: Perfect for gatherings or cozy nights, it suits any celebration and pairs beautifully with coffee or tea.
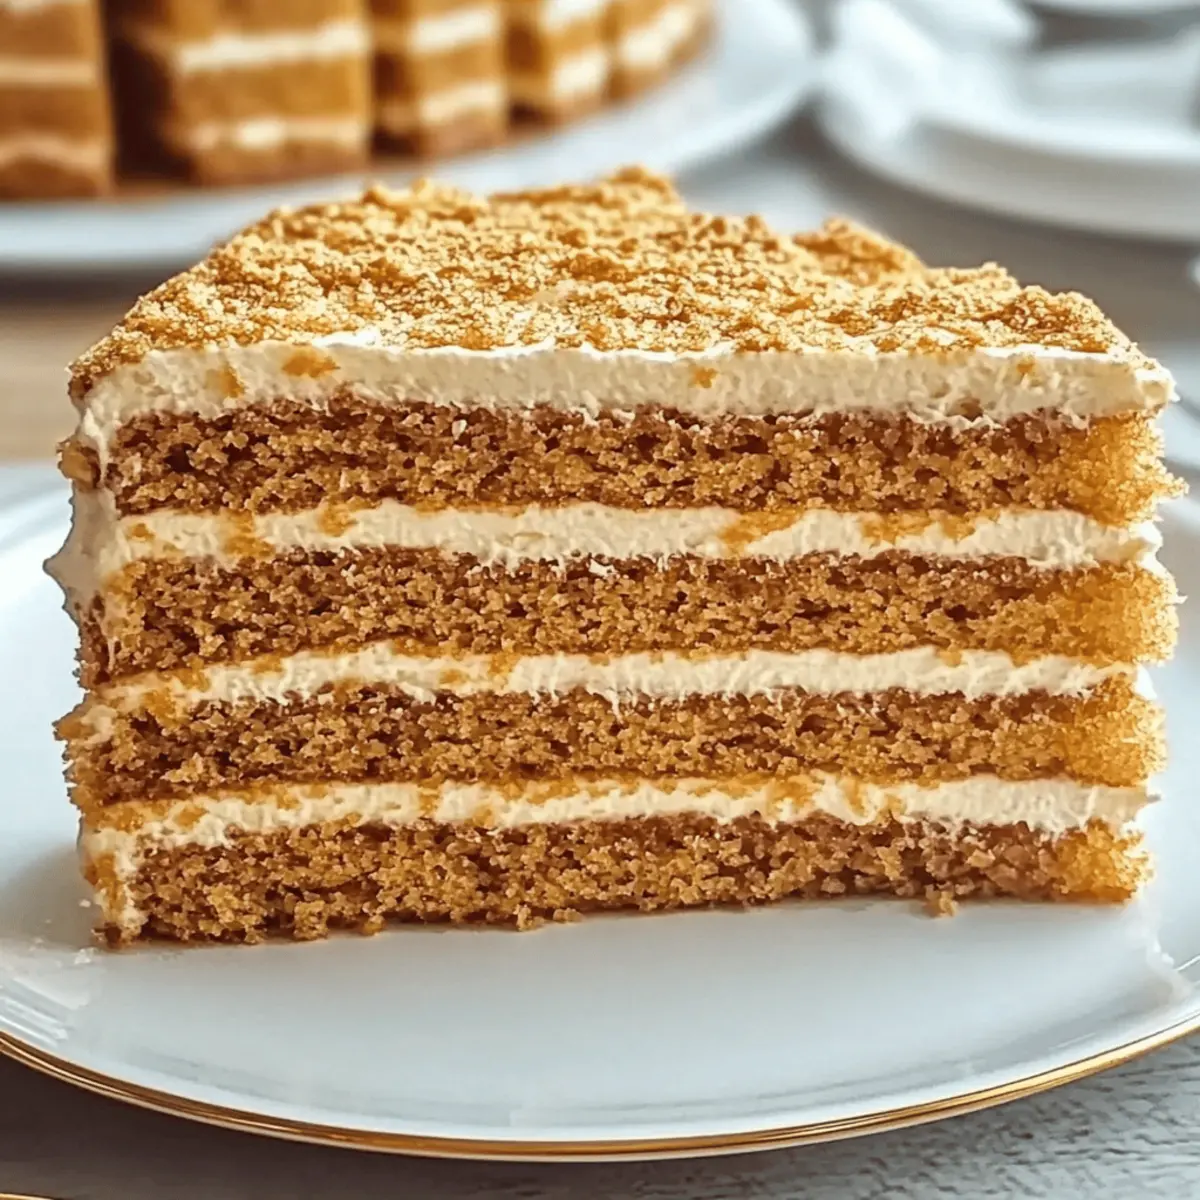
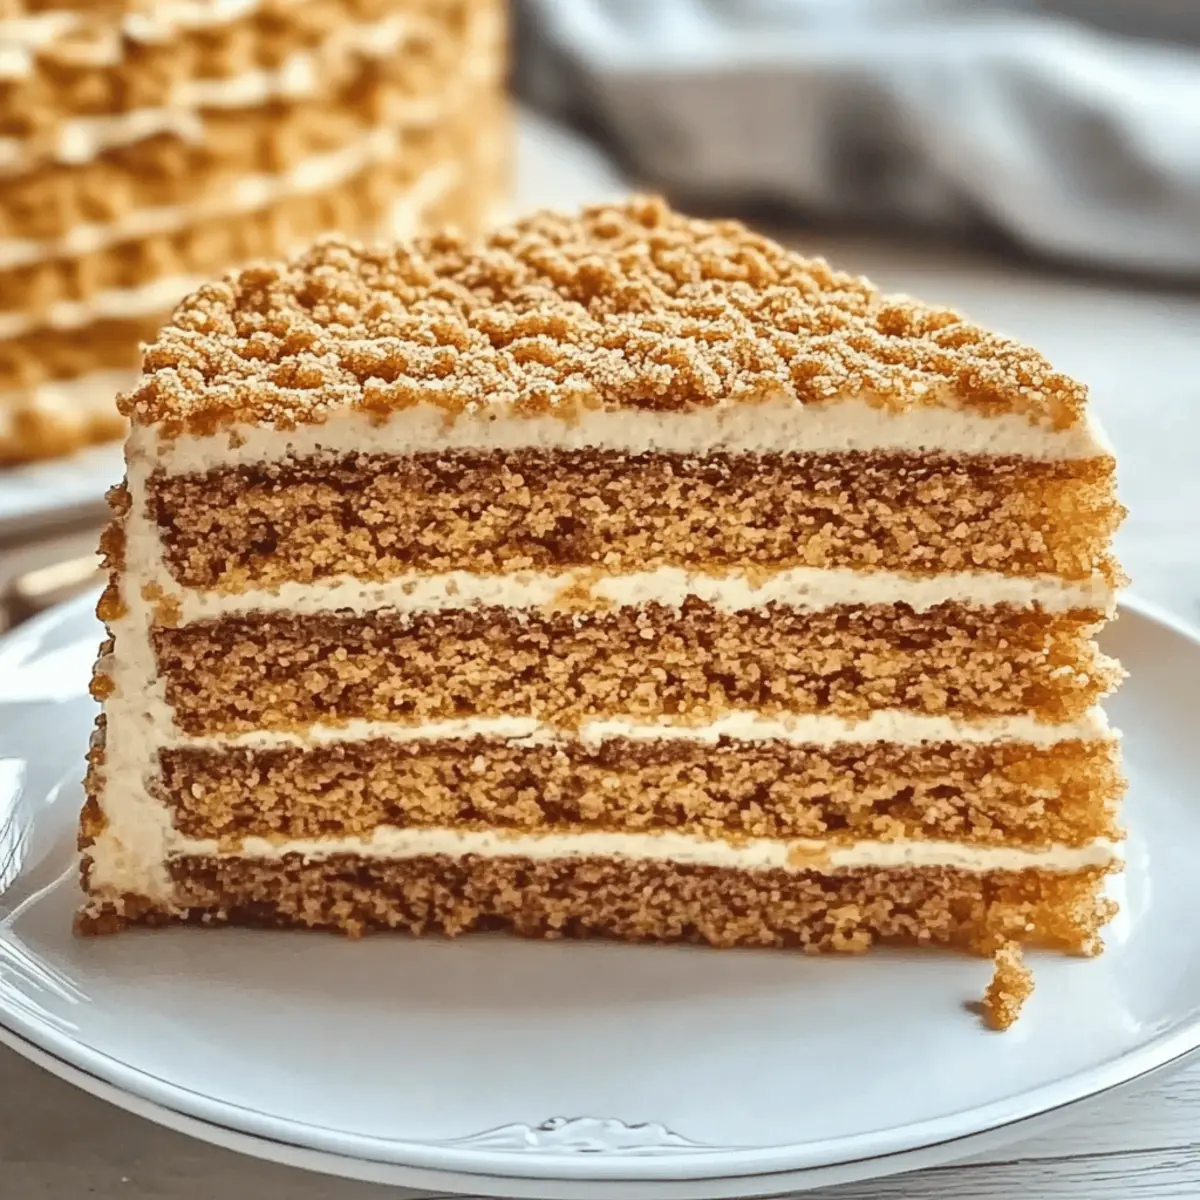
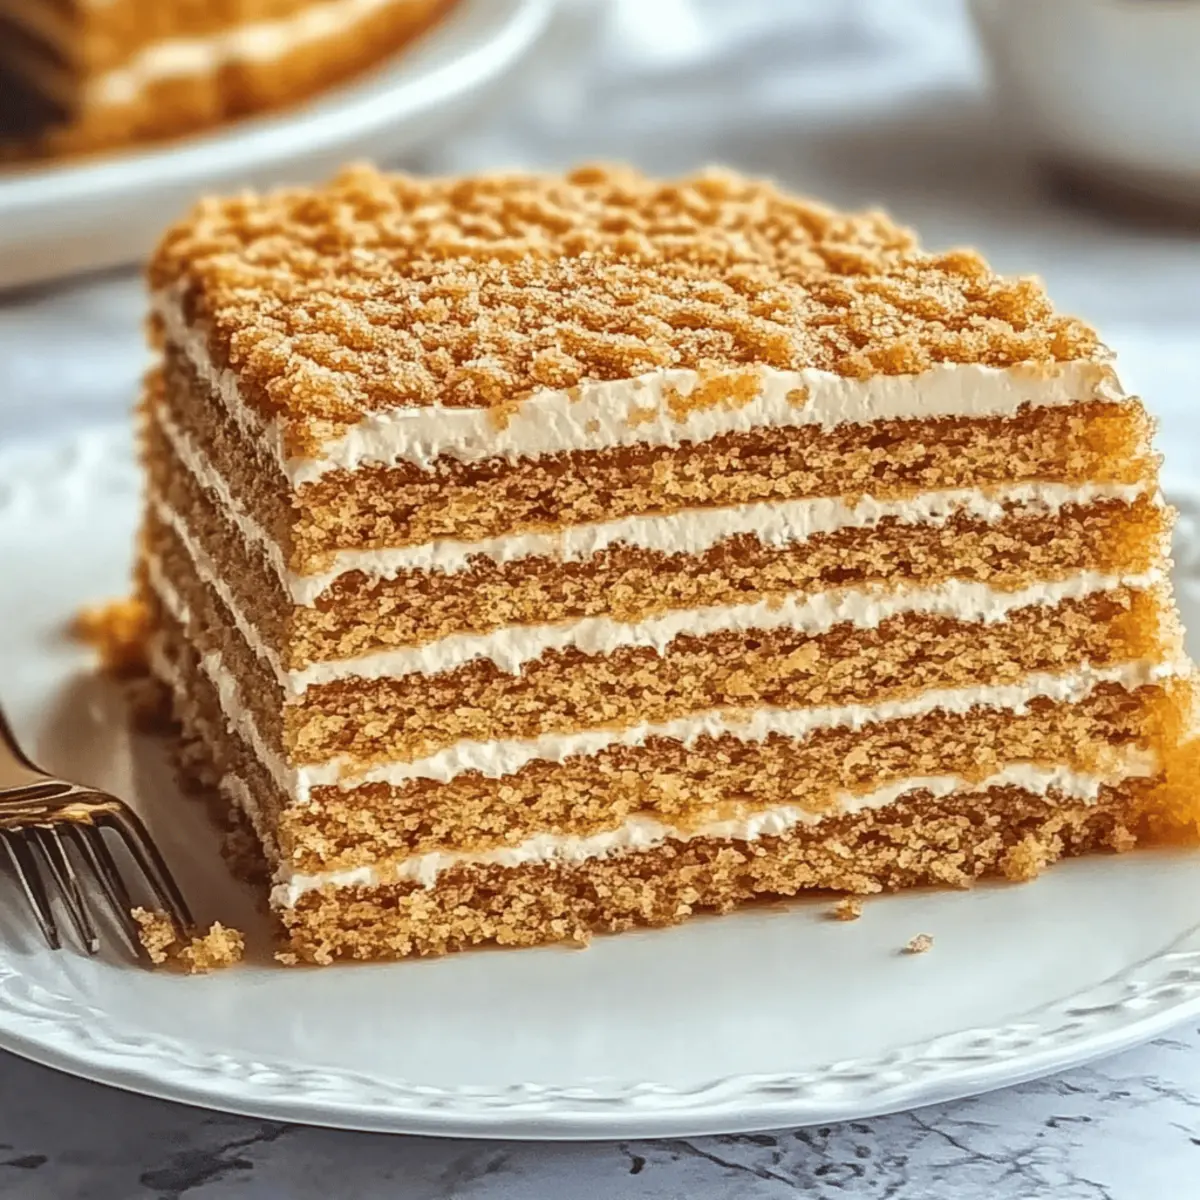
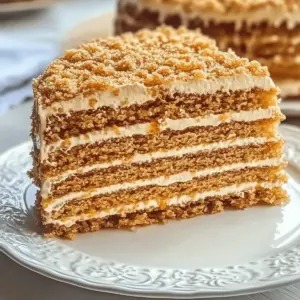
Irresistible Texture: The honey-infused sponge combined with creamy frosting creates a delightful contrast, ensuring every slice is a joy.
Make-Ahead Convenience: Prepare it in advance—allowing flavors to meld overnight only enhances the taste!
This delightful treat reminds you to savor the moment and create lasting memories with loved ones, just like with the beloved Oreo Cake Pops or Grilled Honey Buffalo Chicken Thighs.
Russian Honey Cake Ingredients
• A perfect blend of sweetness awaits!
For the Cake Layers
- All-Purpose Flour – Provides structure for the cake layers; substitute with gluten-free flour for a gluten-free version.
- Honey – Adds sweetness and a distinct flavor, enhancing moisture and richness; maple syrup can be used as a substitute.
- Granulated Sugar – Sweetens the batter and balances flavors; consider reducing the quantity if using very sweet honey.
- Unsalted Butter – Contributes to the cake’s tenderness and flavor; can be replaced with coconut oil for a dairy-free option.
- Eggs – Helps bind the ingredients and provides moisture; flax eggs (1 tablespoon flaxseed meal + 2.5 tablespoons water per egg) can be used as a vegan alternative.
- Baking Soda – A leavening agent that helps the cake rise; ensure it is fresh for optimal results.
For the Frosting
- Heavy Cream – Used to create a rich frosting, lending a luxurious texture; whipped coconut cream can be substituted for a dairy-free frosting.
- Vanilla Extract – Adds depth of flavor; optional, but enhances the cake’s sweetness.
Step‑by‑Step Instructions for Russian Honey Cake
Step 1: Preheat the Oven
Begin by preheating your oven to 350°F (175°C). Prepare two round cake pans by greasing them with unsalted butter and lining the bottoms with parchment paper. This will ensure that your cakes release easily once baked. It’s essential to have your oven at the right temperature for even baking, which is crucial for the fluffy texture of the Russian Honey Cake.
Step 2: Cream Ingredients
In a large mixing bowl, combine softened unsalted butter and granulated sugar. With an electric mixer, beat the mixture on medium speed until it becomes light and fluffy—about 3-5 minutes. Next, add the eggs one at a time, mixing well after each addition. Finally, pour in the rich honey and stir until fully combined. This creates a luscious base for your honey cake.
Step 3: Combine Dry Ingredients
In a separate bowl, whisk together the all-purpose flour and baking soda until evenly mixed. Gradually add this dry mixture to your wet ingredients, alternating with the heavy cream. Mix until the batter is smooth and well-combined, ensuring there are no lumps. This step is vital for achieving the tender crumb texture in your Russian Honey Cake.
Step 4: Bake Cakes
Divide the batter evenly between the prepared cake pans. Place the pans in the preheated oven and bake for 25-30 minutes, or until a toothpick inserted into the center comes out clean. Keep an eye on the cakes; they should turn a beautiful golden brown. Once baked, carefully remove the pans and allow the layers to cool completely in the pans on a wire rack.
Step 5: Make Frosting
While the cake layers are cooling, prepare the frosting. In a large mixing bowl, whip the heavy cream alongside the vanilla extract until soft peaks form. Gradually fold in some honey to sweeten the cream, mixing gently to maintain the airy texture. This luscious frosting will perfectly complement the layers of your Russian Honey Cake, adding a touch of indulgence.
Step 6: Assemble Cake
Once the cake layers are completely cool, it’s time to assemble your Russian Honey Cake. Place one layer on a serving platter and spread a generous amount of the honey frosting on top. Carefully add the second layer, then frost the top and sides of the cake with the remaining frosting. Aim for a smooth, decorative finish; this is what makes your cake truly eye-catching and delicious.
What to Serve with Irresistible Russian Honey Cake
The delightful layers of this honey-infused dessert create a perfect centerpiece, inviting you to create a warm gathering around the table.
-
Creamy Vanilla Ice Cream: A scoop adds a delightful contrast, enhancing the cake’s sweetness and providing cool relief against its rich layers.
-
Brewed English Breakfast Tea: This robust tea pairs beautifully, complementing the cake’s honey notes while calming the senses.
-
Fresh Berries: A burst of tartness from strawberries or raspberries elevates the flavors and adds a delightful pop of color.
-
Chai Latte: The warm spices in chai harmonize wonderfully with the cake’s ingredients, creating a cozy flavor blend that’s perfect for an evening treat.
-
Honey Drizzle: A simple honey drizzle over each slice enhances the natural sweetness and connects the flavors, marrying them beautifully.
-
Caramel Sauce: Drizzling warm caramel adds a luxurious touch, bringing richness to the cake and making each bite decadent.
Indulge in these side treats that not only enrich the dining experience but also create a memorable moment with every bite of your Russian Honey Cake!
Expert Tips for Russian Honey Cake
-
Ingredient Prep: Ensure all ingredients are at room temperature for better blending, which will lead to a smoother batter for your Russian Honey Cake.
-
Layer Cooling: Allow cake layers to cool completely before frosting. This prevents the frosting from melting and ensures a beautiful finish.
-
Flavors Deepen: For best results, let your assembled cake rest in the fridge overnight. This allows the flavors to meld together, enhancing the overall taste.
-
Frosting Consistency: Whip the cream until soft peaks form, but avoid overbeating. This keeps the frosting from becoming too stiff and helps it spread easily between layers.
-
Serving Ideas: Serve your Russian Honey Cake with a side of freshly brewed tea or coffee. This complementary pairing elevates the cake’s comforting qualities, making it a delightful experience.
How to Store and Freeze Russian Honey Cake
Room Temperature: Keep the Russian Honey Cake at room temperature in an airtight container for up to 3 days. This will maintain its fluffy texture and rich flavor.
Fridge: For extended freshness, refrigerate any leftovers for up to 5 days. Ensure it’s tightly wrapped or stored in an airtight container to prevent drying out.
Freezer: You can freeze the assembled Russian Honey Cake for up to 2 months. Wrap it tightly in plastic wrap and then aluminum foil to avoid freezer burn.
Reheating: To enjoy, thaw the cake in the refrigerator overnight, then bring it to room temperature before serving for the best texture.
Russian Honey Cake Variations & Substitutions
Feel free to add your own twist to the Russian Honey Cake with these delightful variations that spark creativity and flavor!
-
Nuts: Sprinkle crushed walnuts or almonds between layers for a delightful crunch that complements the cake’s sweetness. The added texture elevates the dessert’s experience in every bite!
-
Spices: Infuse warmth by adding a pinch of cinnamon or nutmeg to the batter. These spices enhance the cozy flavors, making each slice even more inviting.
-
Frosting Variations: Stir in cocoa powder to create a rich chocolate frosting, transforming the honey cake into a dreamy, decadent treat. It’s perfect if you’re in the mood for a chocolatey twist!
-
Fruit Layers: Incorporate fresh berries or thinly sliced bananas between the cake layers for a burst of freshness. The combination of fruit with the honey cake layers adds a refreshing contrast.
-
Caramel Drizzle: Finish your cake with a drizzle of caramel sauce for a sticky, indulgent topping. It adds a luxurious finish that’s sure to leave a sweet impression on your guests!
-
Heat: For a spicy kick, incorporate a dash of cayenne pepper into the frosting. The slight heat pairs wonderfully with the sweetness of the honey, making for an exciting flavor adventure.
-
Coconut: Use coconut cream instead of heavy cream in the frosting for a tropical flair. This substitution adds a delightful flavor that pairs beautifully with the honey layers.
This adaptable cake is just as easy to customize as it is to make! If you’re looking for additional dessert inspiration, try out the delicious Banana Coffee Cake or enjoy a savory meal with Harissa Honey Chicken. Happy baking!
Make Ahead Options
These Russian Honey Cake layers are perfect for meal prep enthusiasts! You can bake the cake layers up to 3 days in advance—just make sure to let them cool completely, then wrap them tightly in plastic wrap to prevent drying out. Additionally, you can whip the frosting (up to 24 hours before serving) and store it in the refrigerator in an airtight container. When you’re ready to enjoy your cake, simply assemble it by placing a layer on your serving platter, spreading the frosting generously between the layers, and finishing with the remaining frosting on the top and sides. This method not only saves you time but also allows the flavors to meld beautifully, delivering a truly delicious Russian Honey Cake with minimal effort!
Russian Honey Cake Recipe FAQs
How do I select the right honey for my Russian Honey Cake?
Absolutely! Choose a high-quality honey that you love the taste of, as it’s the star ingredient in this recipe. Look for local, raw honey if possible, as it holds richer flavors compared to processed varieties. If you’re not keen on strong sweetness, consider clover or wildflower honey for a milder flavor profile.
How should I store leftover Russian Honey Cake?
Very! You can store the Russian Honey Cake in an airtight container at room temperature for up to 3 days. If you want to keep it fresher for longer, refrigerate it for up to 5 days. Make sure it’s well-wrapped or sealed to prevent it from drying out.
Can I freeze my Russian Honey Cake?
Absolutely! You can freeze the assembled Russian Honey Cake for up to 2 months. To do this, wrap the cake tightly in plastic wrap, followed by a layer of aluminum foil. This double wrapping helps prevent freezer burn. When you’re ready to enjoy it, simply thaw it in the refrigerator overnight and bring it to room temperature before serving.
What should I do if my cake layers rise unevenly?
No worries! If your cake layers don’t rise evenly, it could be due to uneven oven temperature or improperly mixed batter. Always use a reliable oven thermometer to ensure accurate temperatures. When mixing, make sure to incorporate the dry ingredients gently and evenly until just combined. If you notice that one layer has domed more than the other, you can level it off with a serrated knife after they’ve cooled completely.
Are there any dietary considerations for making Russian Honey Cake?
Yes! If you’re making this cake for someone with dietary restrictions, consider using gluten-free flour for a gluten-free version and flax eggs for a vegan alternative. The heavy cream in the frosting can be replaced with whipped coconut cream for a dairy-free option. Always check with your guests to accommodate allergies, especially to nuts if you choose to add them for texture.
How do I enhance the flavor of my Russian Honey Cake?
Certainly! Let your assembled Russian Honey Cake rest in the refrigerator for at least 6 hours or overnight. This chilling time allows the flavors to meld beautifully, resulting in a richer taste. You might also consider adding a sprinkle of cinnamon or nutmeg to the batter for a warm, spicy kick that complements the honey beautifully!
Savor Every Bite of This Delightful Russian Honey Cake
Ingredients
Equipment
Method
- Preheat your oven to 350°F (175°C) and prepare two round cake pans by greasing them.

- In a mixing bowl, cream softened unsalted butter and granulated sugar until fluffy. Add eggs one at a time and mix well.

- Combine all-purpose flour and baking soda in a separate bowl. Gradually add to wet ingredients, alternating with heavy cream until smooth.

- Divide the batter into prepared pans and bake for 25-30 minutes until a toothpick comes out clean.
- Whip the heavy cream with vanilla until soft peaks form. Fold in honey to sweeten gently.

- Assemble the cake by placing one layer on a platter, spreading frosting, adding the second layer, and frosting the top and sides.