

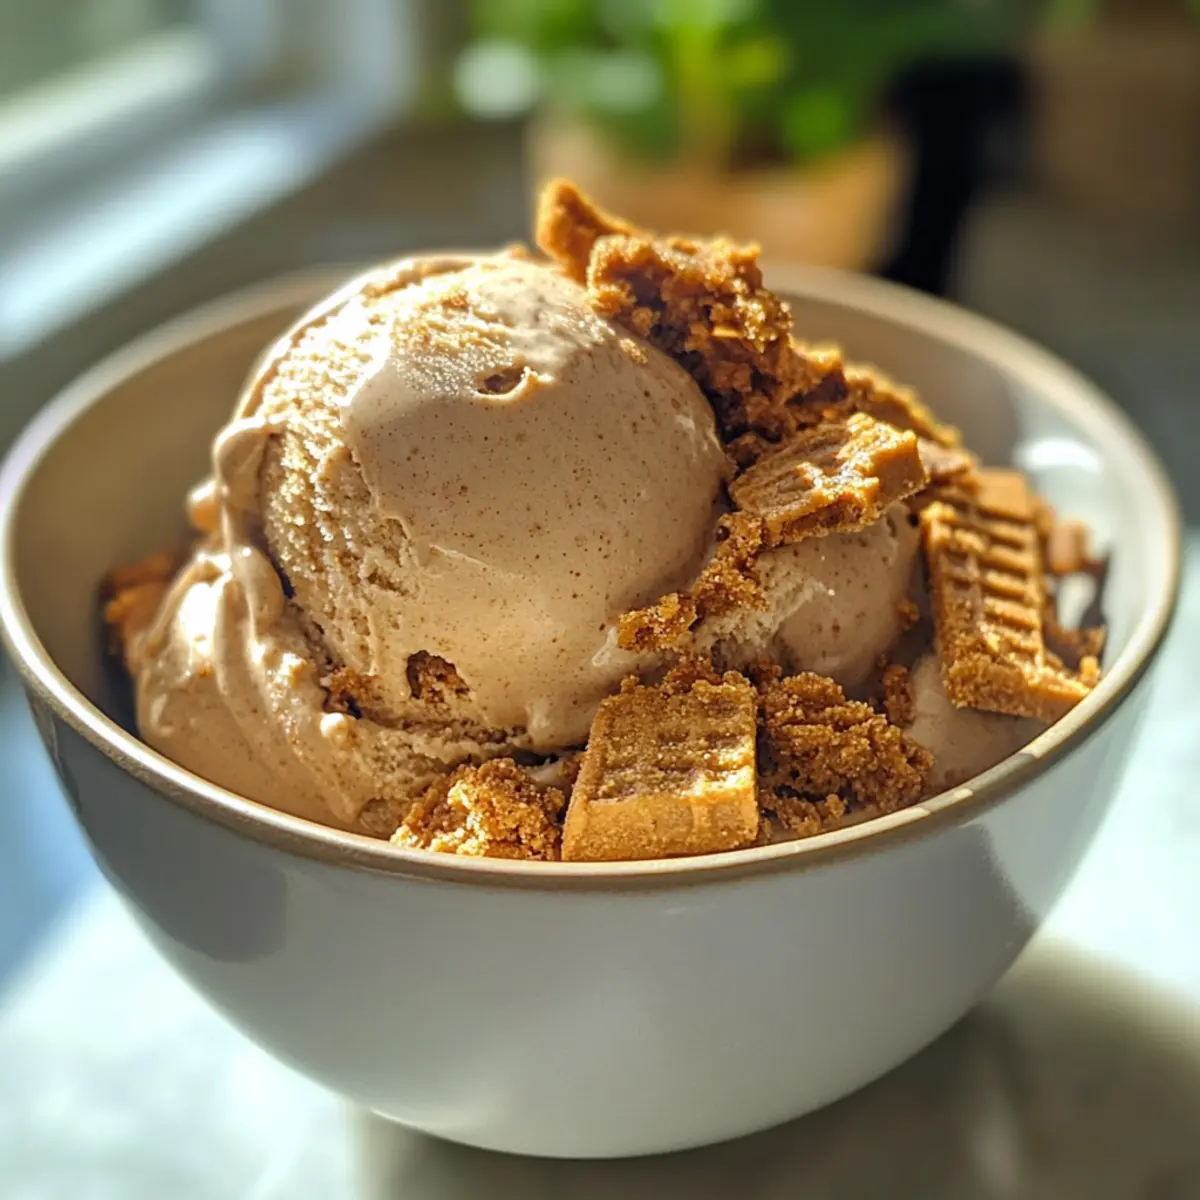
As summer heat rolls in, who wouldn’t crave a cool, creamy treat? Enter my Easy No-Cook Biscoff Ice Cream—a delightful twist on classic homemade ice cream that marries the warm spices of cookie butter with crunchy Biscoff cookies. This recipe shines not only because it’s effortless and egg-free, making it a breeze for anyone to whip up, but it also transforms your kitchen into a cozy ice cream parlor any day of the week. Whether you’re hosting a backyard BBQ or simply craving something sweet at home, this Biscoff Ice Cream is the perfect solution. Plus, with endless variation options—like sprinkling in chocolate chips or even a swirl of caramel—you’ll keep your taste buds entertained all summer long. Are you ready to discover how to make this dreamy dessert?
Why is Biscoff Ice Cream irresistible?
Simplicity: This no-cook recipe means you can create luscious ice cream without any cooking hassle, making it perfect for all skill levels.
Decadent Flavor: With the unique blend of cookie butter and crunchy Biscoff cookies, each spoonful is bursting with rich, spiced goodness that’s simply addictive.
Endless Customization: Feel free to get creative! Swap cookie butter for nut butter or add in chocolate chips or caramel for a personalized twist that suits your cravings.
Crowd-Pleasing Treat: Whether you’re throwing a summer gathering or enjoying a quiet evening in, this ice cream is sure to wow friends and family alike—perfectly scalable for parties!
Quick Freezing Time: Chill your mixture before churning, saving time and ensuring you can enjoy this delightful dessert sooner.
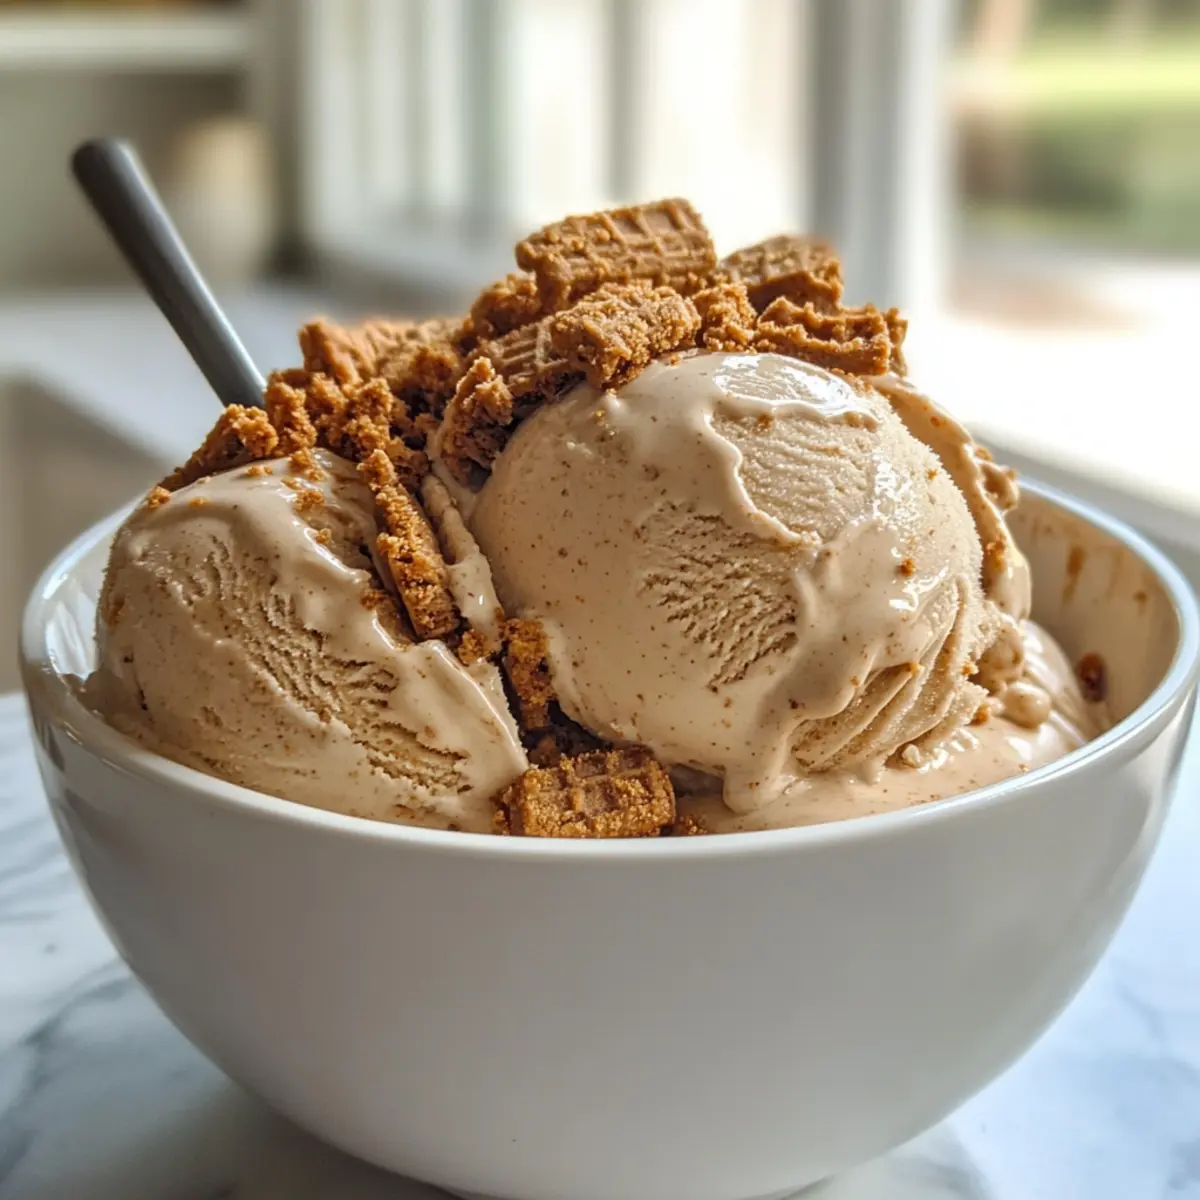
Serve it in waffle cones or bowls with a drizzle of melted chocolate, just like what you get with this Caramel Cream Pie! Your home will feel just like an ice cream parlor.
Biscoff Ice Cream Ingredients
-
For the Base
-
Whole Milk – Provides creaminess and richness. Substitute with low-fat milk for a lighter version, but the texture will be less creamy.
-
Organic Cane Sugar – Adds sweetness. Other sweeteners like coconut sugar or honey can be used, but may alter flavor intensity.
-
Salt – Enhances sweetness and balances flavors. Can use sea salt for a different flavor profile.
-
Biscoff Cookie Butter – Main flavor component, adds a sweet spice profile. Ensure it’s at room temperature for easier mixing.
-
Heavy Cream – Creates a rich, creamy texture. Light cream or half-and-half can be used, but the ice cream will be less indulgent.
-
For the Crunch
-
Biscoff Cookies (Crushed) – Provides texture and additional flavor. Use any similar spiced cookie if unavailable, or make homemade Biscoff cookies.
Step‑by‑Step Instructions for Biscoff Ice Cream
Step 1: Mix the Base
In a large mixing bowl, combine the whole milk, Biscoff cookie butter, organic cane sugar, and a pinch of salt. Whisk together until the sugar is fully dissolved and the mixture is smooth and creamy, which should take about 2–3 minutes. This base will be the flavorful foundation for your Biscoff ice cream.
Step 2: Incorporate the Cream
Gently fold in the heavy cream to your milk mixture using a rubber spatula. Be careful not to whisk or stir too vigorously; the goal is to keep the mixture light and airy. Once fully combined, the mixture should have a silky consistency and an inviting aroma of cookie butter that signals it’s time to chill.
Step 3: Chill the Mixture
Cover the bowl with plastic wrap and place it in the refrigerator to chill for 1-2 hours. This step is essential as it helps to reduce churning time later on. The mixture should feel cold to the touch before moving on, ensuring that your homemade Biscoff ice cream sets up beautifully during the freezing process.
Step 4: Churn the Ice Cream
After chilling, pour the cold mixture into the ice cream maker according to the manufacturer’s instructions. Churn for 25-30 minutes, or until the ice cream reaches a soft-serve consistency. You’ll know it’s ready when it thickens and resembles a creamy, fluffy treat that is invitingly swirled.
Step 5: Layer with Crushed Cookies
Transfer the churned ice cream to a freezer-safe container. As you do this, layer crushed Biscoff cookies between layers of ice cream to add delightful crunch and flavor. Make sure the cookie pieces are evenly distributed throughout, enhancing every scoop of your Biscoff ice cream with a perfect mix of creaminess and crunch.
Step 6: Freeze for Firmness
Seal the container tightly and freeze the ice cream for 5-6 hours, allowing it to become firm. This freezing period is crucial to achieve the ideal scoopable texture that every homemade Biscoff ice cream lover craves. After some patience, you’ll be greeted with a decadent dessert ready for serving.
Expert Tips for Biscoff Ice Cream
-
Room Temperature Butter: Ensure the Biscoff cookie butter is at room temperature before mixing to achieve a smooth and creamy base.
-
Chill Time Matters: Don’t skip the refrigeration step; chilling for 1-2 hours not only melts the butter easily but also speeds up the churn time, resulting in a creamier ice cream.
-
Avoid Over-Churning: Keep an eye on the ice cream as it churns. Over-churning can lead to a grainy texture—stop when it reaches a soft-serve consistency.
-
Layering Cookies: When adding crushed Biscoff cookies, make sure they’re evenly distributed. This enhances texture and flavor throughout your Biscoff ice cream.
-
Storage Savvy: Store your ice cream in an airtight container to prevent ice crystals from forming, ensuring that each scoop remains delightfully smooth for weeks.
Biscoff Ice Cream Variations & Substitutions
Get creative and personalize your Biscoff Ice Cream with these delightful twists and swaps that will elevate your homemade treat!
-
Nutty Option: Swap out Biscoff cookie butter for almond or hazelnut spread for a delicious nutty twist; it will be a whole new experience.
-
Chocolate Delight: Add in some chocolate chips or chunks to your base for a rich, chocolatey surprise that beautifully contrasts the spiced Biscoff flavor.
-
Caramel Swirl: Drizzle ribbons of caramel sauce into the churned ice cream for a sweet, indulgent layer that will make every scoop even more irresistible!
-
Coffee Lovers: Mix in a teaspoon of instant coffee granules to your base before chilling for a delightful coffee-infused Biscoff treat; it’s the perfect afternoon pick-me-up.
-
Fruity Surprise: Toss in some chunks of fresh banana or strawberries during the last few minutes of churning for a fruity twist that adds a refreshing touch to the creamy base.
-
Dairy-Free Delight: Substitute the whole milk with coconut milk and the heavy cream with a plant-based alternative for a vegan-friendly version that keeps the flavor intact.
-
Spicy Kick: A dash of cinnamon or a pinch of ginger in the base can amp up the warm spices you’ll find in the Biscoff cookies. It’s a flavor experience you won’t forget!
-
Make it Minty: Infuse peppermint extract into the mixture for a cool minty Biscoff Ice Cream that gives a refreshing flavor, great for summer nights!
Pair your scoop with a slice of this rich Caramel Cream Pie for a truly indulgent dessert experience. The possibilities are endlessly delicious!
What to Serve with Easy No-Cook Biscoff Ice Cream
Elevate your summer dessert experience with delightful pairings that complement the rich, creamy goodness of this dreamy ice cream.
-
Waffle Cones: The crunchy texture of waffle cones adds a satisfying contrast to the creaminess of the ice cream, enhancing the overall experience.
-
Chocolate Sauce: Drizzling warm chocolate sauce creates a decadent contrast, adding richness and a touch of elegance to every scoop.
-
Fresh Berries: Juicy strawberries or raspberries balance the sweetness, introducing a refreshing burst of flavor that dances beautifully with the spice of Biscoff.
-
Caramel Swirl: Adding a swirl of caramel enhances sweetness while introducing a buttery note that harmonizes perfectly with the ice cream’s spice.
-
Crushed Nuts: Almonds or pecans add a delightful crunch and a nutty richness that beautifully complements the sweet, spiced ice cream.
-
Salted Pretzels: The salty crunch of pretzels contrasts wonderfully, offering a unique flavor profile that enhances the sweet and creamy notes of the Biscoff ice cream.
-
Espresso or Coffee: A rich cup of espresso harmonizes perfectly with the flavors, enhancing the dessert with notes of warmth and depth.
-
Bananas: Sliced bananas provide a delicious creaminess that marries beautifully with the Biscoff, making the ice cream even more indulgent.
-
Homemade Brownies: Pair with warm, fudgy brownies for the ultimate indulgent dessert experience that will leave your taste buds craving more.
How to Store and Freeze Biscoff Ice Cream
Fridge: Keep Biscoff ice cream in the fridge for short-term enjoyment; however, it’s best stored in the freezer for optimal texture and flavor.
Freezer: Store in an airtight container in the freezer for up to one month. If you anticipate that it will last longer, consider wrapping the container in foil for added protection against freezer burn.
Serving: When ready to serve, allow the ice cream to sit at room temperature for about 5-10 minutes to soften slightly for easier scooping.
Reheating: There’s no need to reheat Biscoff ice cream; just scoop and savor its creamy, rich goodness!
Make Ahead Options
These creamy Biscoff Ice Cream treats are perfect for meal prep enthusiasts looking to simplify their weeknights! You can prepare the ice cream base (whole milk, sugar, cookie butter, and salt) up to 24 hours in advance by mixing all the ingredients and refrigerating it until you’re ready to churn. To maintain the dreamy texture, be sure to chill the mixture well before pouring it into your ice cream maker. You can also crush the Biscoff cookies a day ahead and store them in an airtight container. When you’re ready to serve, simply churn the chilled base for 25-30 minutes, layer in the crushed cookies, and freeze for 5-6 hours—you’ll enjoy deliciously homemade Biscoff Ice Cream with minimal effort!
Biscoff Ice Cream Recipe FAQs
How do I select the best Biscoff cookies for this recipe?
Absolutely! When choosing Biscoff cookies, look for ones that are fresh and free from dark spots, which can indicate staleness. If you’re in a pinch, any spiced cookie with a similar texture will work—but nothing beats that classic Biscoff flavor!
What’s the best way to store leftover Biscoff ice cream?
I often keep my Biscoff ice cream in an airtight container in the freezer. It can last up to one month, but good luck with leftovers! To prevent ice crystals from forming, try wrapping the container in foil for added protection.
Can I freeze the Biscoff ice cream? If so, how?
Absolutely! After churning, transfer your ice cream to a freezer-safe container, layering it with crushed Biscoff cookies for added texture. Seal the container tightly and freeze it for 5-6 hours, or until it reaches your desired firmness. For the best texture, ensure it’s frozen completely before serving.
Why is my Biscoff ice cream grainy?
Great question! Graininess usually indicates that the ice cream was over-churned or not adequately chilled before churning. Be sure to churn just until it reaches a soft-serve consistency and don’t skip the chilling step—this helps achieve a smoother texture.
Is this Biscoff ice cream safe for those with egg allergies?
Very! This Biscoff ice cream is completely egg-free and vegetarian, making it a safe and delightful option for anyone avoiding eggs. However, do check your cookie butter for any traces of allergens, just to be extra safe.
What are some great variations for this Biscoff ice cream?
You’ve got options! Swap the Biscoff cookie butter for speculoos spread or nut butter for a different flavor. You could also mix in some chocolate chips or a swirl of caramel before freezing for even more decadence. The more the merrier!
Creamy Biscoff Ice Cream: No-Cook Delight for True Dessert Lovers
Ingredients
Equipment
Method
- In a large mixing bowl, combine whole milk, Biscoff cookie butter, organic cane sugar, and salt. Whisk until smooth and creamy for about 2-3 minutes.
- Gently fold in the heavy cream using a rubber spatula, ensuring a light and airy mixture.
- Cover the bowl with plastic wrap and refrigerate for 1-2 hours to chill.
- Pour the cold mixture into the ice cream maker and churn for 25-30 minutes until soft-serve consistency.
- Transfer churned ice cream to a freezer-safe container, layering crushed Biscoff cookies in between.
- Seal the container tightly and freeze for 5-6 hours for firmness.