

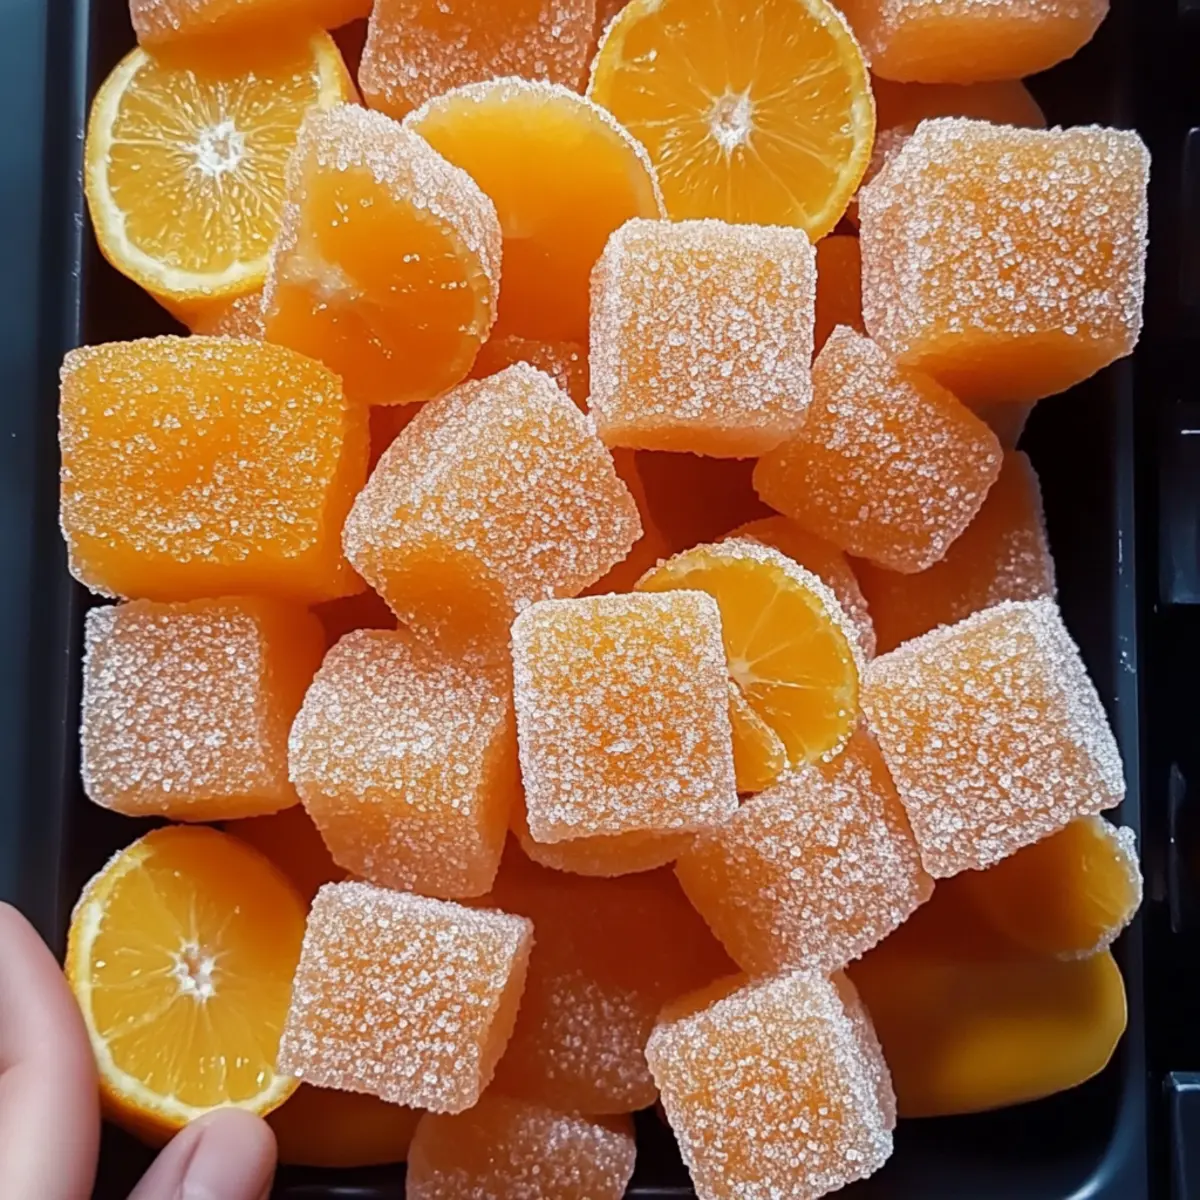
The sweet tang of citrus fills the air as I embark on a delightful kitchen adventure, conjuring memories of sun-kissed afternoons. Today, I’m excited to share my recipe for Classic Homemade Orange Candy—a nostalgic treat that’s surprisingly simple to whip up. With just a handful of ingredients, this chewy, zesty candy is not only a stunning showstopper but also a fantastic way to impress loved ones with a thoughtful, giftable dessert. Its quick prep time makes it perfect for spontaneous cravings, while the option to customize it with different fruits or flavors adds a fun twist to your candy-making experience. Are you ready to brighten your day with this cheerful delight?
Why Make Homemade Orange Candy?
Sweetness, Simplicity: This homemade orange candy comes together with just a few ingredients, making it ideal for both beginner cooks and seasoned chefs alike.
Zesty Delight: You’ll love the vivid flavor of fresh oranges, creating a treat that bursts with citrus goodness—perfect for brightening any day!
Giftable Treat: Dress up your creations for special occasions, as this candy makes a lovely and thoughtful gift, impressive in its homemade charm. You can even explore options like Chocolate Orange Posset for complementary desserts!
Versatile Flavorings: Want to mix things up? Feel free to swap in other fruits or add unique extracts to create a truly personalized candy experience.
Crowd-Pleaser: Everyone will adore these indulgent bites; they’re perfect for sharing at gatherings or enjoying during cozy afternoons!
Homemade Orange Candy Ingredients
For the Candy Mixture
- Fresh Oranges – Use ripe oranges for the most vibrant flavor; they are the star of this homemade orange candy!
- Granulated Sugar – Essential for sweetness and caramelization; no substitutions for the best taste.
- Corn Syrup – Helps prevent crystallization, ensuring a smooth texture; honey can be used as a substitute if needed.
- Gelatin – Gives the candy its chewy consistency; swap with agar-agar if looking for a vegetarian option.
- Water – Critical for dissolving gelatin and sugar; keep it simple—no substitutes necessary.
- Butter (Optional) – Enhances flavor and texture; you can omit for a dairy-free version.
- Confectioners’ Sugar (Optional) – Dust over the finished candy to prevent sticking and add a touch of sweetness.
Step‑by‑Step Instructions for Homemade Orange Candy
Step 1: Zest and Juice
Start by zesting three medium, fresh oranges using a microplane or fine grater, collecting the fragrant zest in a bowl. Then, juice the oranges until you have about ¾ cup of juice, and set both the zest and juice aside for later use in your delicious homemade orange candy.
Step 2: Prepare the Syrup
In a medium saucepan, combine the freshly squeezed orange juice, ¼ cup of water, 1 cup of granulated sugar, and ½ cup of corn syrup. Heat the mixture over medium heat while stirring continuously for about 5 minutes, or until the sugar has completely dissolved, allowing the syrup to gently simmer for a perfect blending of flavors.
Step 3: Bloom Gelatin
In a separate bowl, sprinkle 1 tablespoon of gelatin over ¼ cup of cold water and let it sit undisturbed for about 5 minutes. This process, known as blooming, is crucial for achieving the right texture in your homemade orange candy, ensuring that the gelatin integrates smoothly into the syrup later on.
Step 4: Combine Mixtures
After blooming the gelatin, add it to the simmering syrup and stir until it fully dissolves. Then, mix in the orange zest and optional butter, cooking the mixture for an additional 5 to 10 minutes. You’ll know it’s ready when the consistency thickens to that of honey, creating a rich, flavorful base for your candy.
Step 5: Set the Candy
Pour the orange mixture into a greased or lined 8×8-inch dish, smoothing the surface for an even finish. Allow the candy to cool at room temperature for about 1 hour before transferring it to the refrigerator. Chill for 4 to 6 hours, or ideally overnight, until the candy is completely set and firm to the touch.
Step 6: Cut and Dust
Once the candy is fully set, gently remove it from the dish and place it on a cutting board. Using a sharp knife, cut the candy into your desired shapes or sizes. Optionally, dust each piece with confectioners’ sugar to prevent sticking and add a hint of sweetness to your delightful homemade orange candy.
Expert Tips for Homemade Orange Candy
-
Choose Fresh Oranges: Ensure your oranges are ripe and firm; their flavor is key to making exceptional homemade orange candy.
-
Watch Your Heat: Stir continuously while cooking the syrup to avoid burning, especially after adding butter.
-
Achieve Honey-Like Consistency: Cook the mixture until it thickens properly; this ensures the ideal chewy texture in your candy.
-
Cut with Care: Slice the candy as soon as it’s set to prevent sticking, and dust with confectioners’ sugar afterwards for a polished finish.
-
Store Correctly: Keep your homemade orange candy in an airtight container at room temperature for optimal freshness, or refrigerate for a firmer texture.
Homemade Orange Candy Variations & Substitutions
Feel free to put your own spin on this delightful recipe and make it truly yours!
-
Citrus Swap: Replace oranges with lemons or limes for a refreshing twist that brightens up your candy.
-
Herbal Addition: Incorporate fresh herbs like rosemary or mint for a unique flavor profile that surprises the palate. Imagine the vibrant blend of citrus and herbal notes dancing together—absolute bliss!
-
Flavor Boost: Add extracts like almond or vanilla for a gourmet touch. Elevate the taste by introducing a hint of nostalgia with flavors that remind you of special moments.
-
Chocolate Drizzle: Top with melted dark chocolate for an indulgent finish that adds richness and decadence. A drizzle of chocolate transforms your candy into a luxurious confection you’d be proud to gift!
-
Nutty Crunch: Fold in finely chopped nuts or coconut flakes for added texture. This not only enhances the chewiness but also introduces a delightful crunch—definitely a crowd-pleaser!
-
Dried Fruit Bits: Mix in small pieces of dried fruit, such as apricots or cranberries, for a delightful surprise in every bite. The sweetness from the dried fruits beautifully complements the citrus zing.
-
Spicy Kick: Add a pinch of cayenne or chili powder for a surprising heat level, perfect for those who love a sweet and spicy combo. It’s an unexpected twist that will leave your tastebuds tingling!
-
Vegan-Friendly: Substitute gelatin with agar-agar for a vegetarian option, allowing all candy lovers to indulge. You can still enjoy the chewy texture while keeping things plant-based—an irresistibly inclusive treat!
Whichever variation you choose, you’ll create a version of this divine Chocolate Orange Posset to pair beautifully with your candy. Happy cooking!
Make Ahead Options
These homemade orange candy delights are perfect for busy cooks looking to save time! You can prepare the syrup and bloom the gelatin up to 24 hours in advance to streamline your candy-making process. Simply store the syrup in an airtight container in the refrigerator until you’re ready to combine the ingredients. When you’re ready to make your candy, heat the syrup, add the bloomed gelatin, and proceed as usual. If you want to make the entire candy ahead, simply pour the mixture into the dish, chill overnight, and when set, cut and dust with confectioners’ sugar before serving. This way, you ensure each piece is just as delicious and fresh as if you had made it that day!
Storage Tips for Homemade Orange Candy
-
Room Temperature: Keep your homemade orange candy in an airtight container at room temperature for up to 2 weeks to maintain its chewy texture.
-
Fridge: For a firmer candy, refrigerate in an airtight container for up to 4 weeks. This will slightly alter the texture, making it denser yet delicious.
-
Freezer: You can freeze your orange candy for up to 3 months. Wrap pieces individually in plastic wrap and then place them in a freezer-safe bag for the best quality.
-
Reheating: If you prefer a softer texture after freezing, simply let the candy sit at room temperature for a while before enjoying.
What to Serve with Classic Homemade Orange Candy?
Bring a burst of sunlight to your dessert table with fresh, vibrant accompaniments!
- Fresh Fruit Salad: Bright, juicy fruits like strawberries and kiwis enhance the candy’s citrusy goodness, making for a refreshing side.
- Herbal Iced Tea: A cool, herbal iced tea provides a perfect balance of flavors and complements the sweetness of the orange candy beautifully.
- Cheese Platter: Pair with soft cheeses like Brie or goat cheese; the creamy textures elevate the liveliness of the orange candy.
- Chocolate Dipping Sauce: For an indulgent twist, consider serving the candy with a warm chocolate sauce, perfect for drizzling or dipping.
Complete your afternoon delight with a sprinkle of crushed nuts for added crunch; they elevate the experience!
- Dark Coffee: A rich cup of coffee balances the sweetness perfectly, enhancing the flavors while offering a comforting contrast.
- Shortbread Cookies: Light, buttery cookies provide a delightful textural contrast to the chewy orange candy, making them a delectable duo.
- Vanilla Ice Cream: Serve alongside a scoop of vanilla ice cream, allowing the candy’s tanginess to harmonize with creamy, cold vanilla.
- Lemonade: A refreshing homemade lemonade clears the palate and amplifies the orange flavors for a sunny finish to your treat!
Homemade Orange Candy Recipe FAQs
How do I select ripe oranges for the best flavor?
Absolutely! When choosing oranges, look for those that are firm and heavy for their size—this indicates juiciness. Avoid any that have dark spots or blemishes, as these can affect the flavor. Freshly picked oranges will give your homemade orange candy that vibrant and tangy taste you desire.
How should I store my homemade orange candy?
You can keep your homemade orange candy in an airtight container at room temperature for up to 2 weeks to enjoy its chewy texture. If you prefer a firmer candy, storing it in the refrigerator is a great option! It can last up to 4 weeks this way, but be sure to keep it sealed properly to maintain freshness.
Can I freeze homemade orange candy, and how should I do it?
Absolutely! For freezing, wrap each piece of orange candy individually in plastic wrap to prevent sticking, then place them in a freezer-safe bag. Your homemade orange candy can be frozen for up to 3 months. When you’re ready to enjoy them again, simply remove the pieces from the freezer and let them sit at room temperature until softened.
What if my candy didn’t set properly?
Very common! If your candy hasn’t set, it could be due to not cooking the syrup long enough for the gelatin to activate properly. To fix this, you can reheat the mixture gently, stir in a bit more bloomed gelatin (about 1/2 tablespoon), and let it cook until it thickens to that honey-like consistency before pouring it into a dish to set again.
Are there any dietary considerations with this recipe?
Certainly! This homemade orange candy contains gelatin, which is not vegetarian. However, you can substitute gelatin with agar-agar to make this treat vegetarian-friendly. If there are any allergies at play, be cautious with the confectioners’ sugar, as it might contain cornstarch or other additives that some individuals are sensitive to.
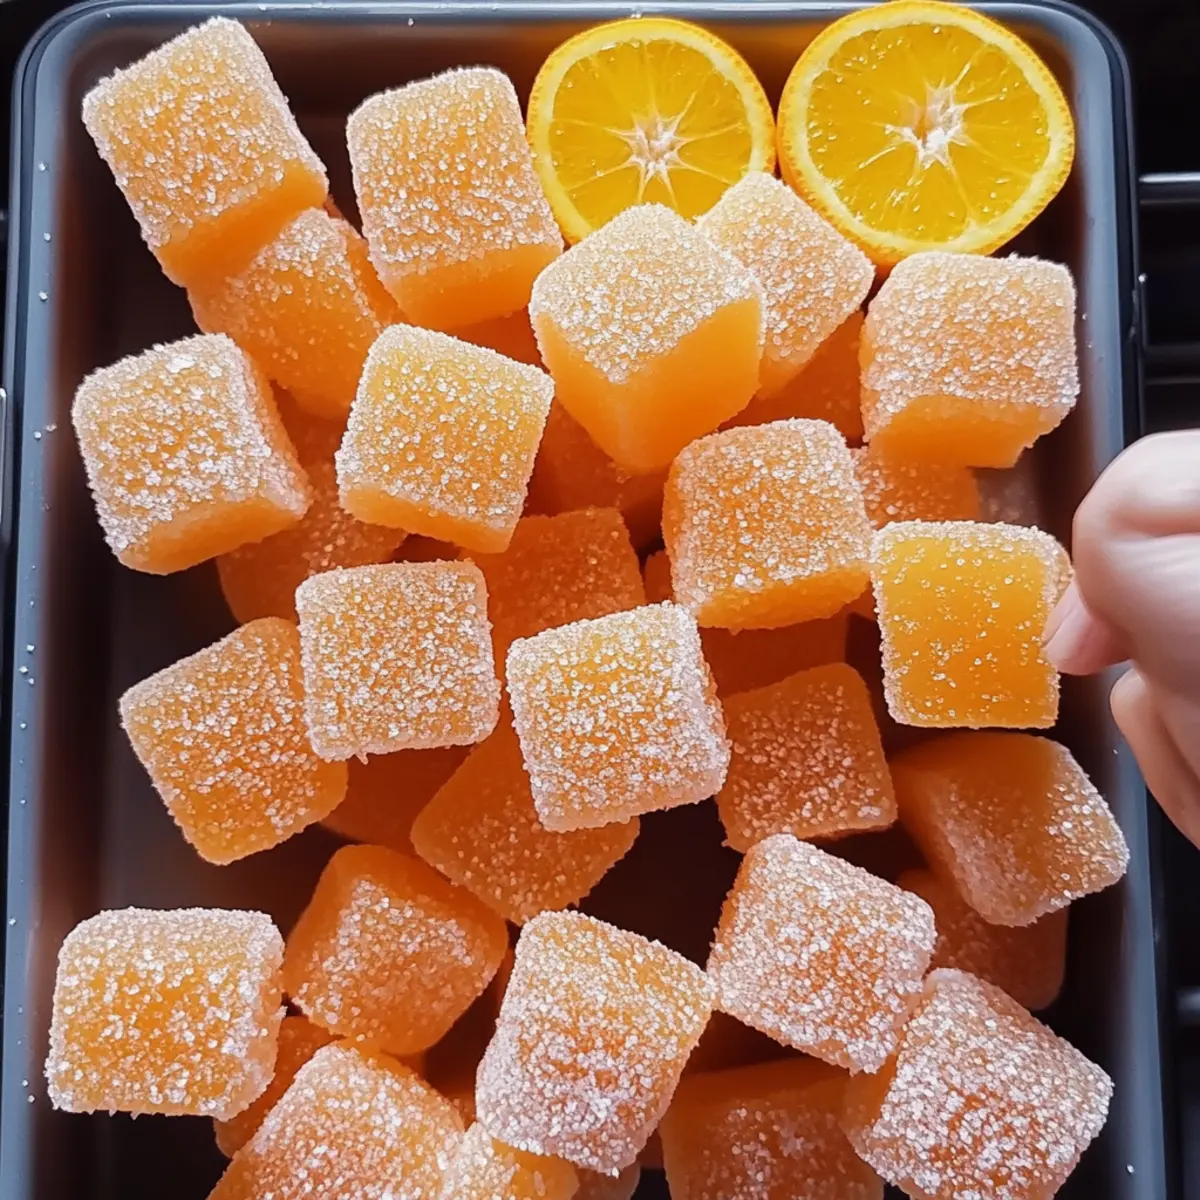
Irresistibly Chewy Homemade Orange Candy for Gifting
Ingredients
Equipment
Method
- Zest three medium fresh oranges and juice them to yield about ¾ cup of juice. Set aside the zest and juice for later use.
- In a medium saucepan, combine the orange juice, ¼ cup of water, 1 cup of granulated sugar, and ½ cup of corn syrup. Heat over medium while stirring until sugar dissolves.
- In a separate bowl, bloom 1 tablespoon of gelatin by sprinkling it over ¼ cup of cold water and letting it sit for 5 minutes.
- Add the bloomed gelatin to the syrup and stir until dissolved. Mix in orange zest and optional butter, cooking for an additional 5 to 10 minutes.
- Pour the mixture into a greased 8x8-inch dish, smooth the surface, and allow it to cool at room temperature for 1 hour, then refrigerate for 4 to 6 hours.
- Once set, remove from the dish, cut into desired shapes, and optionally dust with confectioners' sugar.