

As I stood in my kitchen, the enticing scent of sizzling garlic filled the air, instantly transporting me to a cozy izakaya in Japan. It was the perfect moment to whip up a comforting plate of Japanese Garlic Fried Rice—a recipe so straightforward yet satisfying, it deserves a spot in your weekly rotation. With its creamy Kewpie mayonnaise and a depth of flavor that’s both rich and savory, this dish is your ticket to quick comfort food bliss. In less than 30 minutes, you’ll have a beautiful, fresh meal that effortlessly caters to busy weeknights or dazzling guests. Ready to bring a taste of Japan to your table? Let’s dive into the details of this delightful creation!
Why is This Fried Rice a Must-Try?
Quick Preparation: This Japanese Garlic Fried Rice comes together in under 30 minutes, so it’s perfect for those busy weeknights when you crave something comforting without the fuss.
Flavor Explosion: The combination of sautéed garlic and creamy Kewpie mayonnaise creates a rich, umami-packed flavor that will have everyone at the table asking for seconds.
Customizable Delight: This recipe is incredibly versatile! Whether you want to toss in your favorite veggies or add some protein like grilled chicken or shrimp, you can easily make it your own.
Crowd-Pleasing Comfort: Everyone loves a good fried rice dish, making it a sure hit for family dinners or gatherings with friends.
Ease of Cooking: With just a few simple ingredients and techniques, even novice cooks can shine in the kitchen. If you enjoy this recipe, consider trying it alongside Grilled Garlic Herb Potatoes for a delightful meal combo!
Japanese Garlic Fried Rice Ingredients
Get ready for a delicious homemade experience!
For the Rice
• Japanese Short Grain Rice – Essential for that sticky texture; don’t substitute with other rice types for authentic flavor.
• Water – Needed for cooking the rice; ensure the right ratio for perfect fluffiness.
For the Flavor Base
• Kewpie Mayonnaise – Adds creamy richness; substitute with regular mayonnaise for a different flavor but not the same deliciousness.
• Unsalted Butter – Used to sauté garlic; using unsalted gives you better control over the overall saltiness.
• Garlic – The star ingredient for robust flavor and aroma; garlic powder can be an alternative but won’t provide the freshness you want.
• Soy Sauce – Brings umami depth to the dish; tamari works well for a gluten-free option, or oyster sauce can add extra richness.
For the Protein
• Eggs – Scrambled into the rice for protein and texture; for a vegan twist, plant-based eggs can be used instead.
For Garnish
• Parsley – Adds a fresh color and herbal note; feel free to swap it with scallions or cilantro for a different taste.
Optional Extras
• Vegetables (peas, bell peppers, etc.) – Throw in for a nutritional boost and extra color.
• Chili Paste or Red Pepper Flakes – Perfect for adding some heat; adjust to your spice level for a custom kick.
• Toasted Sesame Oil – Drizzle for nutty flavor; it brings an aromatic touch to your fried rice.
Dive into crafting this tasty Japanese Garlic Fried Rice and elevate your home cooking experience!
Step‑by‑Step Instructions for Japanese Garlic Fried Rice
Step 1: Prepare Rice
Begin by rinsing 2 cups of Japanese short grain rice under cold water until the water runs clear, removing excess starch. Soak the rice in water for 30 minutes, then drain and place it in a medium saucepan with 2¼ cups of fresh water. Bring it to a boil over medium-high heat, then lower the temperature, cover, and simmer for 10 minutes. Once done, let the rice rest for an additional 10 minutes with the lid on.
Step 2: Mix Mayonnaise
Transfer the warm rice to a large mixing bowl, and while it’s still steamy, add in 3 tablespoons of Kewpie mayonnaise. Using a spatula, gently fold the mayonnaise into the rice, ensuring each grain is coated with the creamy mixture. This step enhances the texture and flavor of your Japanese Garlic Fried Rice, giving it a rich and inviting profile.
Step 3: Sauté Garlic
In a large skillet or wok, melt 2 tablespoons of unsalted butter over medium-high heat. Once the butter has melted and is bubbling gently, add 3 finely chopped garlic cloves to the pan. Sauté for about 1 minute until the garlic is fragrant and turns a light golden brown, being careful not to let it burn as burnt garlic can dominate the dish’s flavor.
Step 4: Stir-Fry Rice
Add the mayonnaise-coated rice to the skillet with the sautéed garlic. Using a spatula, stir-fry the rice for about 30 seconds, ensuring that the garlic is evenly distributed throughout. Following this, pour in 1½ tablespoons of soy sauce, stirring continuously until the rice and garlic are well combined, and the soy sauce has been absorbed, creating a beautiful glaze.
Step 5: Add Eggs
Create a space in the center of the rice by pushing it to the sides of the skillet. Crack 2 eggs into this empty space, lightly whisking them until they begin to set, about 30 seconds. As the edges set, gently scramble the eggs and fold them into the Japanese Garlic Fried Rice, allowing them to mix thoroughly and cook for another minute or so until they’re fully incorporated.
Step 6: Season and Serve
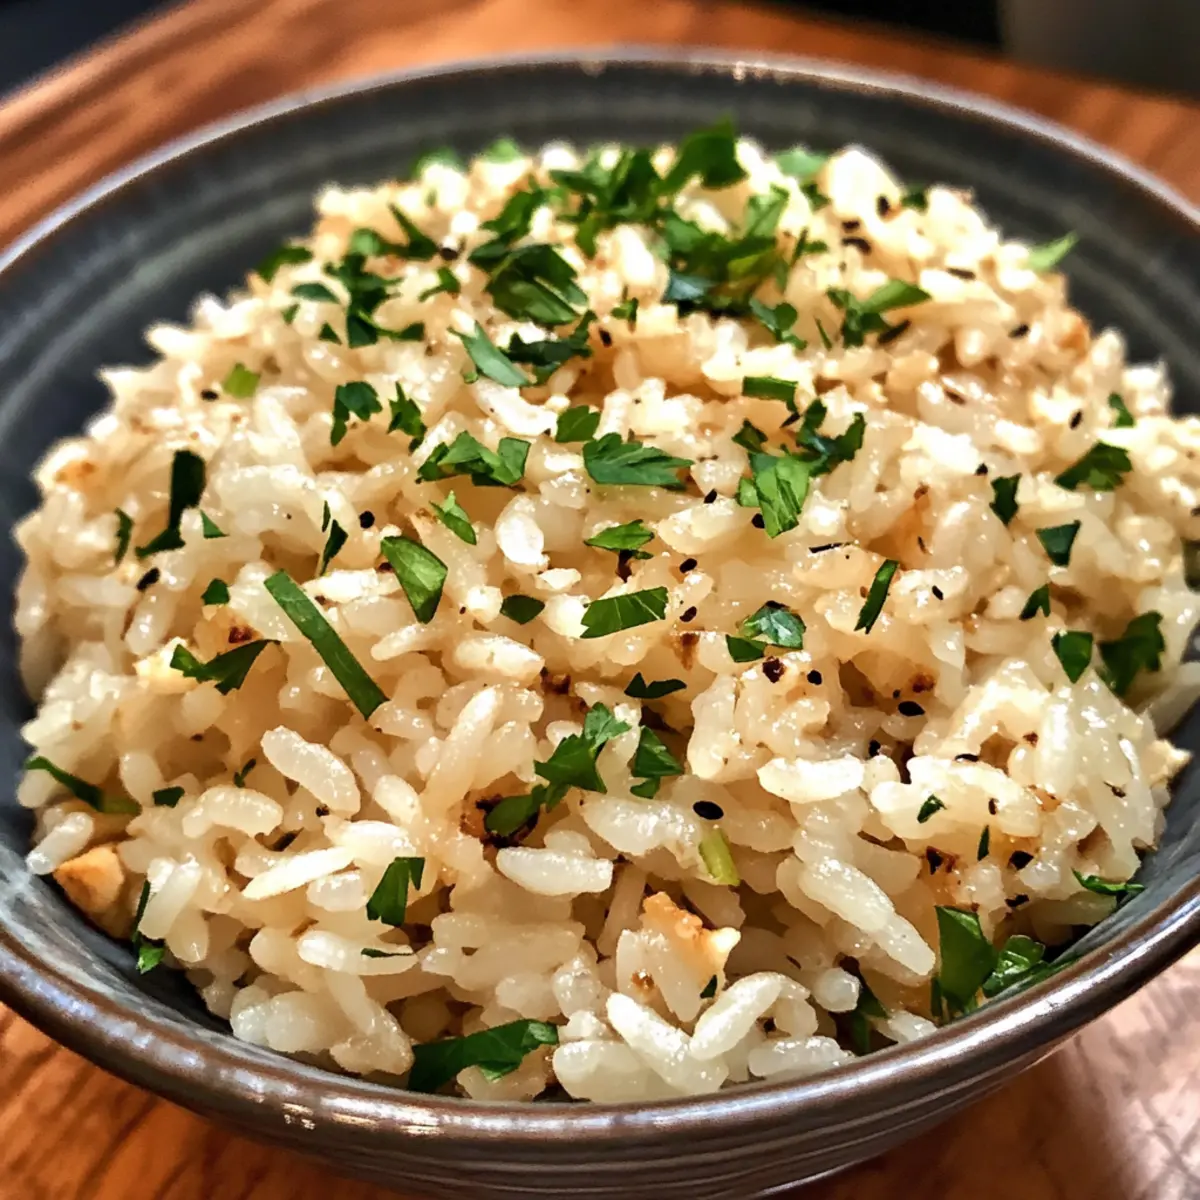
Taste your delicious Japanese Garlic Fried Rice and adjust seasoning as needed, adding a pinch of sea salt for extra flavor. Then, toss in freshly chopped parsley for a pop of color and freshness. Serve immediately while it’s warm, enjoying its creamy texture and captivating aroma that’s sure to please everyone at the table.

Japanese Garlic Fried Rice Variations
Feel free to explore these delightful twists on your Japanese Garlic Fried Rice to suit your taste and dietary needs!
-
Vegetable Boost: Add 1 cup of colorful veggies like bell peppers or peas to enhance nutrition and flavor. The more, the merrier—this addition brightens up your dish and makes it even more satisfying!
-
Protein Addition: Mix in cooked chicken, shrimp, or tofu for a heartier meal. Adding protein not only increases the dish’s richness but also turns it into a well-rounded dining experience.
-
Spicy Variation: Introducing a teaspoon of chili paste or red pepper flakes while cooking adds a lovely kick. Adjust the heat level to match your spice tolerance, creating a version that excites your palate.
-
Herb Twist: Swap parsley for fresh scallions or cilantro to brighten flavors. This simple change lifts the dish with its aromatic qualities, leaving you with a fresh and vibrant taste.
-
Nutty Flavor: Finish your dish with a drizzle of toasted sesame oil before serving to achieve that nutty aroma. It elevates the overall taste and adds a unique finish to your fried rice.
-
Fruity Note: For a sweet contrast, toss in diced pineapple. The unexpected fruitiness pairs beautifully with the savory elements, creating a deliciously balanced dish.
-
Creamy Vegan Option: Substitute Kewpie mayonnaise with a plant-based alternative for a vegan-friendly dish. Enjoy the same creamy texture while keeping it in line with your dietary preferences. Pair it with Roasted Garlic Sausage Pasta for a delightful meal combo!
-
Umami Depth: Experiment with a splash of oyster sauce for an extra umami punch. This swap brings a depth of flavor that rounds out your fried rice beautifully, making every bite memorable.
With these variations, you can easily personalize your Japanese Garlic Fried Rice to match any occasion or craving!
What to Serve with Japanese Garlic Fried Rice
Elevate your meal with delightful accompaniments that perfectly complement the savory flavors of this satisfying dish.
- Teriyaki Salmon: The sweet and savory glaze of teriyaki salmon beautifully contrasts the garlic’s richness, creating a well-rounded plate.
- Asian Slaw: A refreshing mix of cabbage and carrots adds crunch and brightness, balancing the creamy texture of the fried rice.
- Miso Soup: This warm, umami-rich broth is comforting and makes a perfect starter before diving into the hearty fried rice.
- Tempura Vegetables: Lightly battered and fried veggies add a delightful crispness, giving an exciting texture alongside the creamy rice.
- Crispy Edamame: These seasoned green soybeans provide a pop of protein and a satisfying crunch that complements the rice’s softness.
- Ginger-Infused Iced Tea: The refreshing zing helps cleanse the palate between bites, making each taste of garlic fried rice feel vibrant.
- Fluffy Steamed Bun: Serve warm buns on the side to scoop up fried rice or to enjoy on their own for a comforting touch.
- Green Tea Ice Cream: A delicious way to end your meal, the creamy and subtly sweet flavor pairs perfectly with the umami notes of the rice.
Make Ahead Options
These Japanese Garlic Fried Rice are perfect for meal prep enthusiasts! You can prepare the rice up to 24 hours in advance. Simply rinse and soak 2 cups of Japanese short grain rice, then cook and cool it before refrigerating. The sautéed garlic and mixed Kewpie mayonnaise can also be prepped ahead; store the garlic in an airtight container and combine it with mayonnaise just before use to keep the flavors fresh. When you’re ready to serve, reheat the rice gently with a splash of water or soy sauce in a skillet, add the remaining ingredients, and finish cooking as per the recipe for delicious results that taste just as delightful as when freshly made!
Storage Tips for Japanese Garlic Fried Rice
Room Temperature: Enjoy your Japanese Garlic Fried Rice right away for the best flavor and texture. If left out, consume within 2 hours to ensure freshness.
Fridge: Store leftovers in an airtight container for up to 3 days. Keep it covered to prevent the rice from drying out and losing its delightful creaminess.
Freezer: For longer storage, freeze the fried rice in airtight containers for up to 2 months. Thaw in the fridge overnight before reheating for the best results.
Reheating: When ready to enjoy, reheat on the stove over low heat with a splash of water or soy sauce to bring back moisture. Stir until heated through, and it’s ready to be savored again!
Expert Tips for Japanese Garlic Fried Rice
-
Fluffy Rice: Soaking the rice before cooking is crucial for that perfect, fluffy texture. Don’t rush this step; it makes all the difference!
-
Watch the Garlic: Keep an eye on the garlic while sautéing. Overcooked garlic can become bitter, ruining the overall flavor of your Japanese Garlic Fried Rice.
-
Taste Test: Always taste your fried rice before serving. Adjust salt and soy sauce to ensure the flavors are balanced and delicious.
-
Add Extra Veggies: For a nutritional boost, toss in some colorful veggies like peas or bell peppers. It enhances flavors and makes the dish even more satisfying!
-
Crispy Topping: For added crunch, consider topping your fried rice with crispy fried shallots. They add texture and an extra layer of flavor.

Japanese Garlic Fried Rice Recipe FAQs
What type of rice should I use for this recipe?
Absolutely use Japanese short-grain rice! It’s essential for achieving that sticky and fluffy texture. Avoid using jasmine or basmati rice, as they won’t provide the same delightful hold and flavor profile that showcases this dish’s authenticity.
How should I store leftovers of Japanese Garlic Fried Rice?
After enjoying your delicious meal, you can store leftovers in an airtight container in the fridge for up to 3 days. Be sure to keep it well-covered to retain its luscious creaminess and prevent it from drying out.
Can I freeze Japanese Garlic Fried Rice?
Yes, you can absolutely freeze this tasty dish! To do so, place the cooled fried rice in airtight containers or resealable freezer bags and freeze for up to 2 months. When you’re ready to enjoy it, thaw the rice in the refrigerator overnight. Reheat gently on the stove with a splash of water or soy sauce to restore moisture before serving.
How can I prevent the garlic from burning while cooking?
Very good question! To prevent burning the garlic, make sure to sauté it over medium-high heat and keep a close eye on it. Stir frequently and remove it from the heat as soon as it turns light golden brown and fragrant, which should take about 1 minute. This will keep the flavors fresh and delicious.
Are there any dietary considerations with this recipe?
This recipe can be easily customized! For vegans, substitute eggs with plant-based egg alternatives. If there are allergies to soy, use tamari for a gluten-free option. Always be mindful of potential allergens that may come from the ingredients, like eggs or mayo, and adjust according to your needs.
How can I add more nutrients to this fried rice?
Absolutely! You can boost the nutrition by adding about 1 cup of colorful vegetables like peas, bell peppers, or even carrots. Just toss them in while stir-frying the rice, and they will cook quickly, adding color and essential nutrients to your delightful Japanese Garlic Fried Rice!

Irresistible Japanese Garlic Fried Rice: Quick Comfort Meal
Ingredients
Equipment
Method
- Rinse Japanese short grain rice under cold water until clear, soak in water for 30 minutes, then drain and cook with water in a saucepan.
- Transfer warm rice to a bowl, add Kewpie mayonnaise, and gently fold to coat each grain.
- Melt butter in a skillet, sauté garlic until golden and fragrant.
- Add rice to skillet and stir-fry for 30 seconds; pour in soy sauce and combine well.
- Push rice to sides, crack eggs in the center, whisk until setting, then scramble and mix with rice.
- Taste and adjust seasoning, add parsley, and serve warm.