

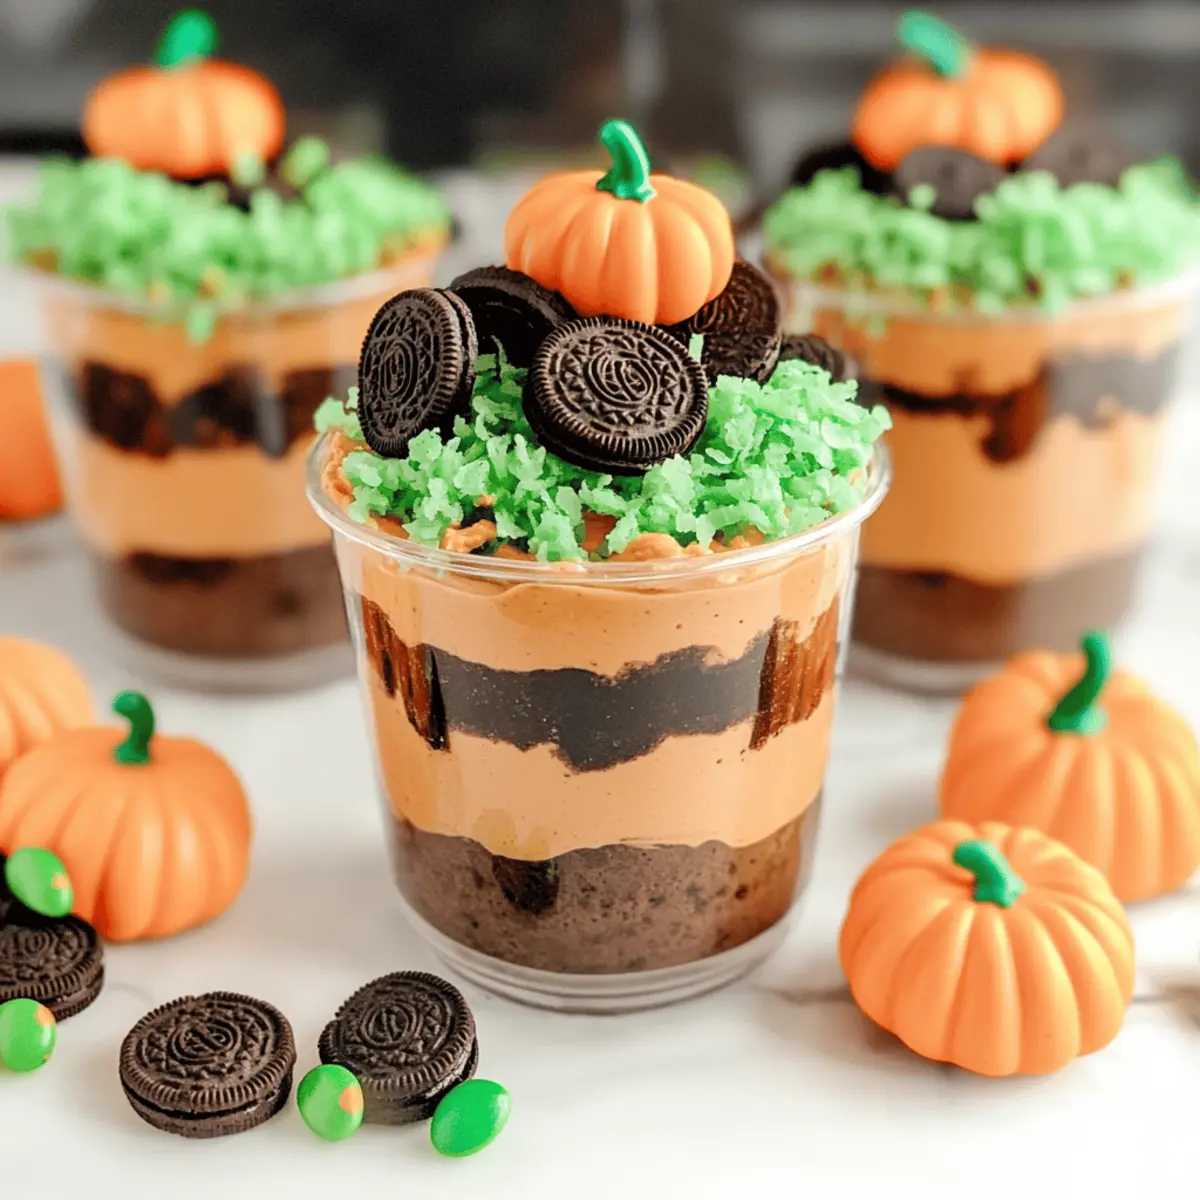
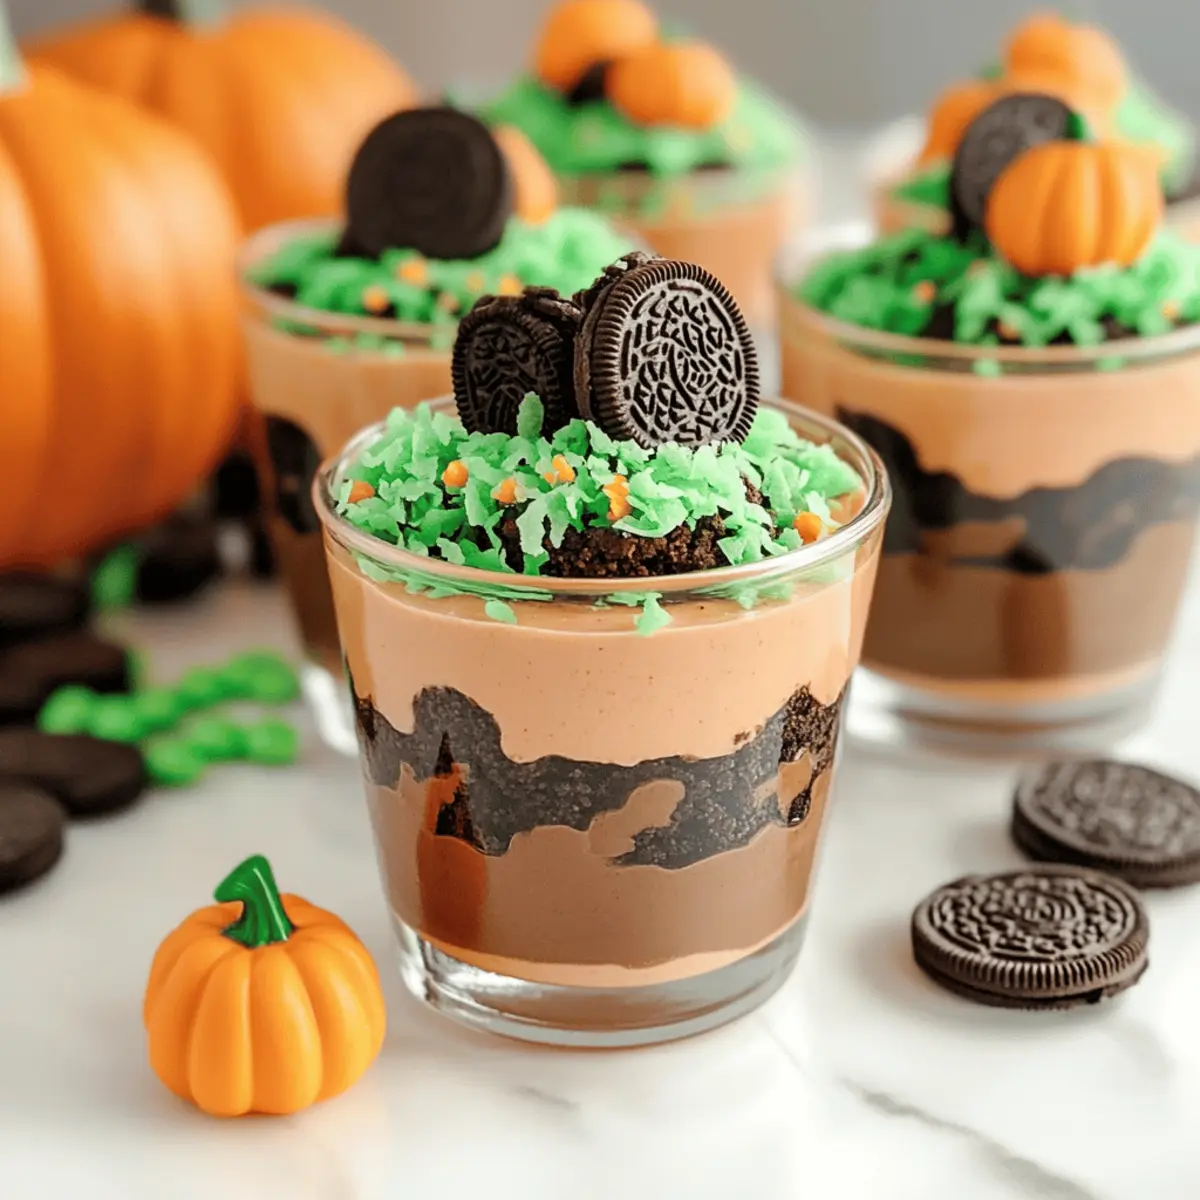
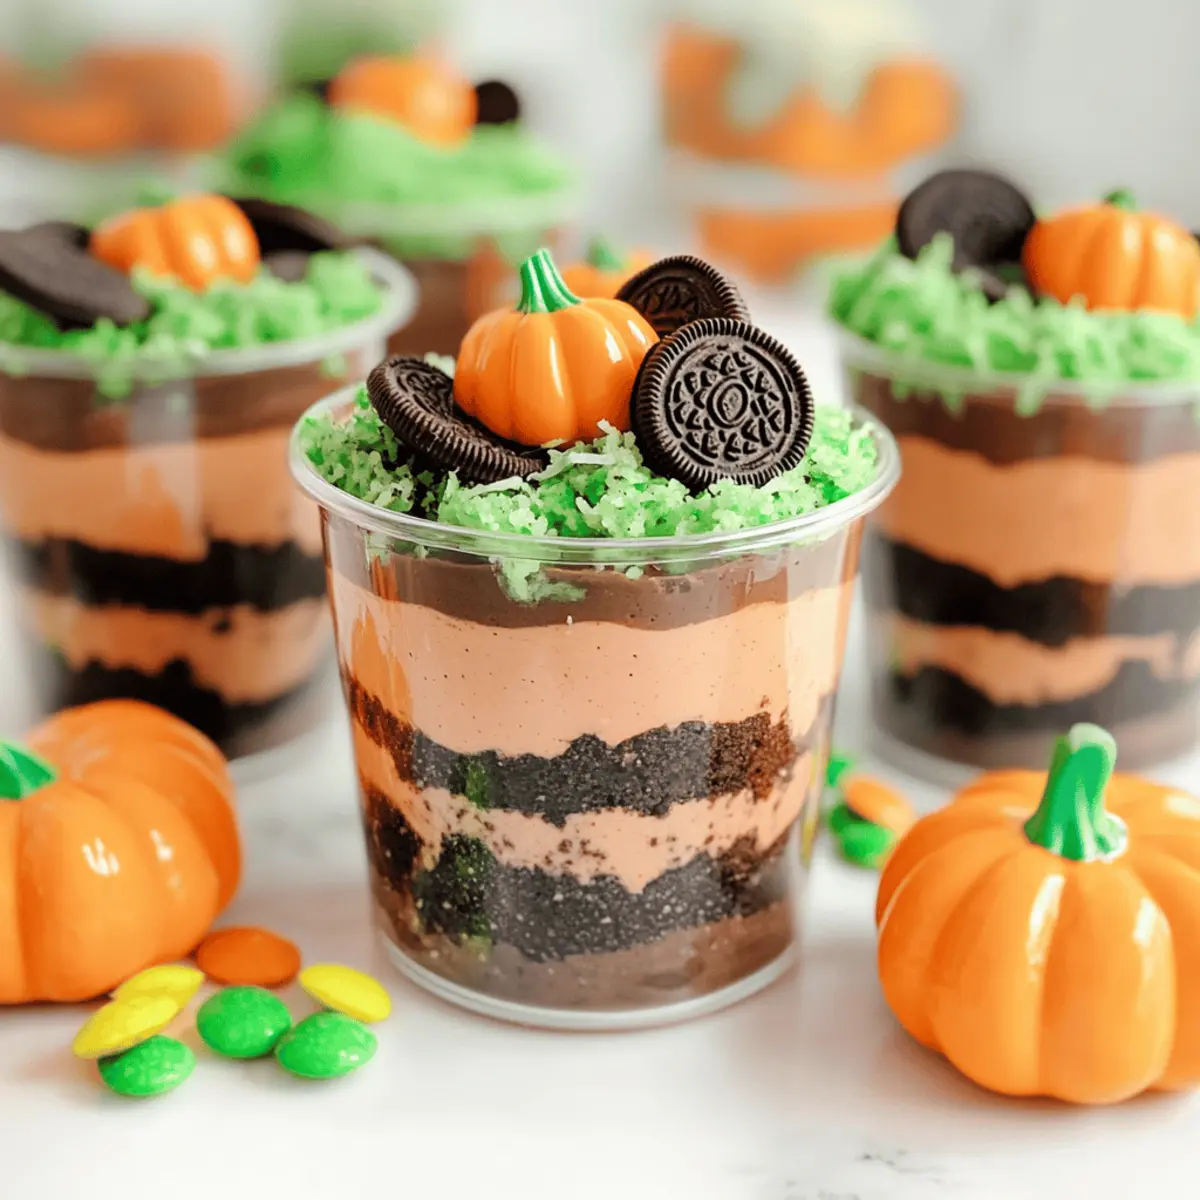
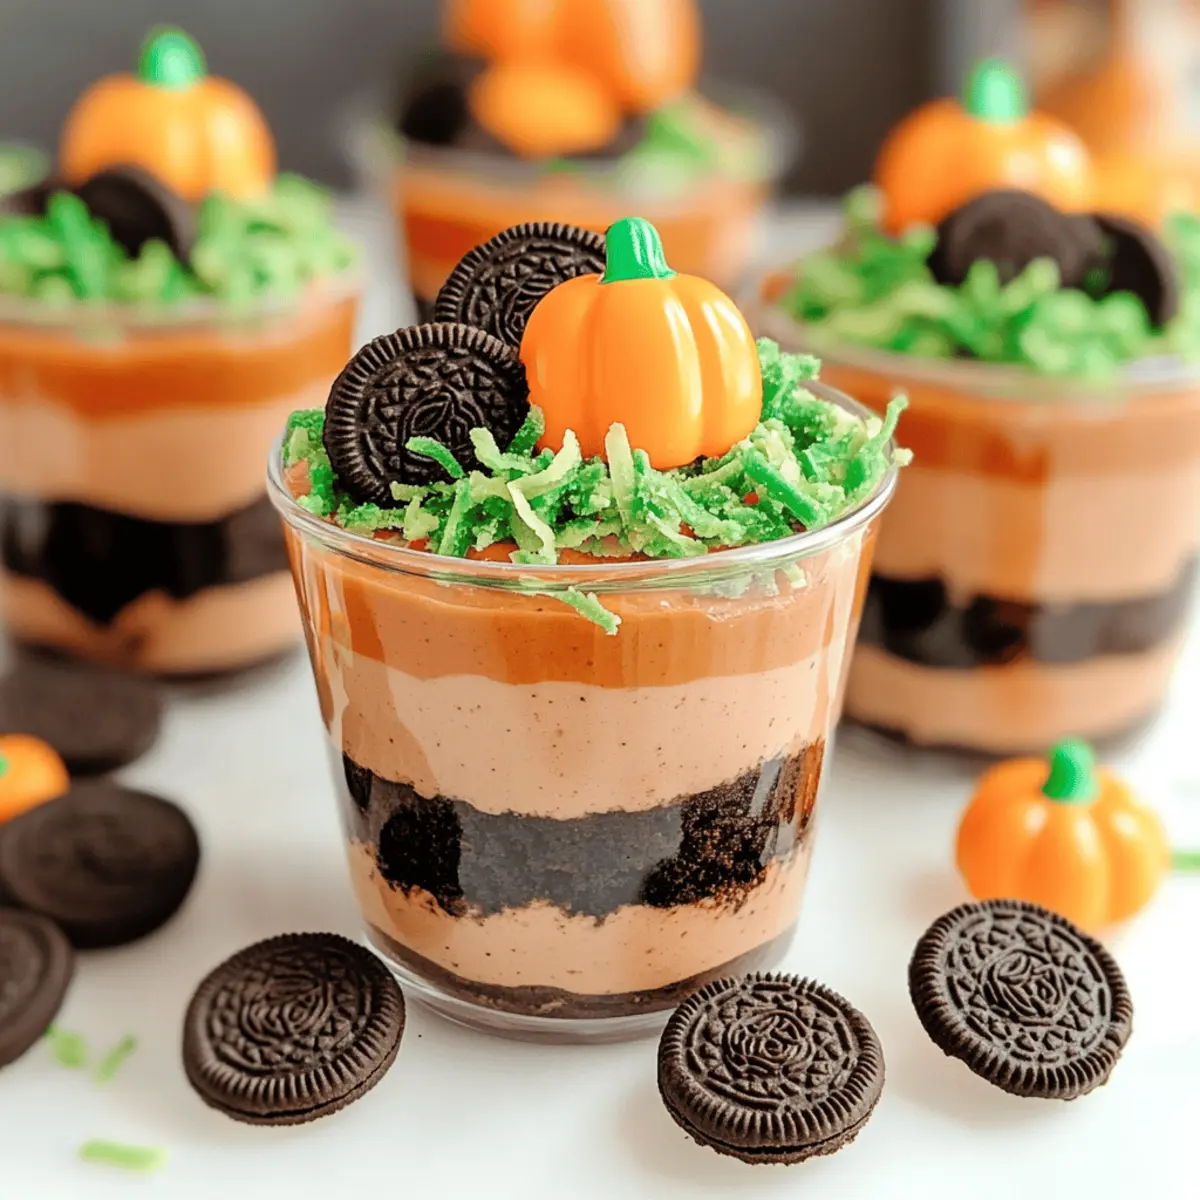
Every fall, I find myself enchanted by the colors and flavors that envelop this season, and those magical feelings often lead me right to the kitchen. That’s where these delightful Pumpkin Dirt Cups come into play—a fun and creative dessert that captures the essence of autumn! Picture a whimsical layer of creamy pudding, crunchy Oreo “dirt,” and the playful addition of candy pumpkins that even kids can’t resist. Not only are these Pumpkin Dirt Cups incredibly simple to prepare, but they are also customizable to suit any palate. Whether you’re hosting a lively Halloween party or just want a sweet treat for the family, this recipe is sure to spark joy and satisfy every craving. Ready to create a dessert that embodies all the cozy charm of fall? Let’s dig in!
Why are Pumpkin Dirt Cups a Must-Try?
Fun and Playful: These Pumpkin Dirt Cups are the perfect way to bring out your inner child, making dessert a delightful experience for both kids and adults!
Easy to Make: With just a few simple steps, you can whip up these delicious treats in no time, perfect for busy autumn evenings.
Customizable Flavors: Experiment with different pudding flavors or toppings like gummy worms to create your own unique rendition!
Eye-Catching Presentation: The bright colors and layered textures make these cups not only tasty but also a beautiful centerpiece for any fall gathering.
Guaranteed Crowd-Pleaser: From Halloween parties to family get-togethers, these cups are sure to impress your guests and leave them wanting more!
If you love seasonal treats, consider pairing these with our Roasted Pumpkin Yogurt for a well-rounded autumn feast!
Pumpkin Dirt Cups Ingredients
• Here’s everything you need to create these charming Pumpkin Dirt Cups that will become a fall favorite!
For the Pudding Layer
- Chocolate Instant Pudding – Provides that rich creaminess; try vanilla for a lighter twist.
- Milk – Essential for pudding consistency; any type works, including non-dairy.
- Cool Whip – Adds airy fluffiness; for a healthier option, use whipped yogurt.
For the “Dirt” Layer
- Oreo Cookies – Creates the perfect “dirt” layer; Golden Oreos can add a unique flavor variation.
For the Garnish
- Candy Pumpkins – Fun, festive treats that add a sweet touch; swap with gummy worms for a playful spin.
- Shredded Coconut – Colored green, it mimics grass in a pumpkin patch; optional but adds a great visual!
These delightful Pumpkin Dirt Cups are sure to delight everyone at your table—perfect for bringing a taste of fall to your gatherings!
Step‑by‑Step Instructions for Pumpkin Dirt Cups
Step 1: Crush Oreos
Begin by crushing the Oreo cookies to create a crumbly “dirt” layer for your Pumpkin Dirt Cups. You can either use a food processor for a fine texture or place the cookies in a Ziploc bag and crush them using a rolling pin. Aim for a texture similar to sand, as this will enhance the visual appeal of your dessert.
Step 2: Prepare Pudding
In a medium bowl, whisk together the chocolate instant pudding mix and 2 cups of milk for about 2 minutes. You’ll notice the mixture begin to thicken significantly. Let it sit for an additional 5 minutes to reach the ideal pudding consistency. This layer will provide creaminess and richness to your Pumpkin Dirt Cups.
Step 3: Fold in Cool Whip
Once the pudding has set, gently fold in the Cool Whip into the bowl. Use a spatula to combine the ingredients until you achieve a smooth and fluffy texture. Be careful not to overmix, as you want to maintain that lightness that makes the Pumpkin Dirt Cups so delightful.
Step 4: Layer Dessert
Grab your clear cups and begin layering the Pumpkin Dirt Cups. Start with a generous spoonful of the crushed Oreo “dirt” at the bottom, followed by a layer of the creamy pudding mixture. Repeat these layers until the cups are filled, making sure to finish with an Oreo crumb layer on top for a pleasing finish.
Step 5: Garnish
Before serving your Pumpkin Dirt Cups, it’s time to get creative with the toppings! Sprinkle the colored shredded coconut on top to mimic grass in a pumpkin patch, then add candy pumpkins for a festive touch. This playful presentation is sure to charm guests of all ages.
Step 6: Refrigerate
Once your Pumpkin Dirt Cups are assembled and garnished, cover them and place them in the refrigerator to chill for at least 1 hour. This chilling time allows the flavors to meld beautifully and ensures the pudding is cool and refreshing when served, making them an ideal treat for any fall gathering.
Pumpkin Dirt Cups Variations & Substitutions
Feel free to get creative with these Pumpkin Dirt Cups—your taste buds will thank you for it!
- Dairy-Free: Substitute with almond or coconut milk and use whipped coconut cream instead of Cool Whip for a deliciously dairy-free treat.
- Pumpkin Spice: Switch out chocolate pudding for pumpkin spice pudding to capture the essence of fall even more. This variation will bring an extra warmth to the dessert.
- Healthier Option: Replace Cool Whip with Greek yogurt for a lighter version that doesn’t compromise on creaminess. Your guests won’t even notice the difference!
- Gummy Worms: Add gummy worms instead of candy pumpkins for a fun twist—perfect for Halloween parties! Kids love the playful combination that makes it feel like an adventure.
- Nut Butter Swirl: Mix in a spoonful of peanut or almond butter with the pudding for an unexpected nutty flavor that pairs beautifully with the sweet layers.
- Add Crunch: Consider adding crushed nuts, such as pecans or walnuts, within the layers for an extra crunch. They’ll add a delightful texture to the overall experience.
- Chocolate Overload: Drizzle melted chocolate over the top layer for those who crave extra indulgence; it beautifully complements the other flavors and looks divine.
- Seasonal Sprinkles: Top with festive Halloween sprinkles for a pop of color and fun. They add a whimsical touch that makes your cups even more inviting.
Once you’ve experimented with these variations, you might want to serve your Pumpkin Dirt Cups alongside our delicious Roasted Pumpkin Yogurt to create a full autumn feast!
Expert Tips for Pumpkin Dirt Cups
-
Fine Crumbs Matter: Ensure Oreos are crushed finely for better texture; large pieces can disrupt the creamy layers and presentation.
-
Chill Time Is Key: Don’t rush the refrigeration process; chilling for at least an hour allows flavors to meld and the pudding to set properly.
-
Add Color with Care: When coloring shredded coconut, use just a few drops of green food coloring in a sealed container to avoid clumping.
-
Alternate Ingredients: Feel free to swap chocolate pudding with vanilla or pumpkin spice to enhance seasonal flavors in your Pumpkin Dirt Cups.
-
Garnish Creatively: Mix up the toppings with gummy worms or candy corn for a fun twist; it keeps the dessert exciting for both kids and adults.
Make Ahead Options
These Pumpkin Dirt Cups are perfect for meal prep enthusiasts! You can prepare the pudding layer and crush the Oreos up to 24 hours in advance, keeping them stored separately in the refrigerator to maintain that delightful texture. The pudding can be covered tightly to prevent it from forming a skin. When you’re ready to serve, simply layer the prepped components in cups, starting with the Oreo crumbs, followed by the pudding mixture, and finish off with another layer of crumbs. Add the colored coconut and candy pumpkins just before serving to ensure they look fresh and fun. This way, you can enjoy a delicious dessert without the last-minute rush!
What to Serve with Pumpkin Dirt Cups
Imagine a cozy fall gathering where every bite brings a smile, and your Pumpkin Dirt Cups take center stage.
- Warm Apple Cider: This classic autumn beverage offers a sweet and spicy contrast, perfectly complementing the creamy texture of your dessert.
- Cinnamon Sugar Donuts: These fluffy treats add a delightful crunch that balances the smooth pudding layers, making for a blissful combination.
- Caramel Corn: The sweetness and crunch of caramel corn enhance the playful spirit of your Pumpkin Dirt Cups while adding a touch of nostalgia.
- Chocolate Chip Cookies: A timeless favorite, their chewy texture beautifully contrasts with the creamy layers of the cups, creating a dessert duo that’s hard to resist.
- Pumpkin Spice Latte: This rich and creamy drink echoes the fall flavors in your treats, providing a warm and comforting experience with every sip.
- Sliced Pears with Honey: The juicy, sweet pears add a fresh element, offering a lightness that beautifully complements the indulgent nature of Pumpkin Dirt Cups.
Each of these pairings enhances the whimsical charm of your Pumpkin Dirt Cups, creating a delightful autumn feast!
Storage Tips for Pumpkin Dirt Cups
Fridge: Store any leftover Pumpkin Dirt Cups in the refrigerator for up to 2 days. Make sure to cover them tightly with plastic wrap to prevent them from drying out.
Freezer: You can freeze assembled Pumpkin Dirt Cups for longer storage, but for best results, freeze only the pudding layer. Thaw in the fridge overnight and reassemble with fresh toppings when ready to serve.
Reheating: While these cups are best enjoyed cold, if you freeze the pudding layer, allow it to thaw completely before adding the “dirt” and garnishes.
Serving Suggestion: Always reassemble with fresh toppings after thawing, ensuring that those delightful layers stay visually appealing!
Pumpkin Dirt Cups Recipe FAQs
What type of chocolate pudding should I use?
Absolutely! I recommend using instant chocolate pudding for the best consistency and flavor in your Pumpkin Dirt Cups. If you prefer a lighter dessert, vanilla pudding works wonderfully—just add a few drops of food coloring for a Halloween touch!
How should I store leftover Pumpkin Dirt Cups?
You can store any leftover Pumpkin Dirt Cups in the refrigerator for up to 2 days. Make sure to cover them tightly with plastic wrap to prevent them from drying out, ensuring that every bite remains moist and delicious!
Can I freeze Pumpkin Dirt Cups?
Yes, you can freeze them, but there’s a little trick! To maintain the best texture, I recommend freezing only the pudding layer in airtight containers. When you’re ready to enjoy, thaw the pudding in the fridge overnight and reassemble the cups with fresh toppings. This way, you’ll keep that delightful crunch on top!
How can I make Pumpkin Dirt Cups allergy-friendly?
Very! For a nut-free option, be sure to check the specific brands of the pudding and Cool Whip you are using, as some may contain potential allergens. You can also substitute regular milk with nut-free plant-based alternatives like oat or coconut milk!
What if my pudding doesn’t set properly?
No worries at all! If your pudding doesn’t thicken as expected, try whisking it for an extra minute or two, and let it sit longer to allow the cornstarch to activate. If you still encounter issues, it could be due to using non-instant pudding. Always opt for instant pudding for the best results with Pumpkin Dirt Cups!
Can I use different cookies for the “dirt” layer?
The more the merrier! While Oreos give that classic look, feel free to experiment with other cookies, such as chocolate wafers or even Golden Oreos for a different flavor. Just remember, the visual effect of “dirt” may change, but the taste will still be delightful!
Whimsical Pumpkin Dirt Cups that Kids Will Love!
Ingredients
Equipment
Method
- Begin by crushing the Oreo cookies to create a crumbly 'dirt' layer for your Pumpkin Dirt Cups.
- In a medium bowl, whisk together the chocolate instant pudding mix and 2 cups of milk for about 2 minutes.
- Once the pudding has set, gently fold in the Cool Whip into the bowl.
- Grab your clear cups and begin layering the Pumpkin Dirt Cups.
- Before serving, sprinkle the colored shredded coconut on top and add candy pumpkins.
- Once assembled, cover and refrigerate for at least 1 hour.