

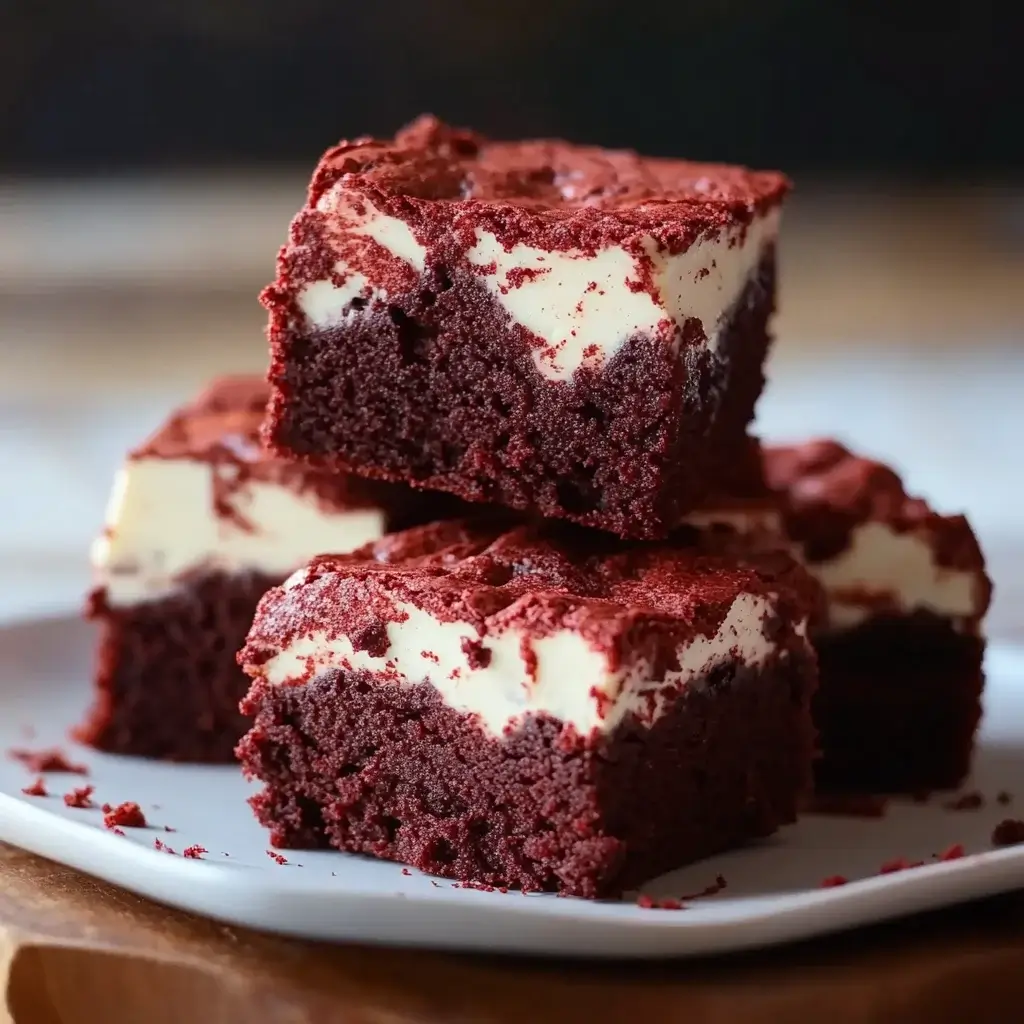
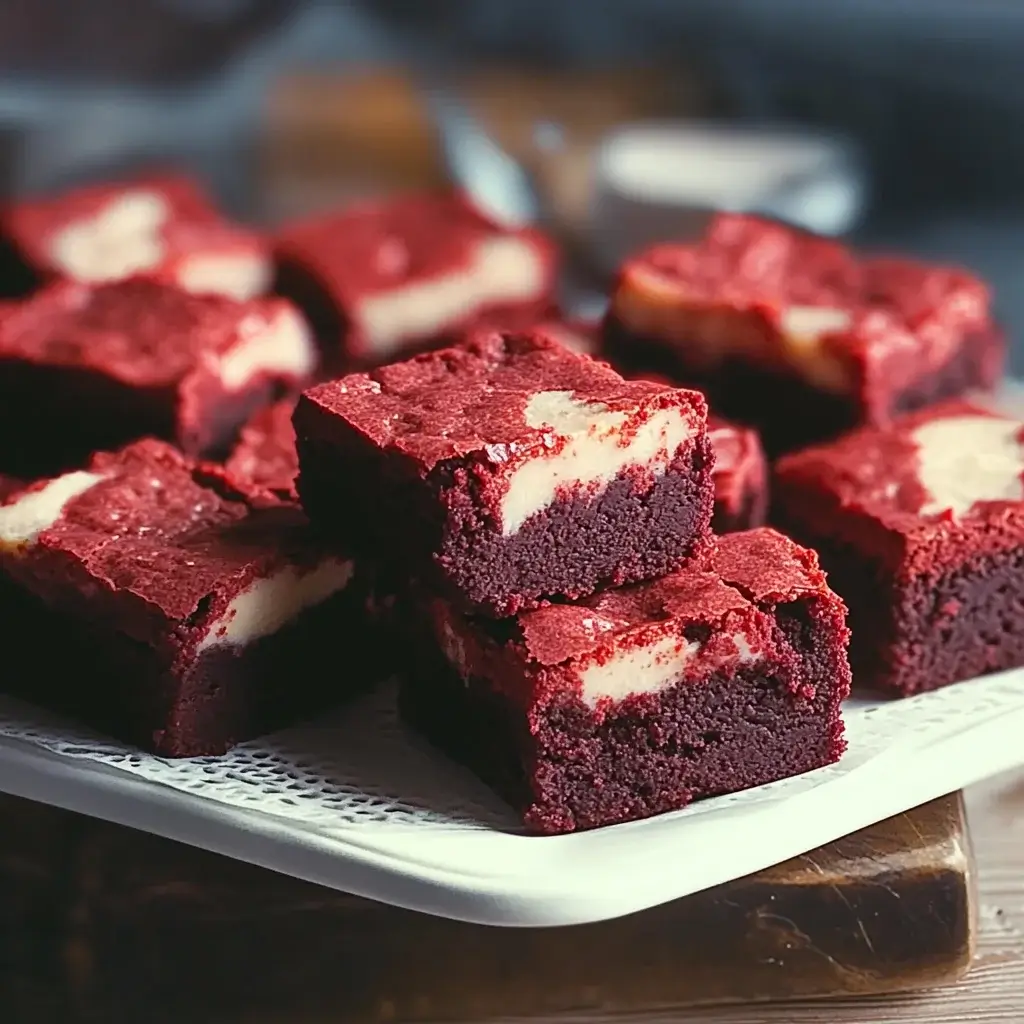
Introduction to Red Velvet Brownies
There’s something magical about the vibrant hue of red velvet brownies that instantly brightens any gathering. These deliciously rich treats are not just a feast for the eyes; they’re a quick solution for a busy day or a delightful way to impress your loved ones. I remember the first time I made them; the aroma filled my kitchen, and my family couldn’t resist sneaking bites before they even cooled. With their fudgy texture and subtle cocoa flavor, red velvet brownies are perfect for any occasion, whether it’s a casual weeknight or a festive celebration.
Why You’ll Love This Red Velvet Brownies
These red velvet brownies are a game-changer in the dessert world. They come together in just 40 minutes, making them perfect for those last-minute cravings or surprise guests. The rich, velvety texture paired with a hint of cocoa creates a taste sensation that’s hard to resist. Plus, they’re versatile enough to dress up for special occasions or enjoy casually with a cup of coffee. Trust me, you’ll be hooked!
Ingredients for Red Velvet Brownies
Gathering the right ingredients is the first step to creating these delightful red velvet brownies. Here’s what you’ll need:
- All-purpose flour: This is the backbone of your brownies, providing structure and a chewy texture.
- Granulated sugar: Sweetness is key! It balances the cocoa and enhances the overall flavor.
- Unsweetened cocoa powder: This adds a rich chocolate flavor, making your brownies decadent.
- Baking powder: A little lift helps create that perfect fudgy texture.
- Salt: Just a pinch enhances all the flavors and balances the sweetness.
- Unsalted butter: Melted butter gives your brownies a rich, moist quality.
- Large eggs: They bind everything together and contribute to the brownies’ fudgy texture.
- Vanilla extract: A splash of vanilla adds warmth and depth to the flavor profile.
- Red food coloring: This is what gives your brownies that signature vibrant hue. A little goes a long way!
- White chocolate chips (optional): For those who love a sweet twist, these add a creamy contrast to the rich cocoa.
For exact measurements, check the bottom of the article where you can find a printable version of the recipe. Happy baking!
How to Make Red Velvet Brownies
Step 1: Preheat and Prepare
Start by preheating your oven to 350°F (175°C). While it warms up, grab an 8×8-inch baking pan. Grease it lightly or line it with parchment paper for easy removal later. This simple step ensures your brownies bake evenly and don’t stick, making cleanup a breeze.
Step 2: Mix Dry Ingredients
In a large mixing bowl, whisk together the all-purpose flour, granulated sugar, unsweetened cocoa powder, baking powder, and salt. This dry mixture is the foundation of your red velvet brownies. Make sure everything is well combined to avoid any clumps, which can affect the texture.
Step 3: Combine Wet Ingredients
In another bowl, mix the melted unsalted butter, large eggs, vanilla extract, and red food coloring until smooth. The vibrant red hue will start to shine through, making your mixture look irresistible. This step is crucial for achieving that rich, velvety texture we all love.
Step 4: Combine Mixtures
Pour the wet ingredients into the dry ingredients and stir gently until just combined. Be careful not to overmix; a few lumps are perfectly fine. If you’re feeling adventurous, fold in the optional white chocolate chips for an extra layer of sweetness and creaminess.
Step 5: Bake
Spread the brownie batter evenly into your prepared pan. Pop it into the oven and bake for 20-25 minutes. Keep an eye on them! You want a toothpick inserted in the center to come out with a few moist crumbs, indicating they’re perfectly fudgy.
Step 6: Cool and Serve
Once baked, allow the brownies to cool in the pan for about 10 minutes. Then, transfer them to a wire rack to cool completely. This step is essential for achieving that perfect texture. Once cooled, cut them into squares and get ready to enjoy!
Tips for Success
- Use room temperature eggs for better mixing and texture.
- Don’t overmix the batter; it can lead to tough brownies.
- Check for doneness a minute or two early to avoid overbaking.
- Let the brownies cool completely for cleaner cuts.
- Store leftovers in an airtight container to keep them fresh.
Equipment Needed
- 8×8-inch baking pan: A square pan is ideal, but you can use a similar-sized round pan if needed.
- Mixing bowls: Use any size, but a large bowl is best for mixing ingredients.
- Whisk: A whisk helps combine dry ingredients smoothly; a fork works too.
- Spatula: A rubber spatula is perfect for folding in ingredients and scraping the bowl.
- Wire rack: For cooling; a plate can substitute in a pinch.
Variations
- Nutty Delight: Add chopped walnuts or pecans for a crunchy texture that complements the fudgy brownies.
- Mint Chocolate: Incorporate a few drops of peppermint extract for a refreshing twist, perfect for the holidays.
- Gluten-Free Option: Substitute all-purpose flour with a gluten-free blend to make these brownies suitable for gluten-sensitive friends.
- Vegan Version: Replace eggs with flaxseed meal mixed with water and use a plant-based butter alternative for a vegan-friendly treat.
- Cheesecake Swirl: Add dollops of cream cheese mixture on top before baking for a rich, creamy layer that elevates the brownies.
Serving Suggestions
- Pair your red velvet brownies with a scoop of vanilla ice cream for a delightful contrast.
- Serve with a drizzle of chocolate or cream cheese frosting for an extra indulgent treat.
- Enjoy alongside a hot cup of coffee or a glass of cold milk.
- For a festive touch, dust with powdered sugar or top with fresh berries.
FAQs about Red Velvet Brownies
Can I use cake flour instead of all-purpose flour?
While all-purpose flour is ideal for red velvet brownies, you can use cake flour for a lighter texture. Just remember, it may alter the density slightly.
How do I store leftover brownies?
To keep your brownies fresh, store them in an airtight container at room temperature for up to three days. You can also refrigerate them for a week, but they might lose some of their fudginess.
Can I make these brownies ahead of time?
Absolutely! You can bake them a day in advance. Just let them cool completely, then cover them tightly. They’ll be just as delicious the next day!
What can I substitute for red food coloring?
If you prefer a natural option, beet juice or pomegranate juice can be used as a substitute. Keep in mind that the color may not be as vibrant, but the flavor will still shine through.
Can I freeze red velvet brownies?
Yes! Wrap individual brownies in plastic wrap and place them in a freezer-safe bag. They can be frozen for up to three months. Just thaw them at room temperature before enjoying!
Final Thoughts
Creating these red velvet brownies is more than just baking; it’s about crafting moments of joy. The vibrant color and rich flavor bring smiles to faces, whether at a family gathering or a cozy night in. Each bite is a reminder of the simple pleasures in life, like sharing a sweet treat with loved ones. Plus, the ease of making them means you can whip up a batch anytime the craving strikes. So, roll up your sleeves, embrace the process, and let these brownies become a cherished part of your dessert repertoire. Happy baking!
Red Velvet Brownies: Discover the Ultimate Recipe Today!
Ingredients
Method
- Preheat your oven to 350°F (175°C) and grease an 8x8-inch baking pan or line it with parchment paper.
- In a large mixing bowl, whisk together the flour, sugar, cocoa powder, baking powder, and salt until well combined.
- In another bowl, mix the melted butter, eggs, vanilla extract, and red food coloring until smooth.
- Pour the wet ingredients into the dry ingredients and stir until just combined. If using, fold in the white chocolate chips.
- Spread the batter evenly into the prepared baking pan.
- Bake for 20-25 minutes, or until a toothpick inserted into the center comes out with a few moist crumbs.
- Allow the brownies to cool in the pan for about 10 minutes before transferring them to a wire rack to cool completely.
Nutrition
Notes
- For a cream cheese frosting, mix 4 oz of softened cream cheese with 1/4 cup powdered sugar and a splash of vanilla extract, then spread it over the cooled brownies.
- Add chopped nuts or a sprinkle of sea salt on top before baking for added texture and flavor.